Panna Cotta with Caramel Sauce

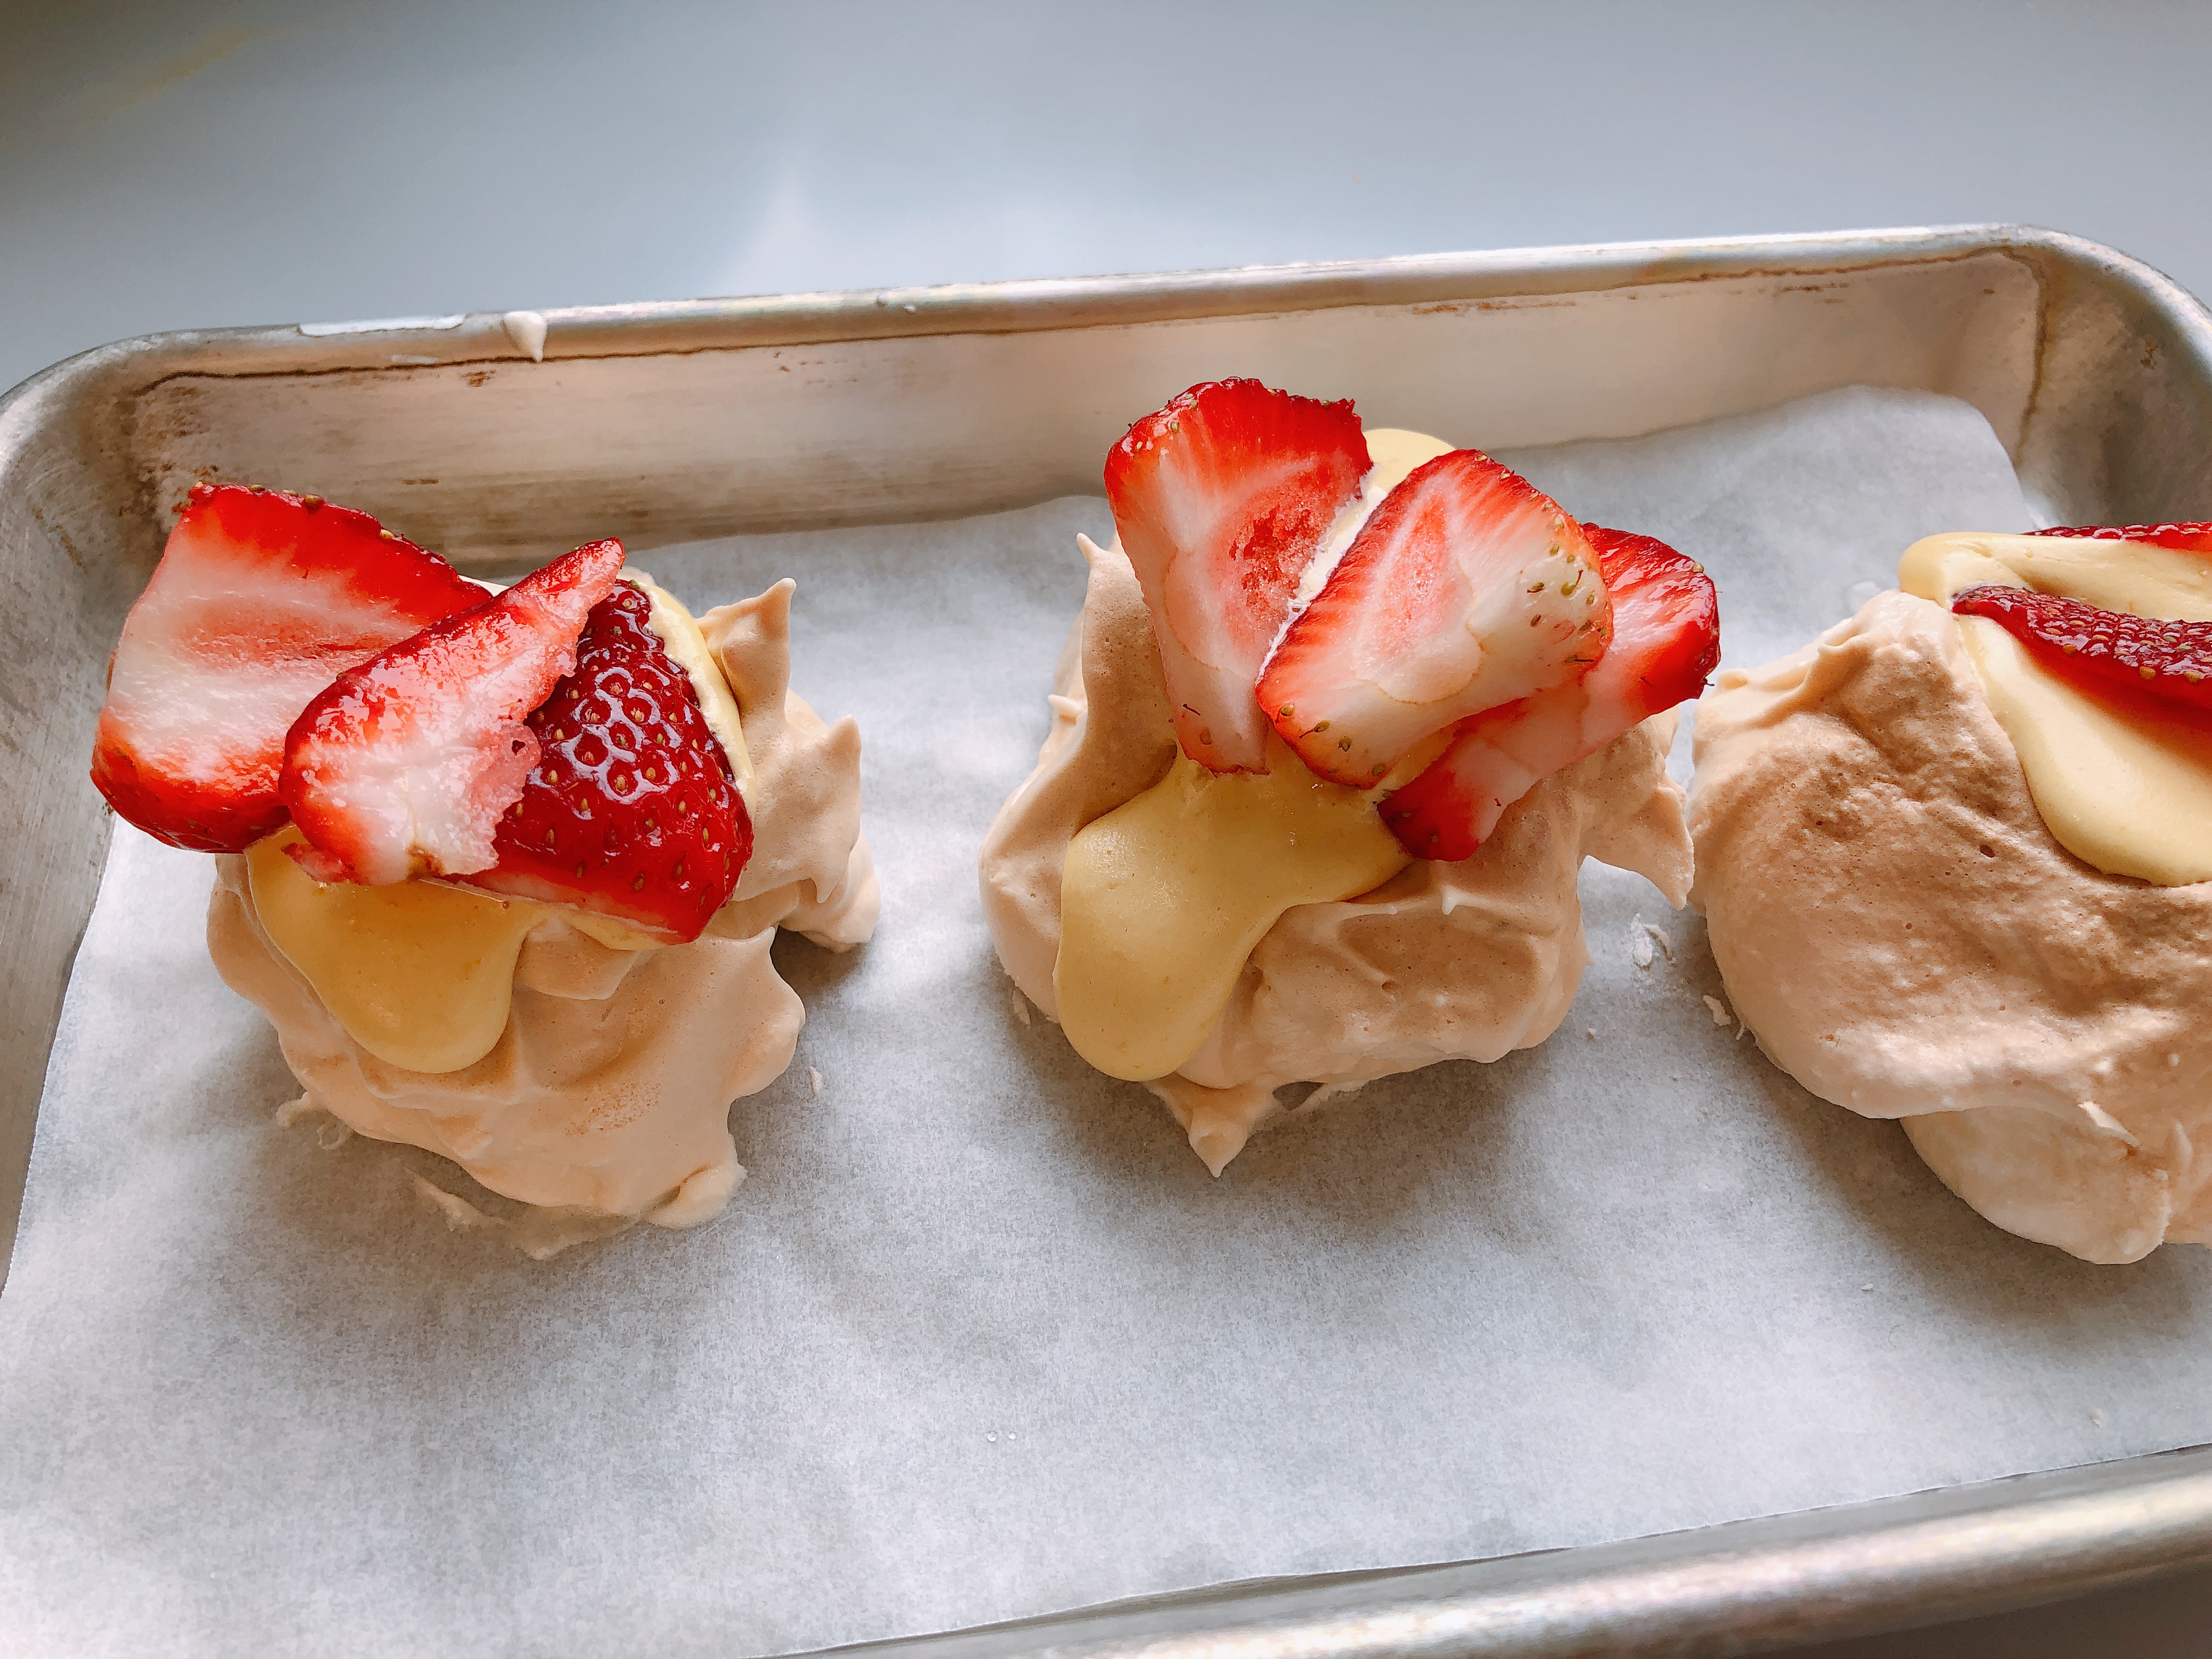
How to make Panna Cotta with Caramel Sauce

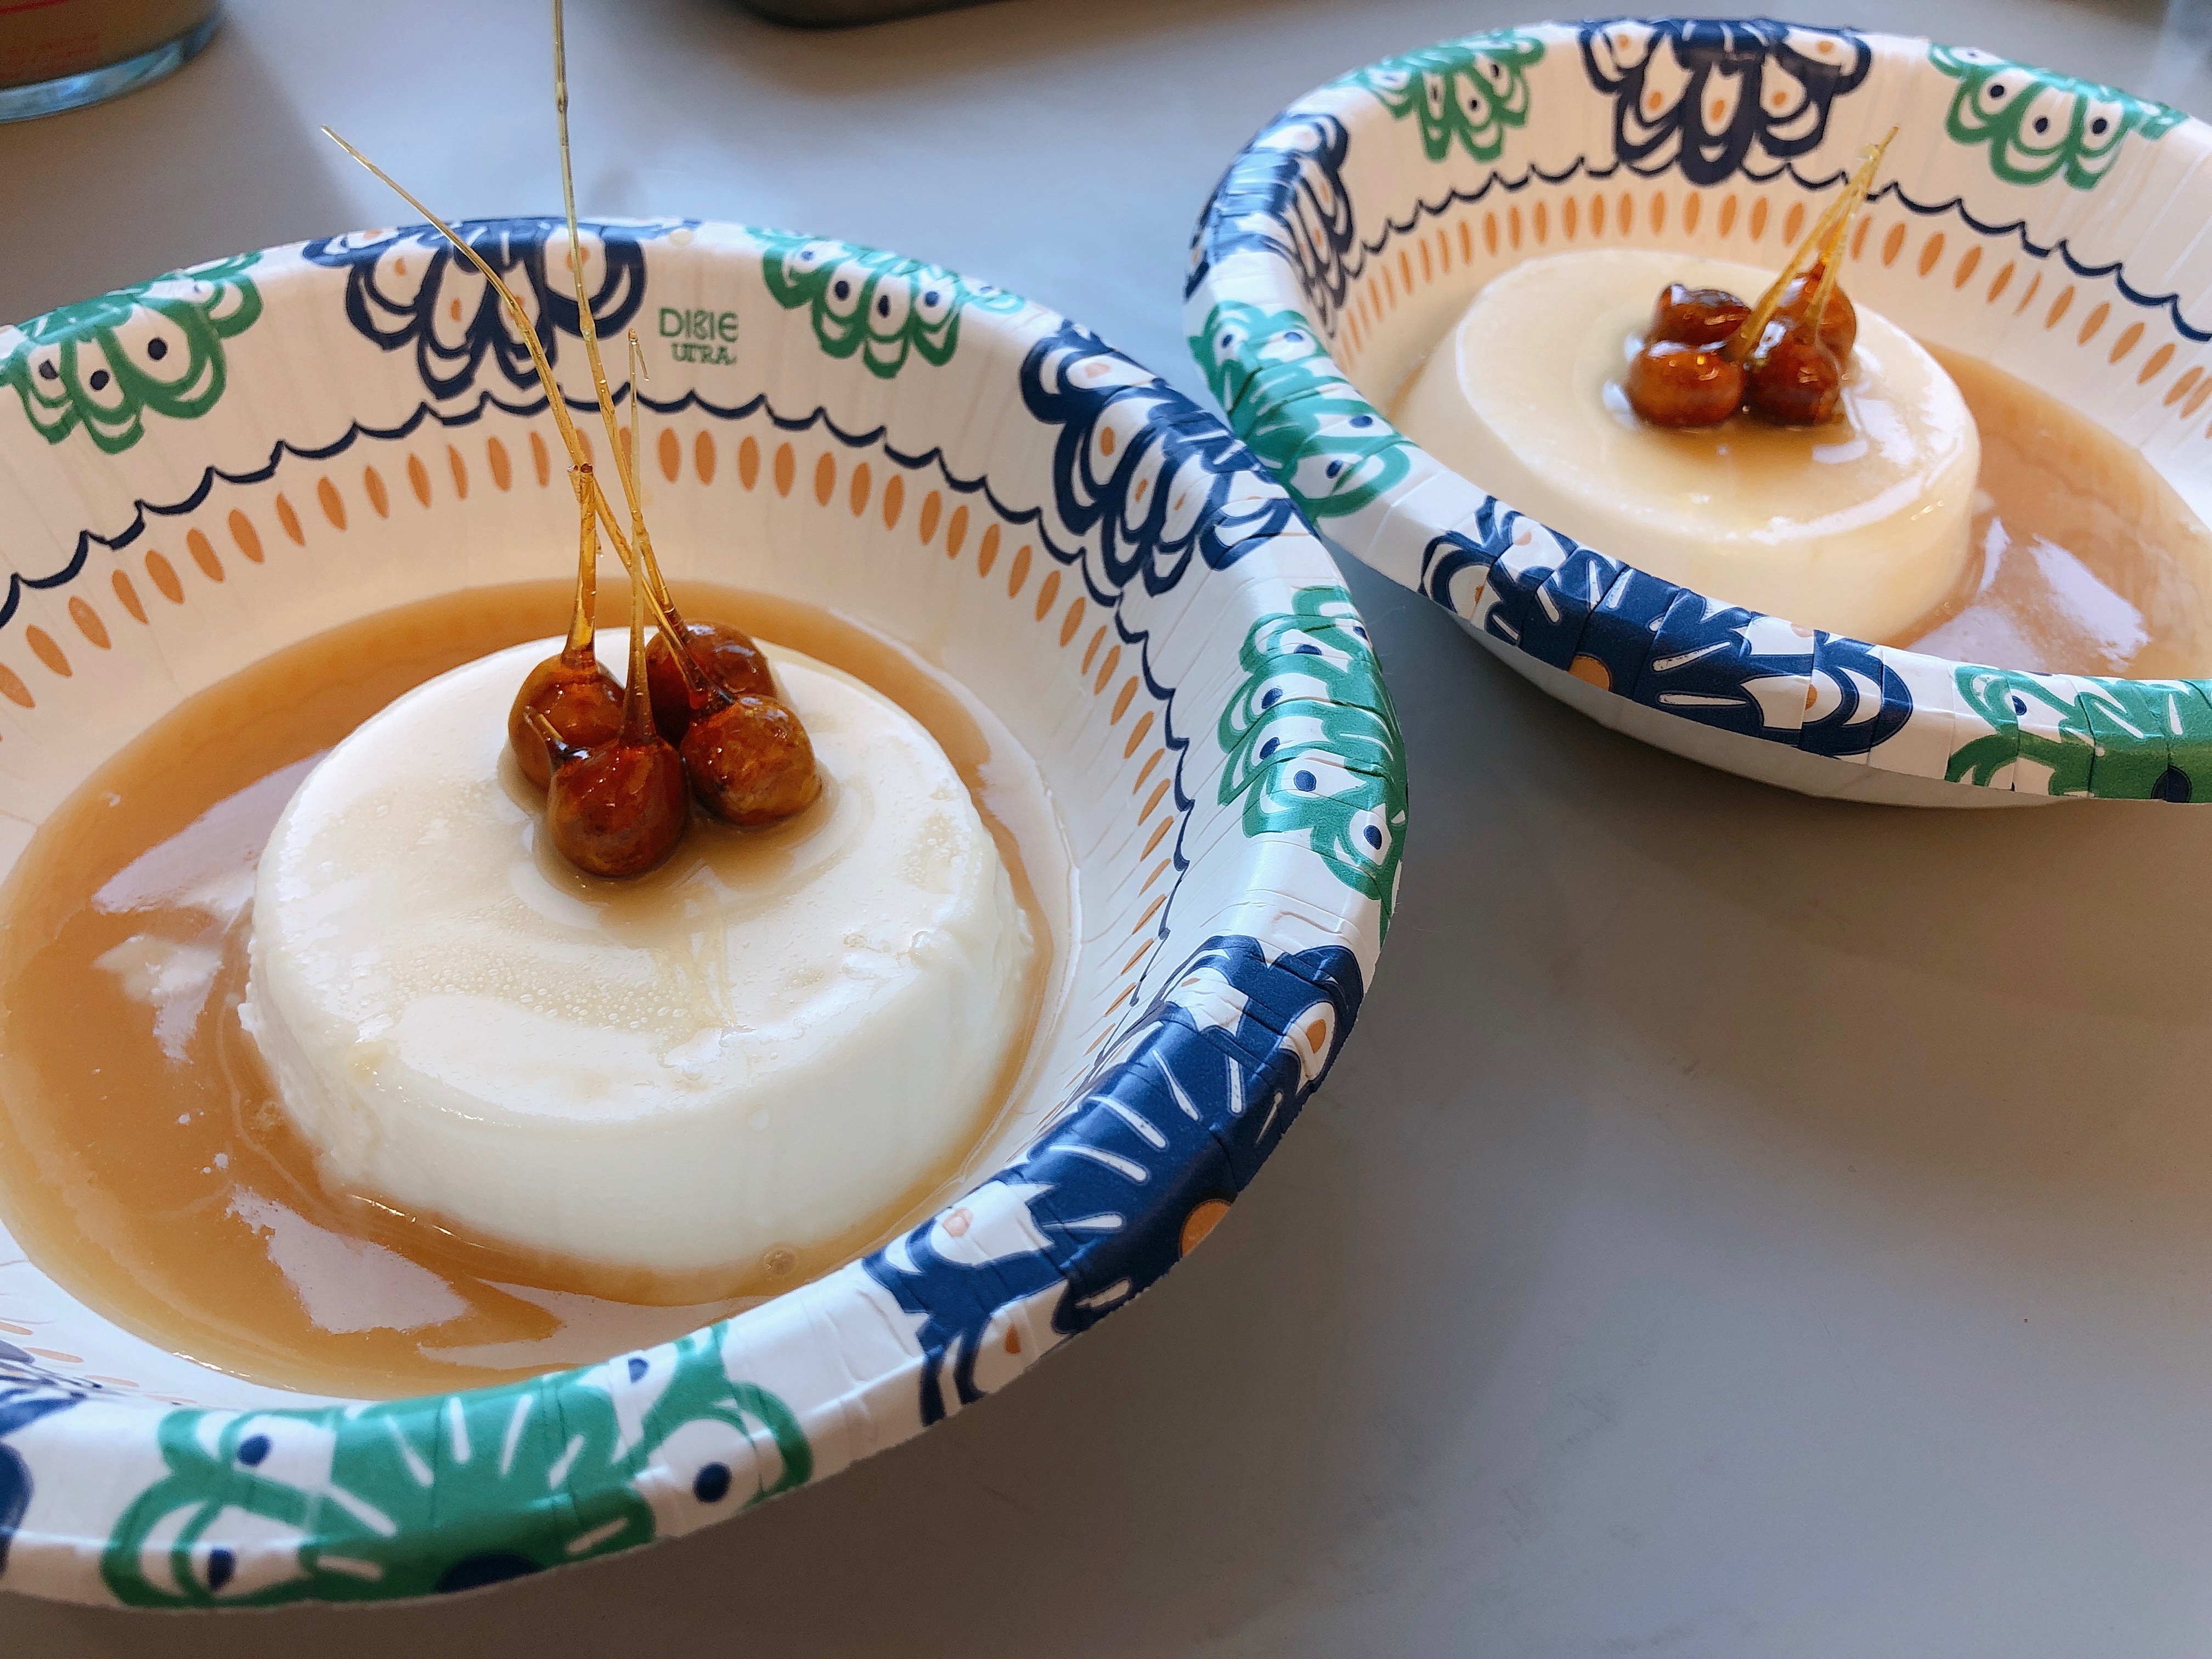
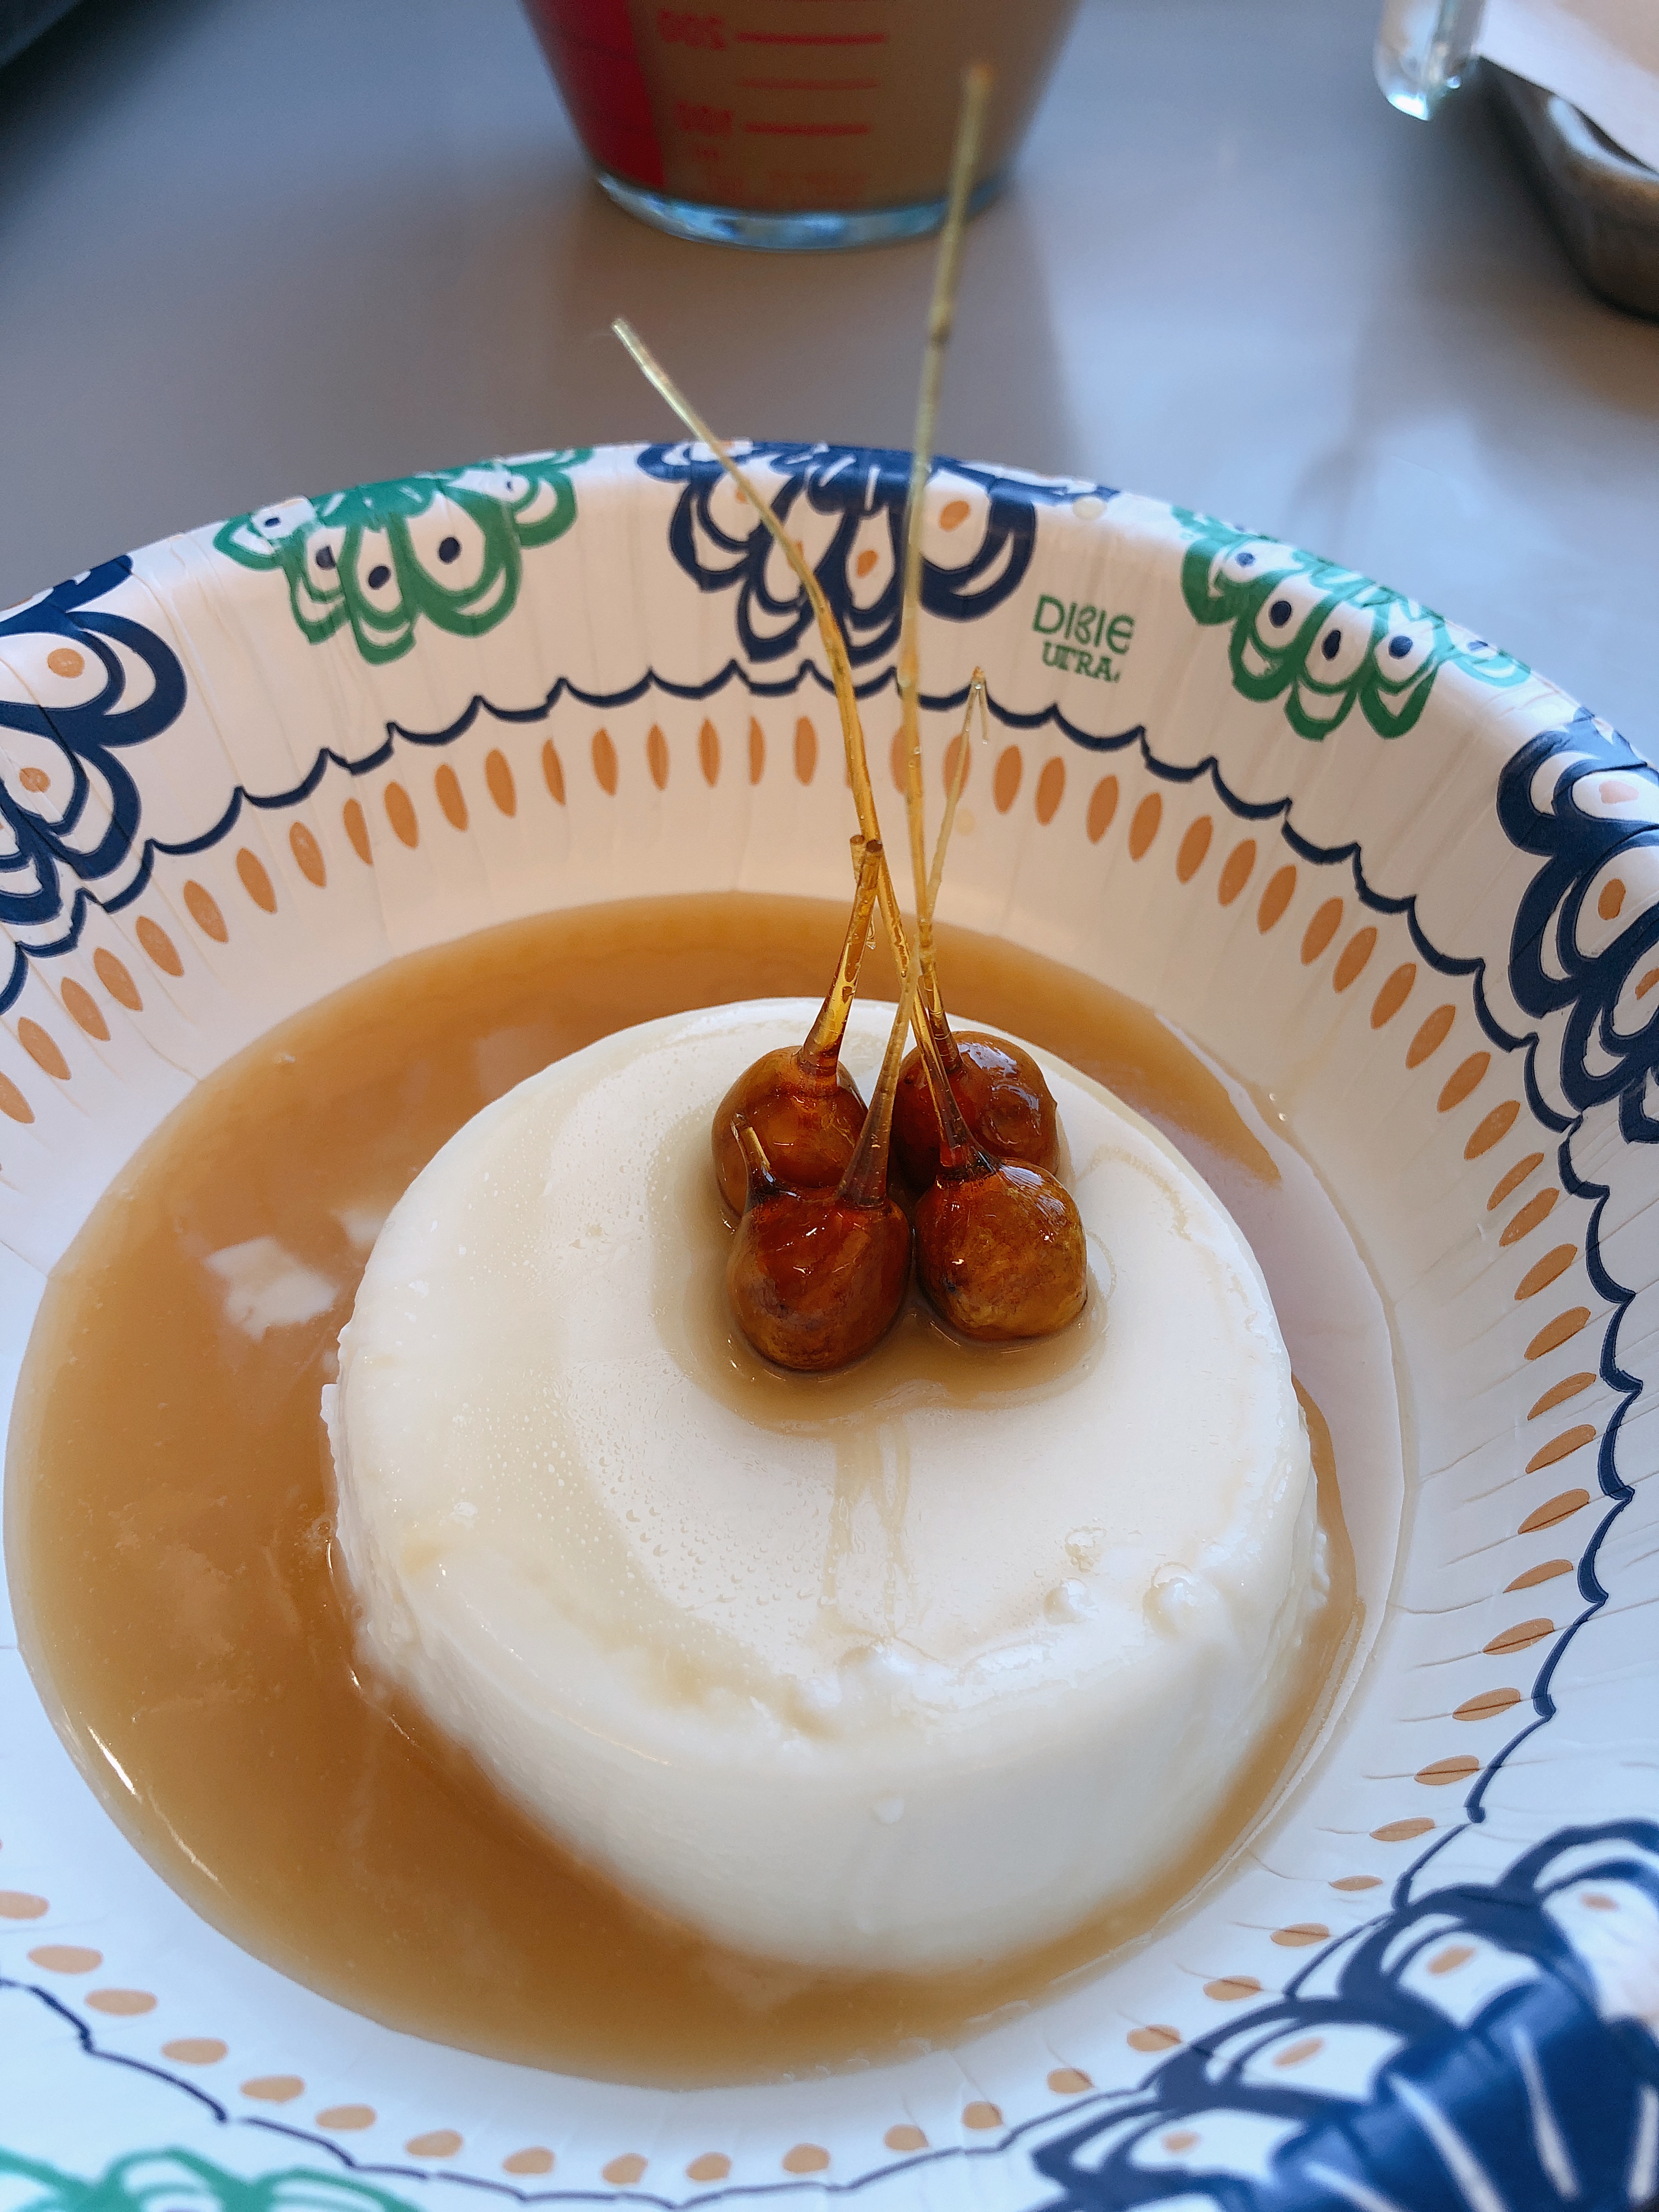
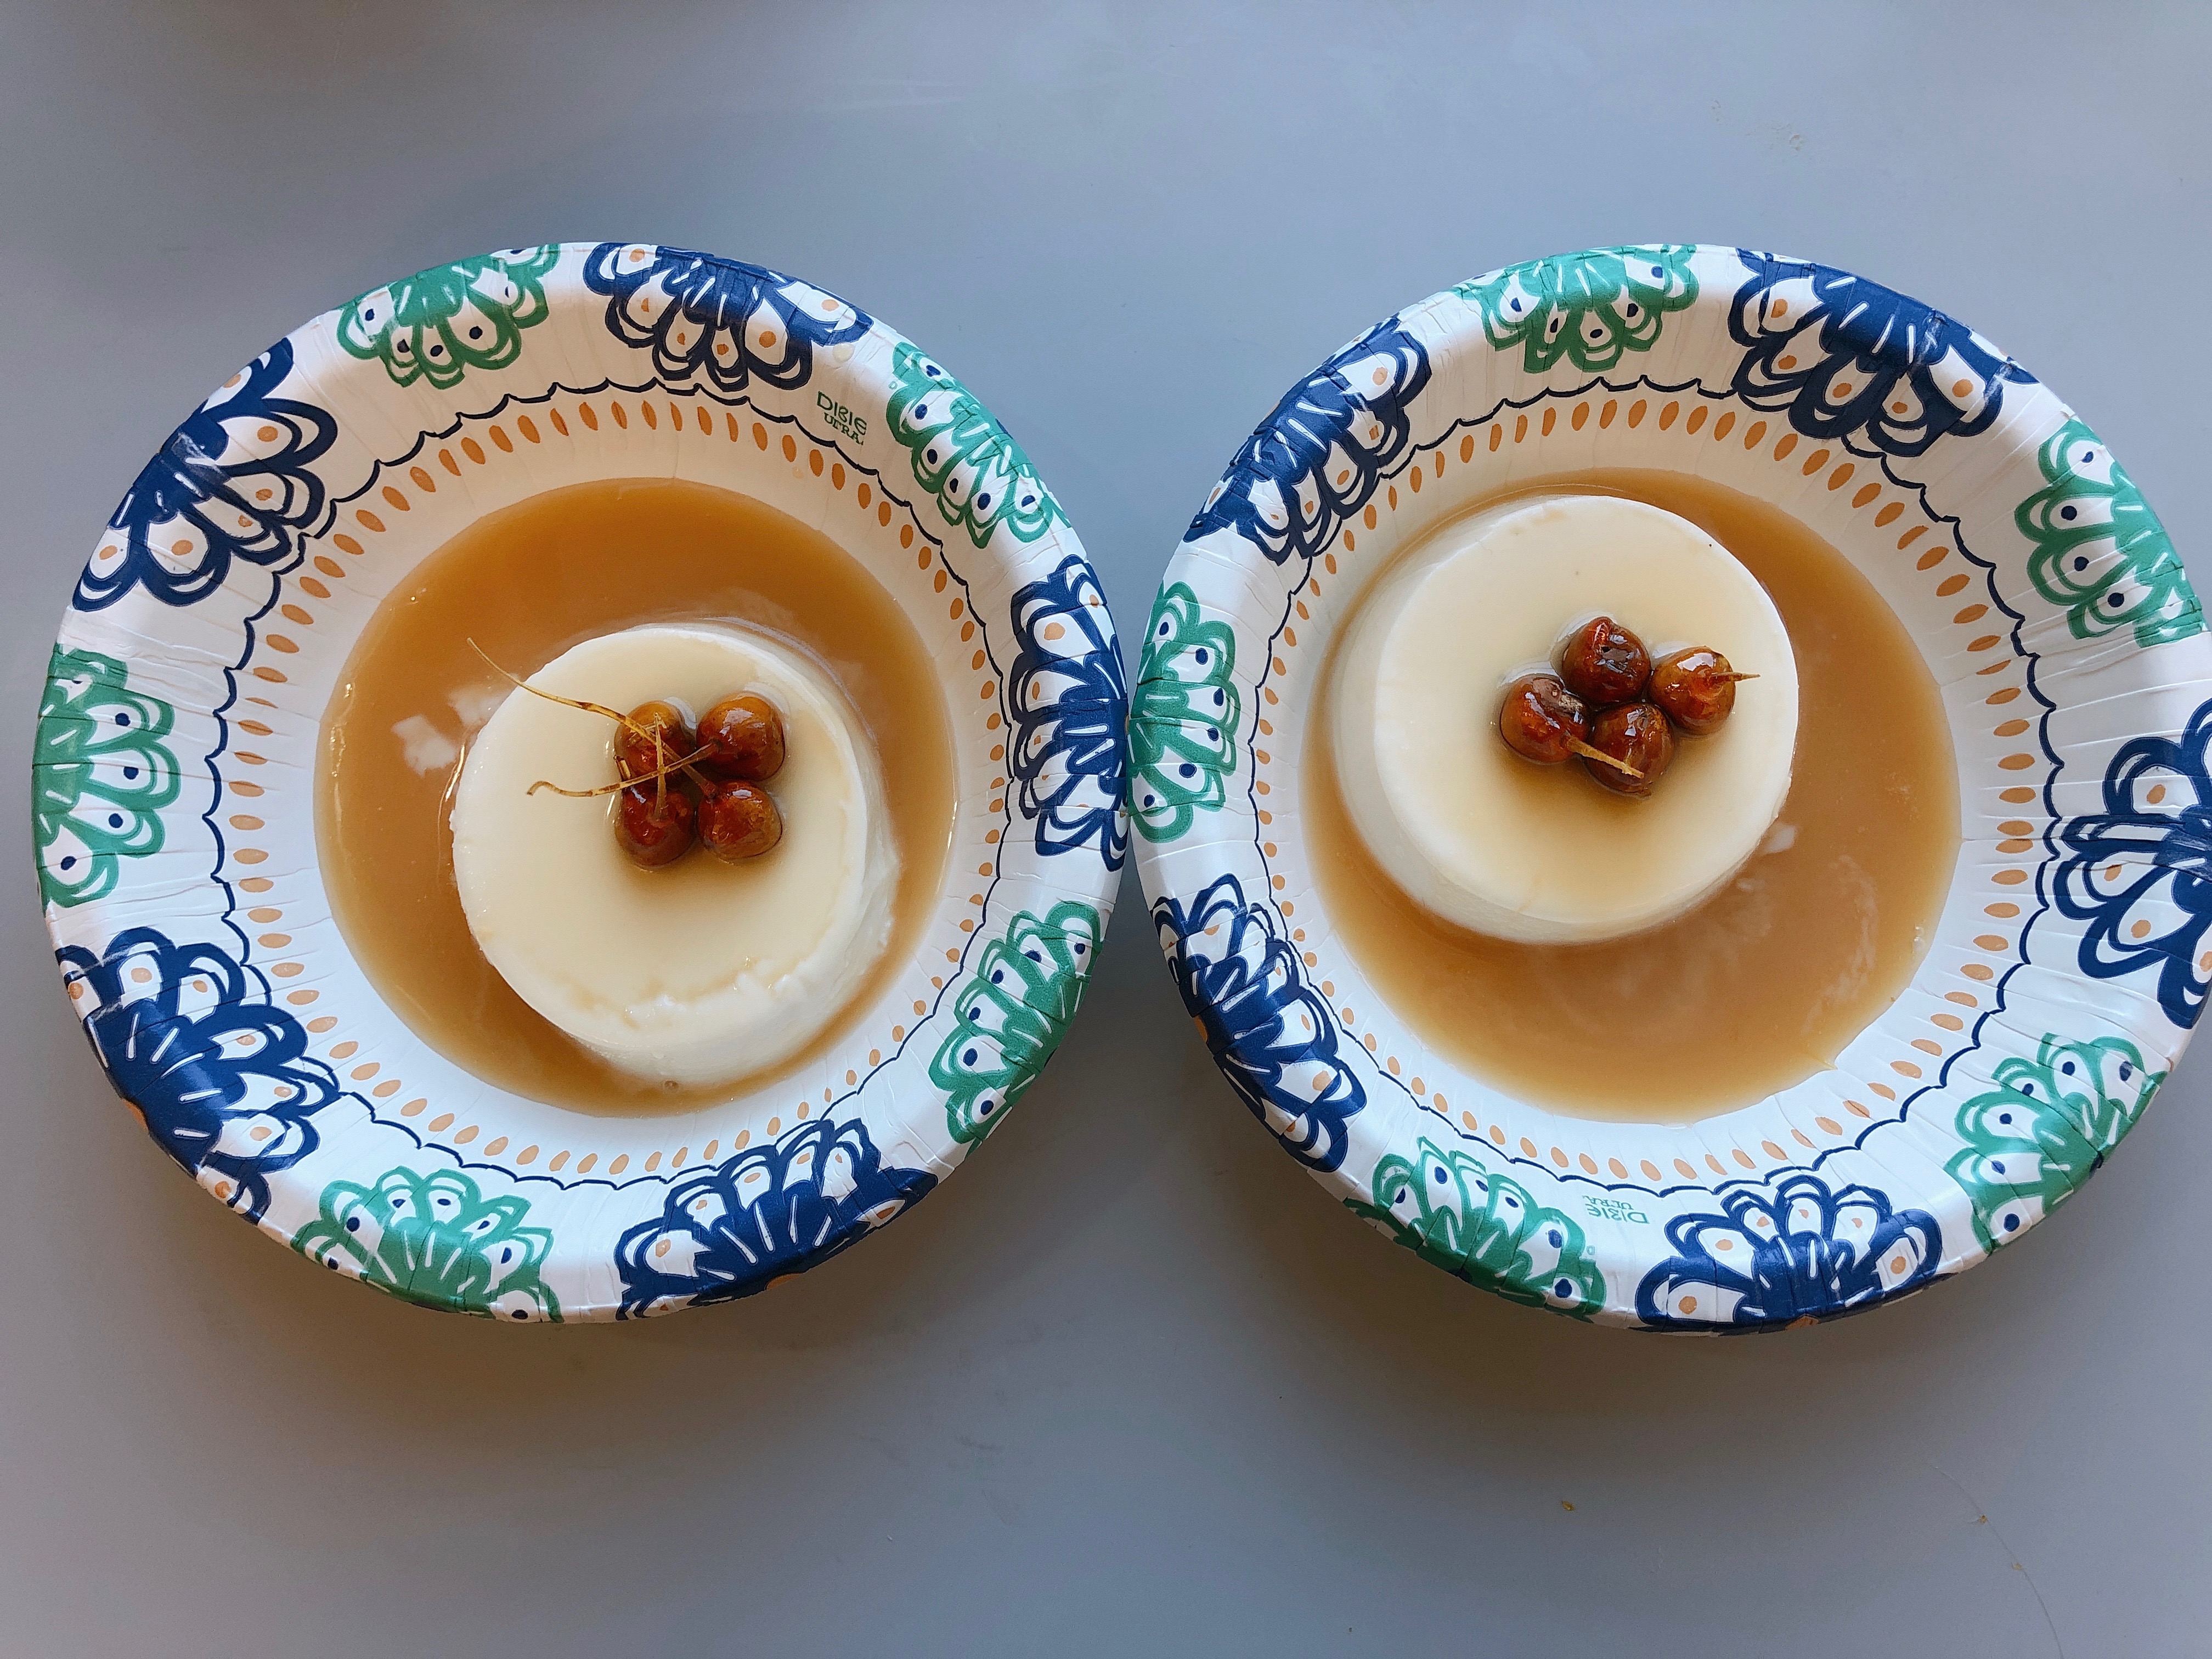
This sweet Italian dessert consists of panna cotta, a creamy liquid that then forms a soft gelatin, which is then covered with caramelized sauce and decorated with candied hazelnuts.

Part 1: Making the Vanilla Bean Panna Cotta with Salted Carmel Sauce

Materials:                                                    Ingredients:

  • Small bowl                                                                                – 1 cup whole milk
  • Four 4oz Ramekins                                                                  – 2  teaspoons unflavored gelatin
  • Saucepan                                                                                   – 1 cups heavy cream
  • Thin sharp knife                                                                       – 1/4 cup sugar
  • Liquid measuring cup                                                              – 2 teaspoons pure vanilla extract
  • Dry measuring cups and spoons                                           – Cooking spray
  • Spoonula
  • Whisk

Directions

1.  Spray a paper towel with some cooking spray and wipe the insides of the ramekins.

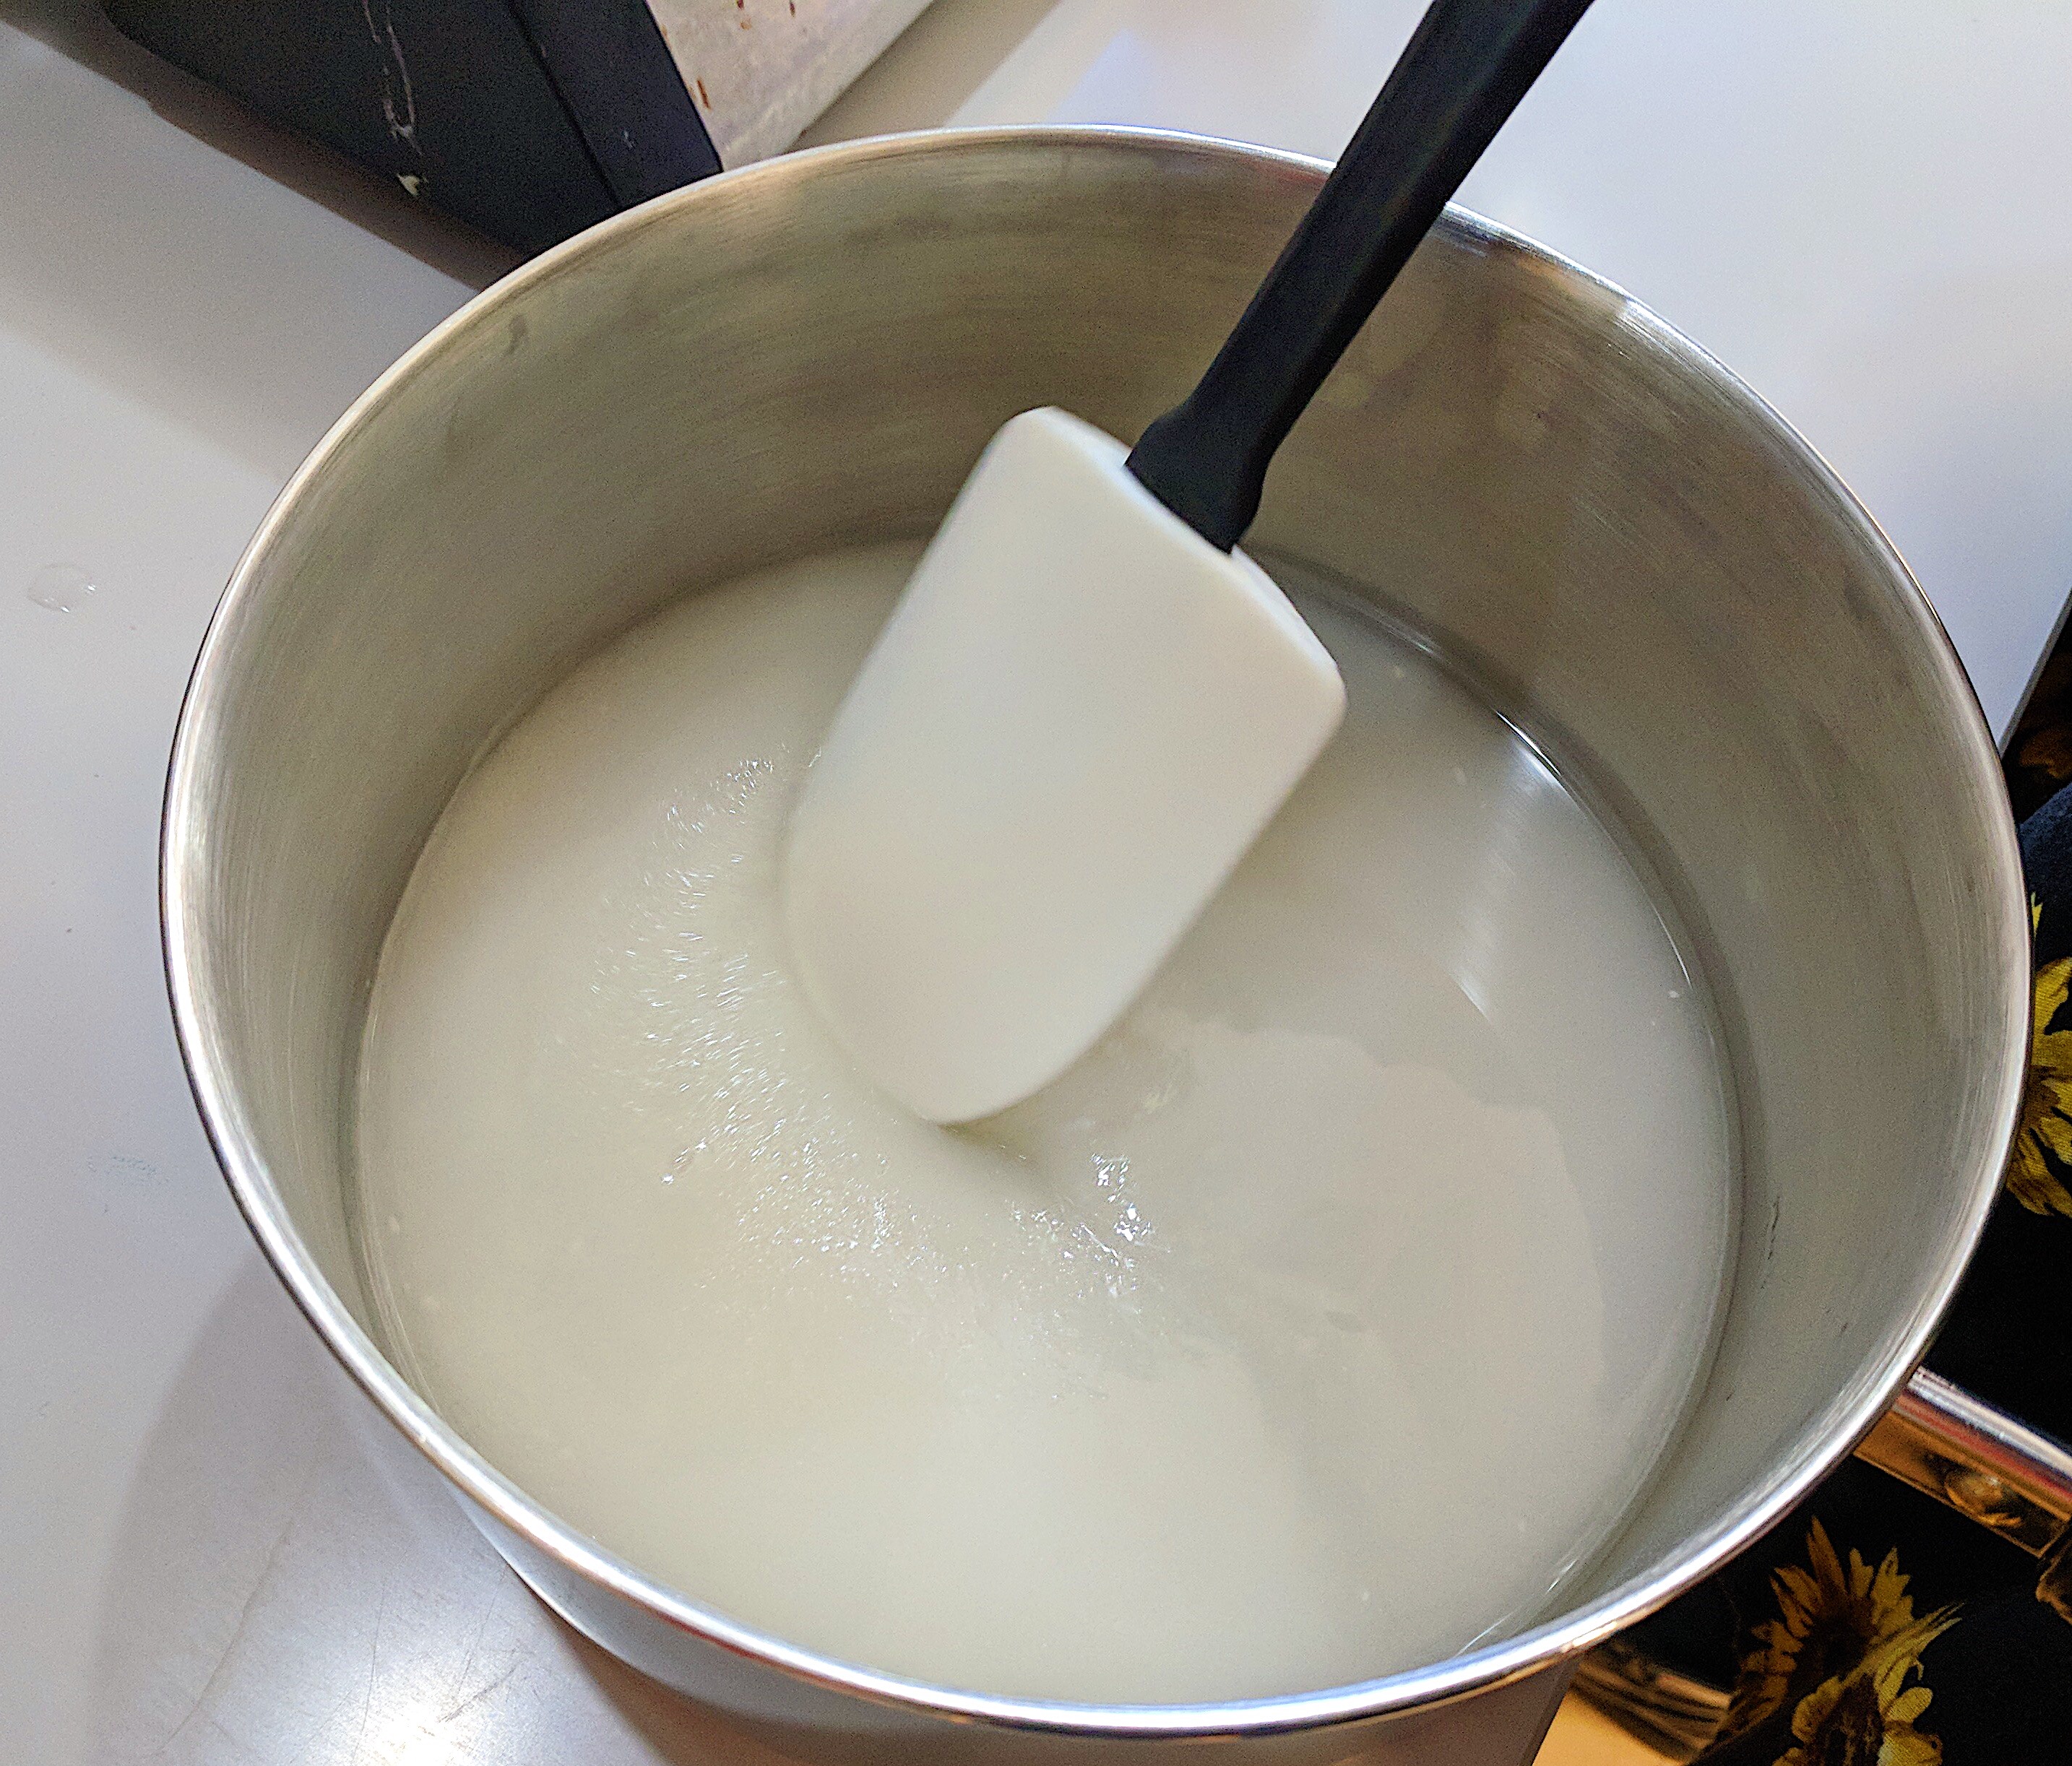
2. Pour the milk into the saucepan and sprinkle the gelatin evenly over top. Let this soften for 5 minutes or until the surface is wrinkled and the gelatin grains look wet and slightly dissolved.

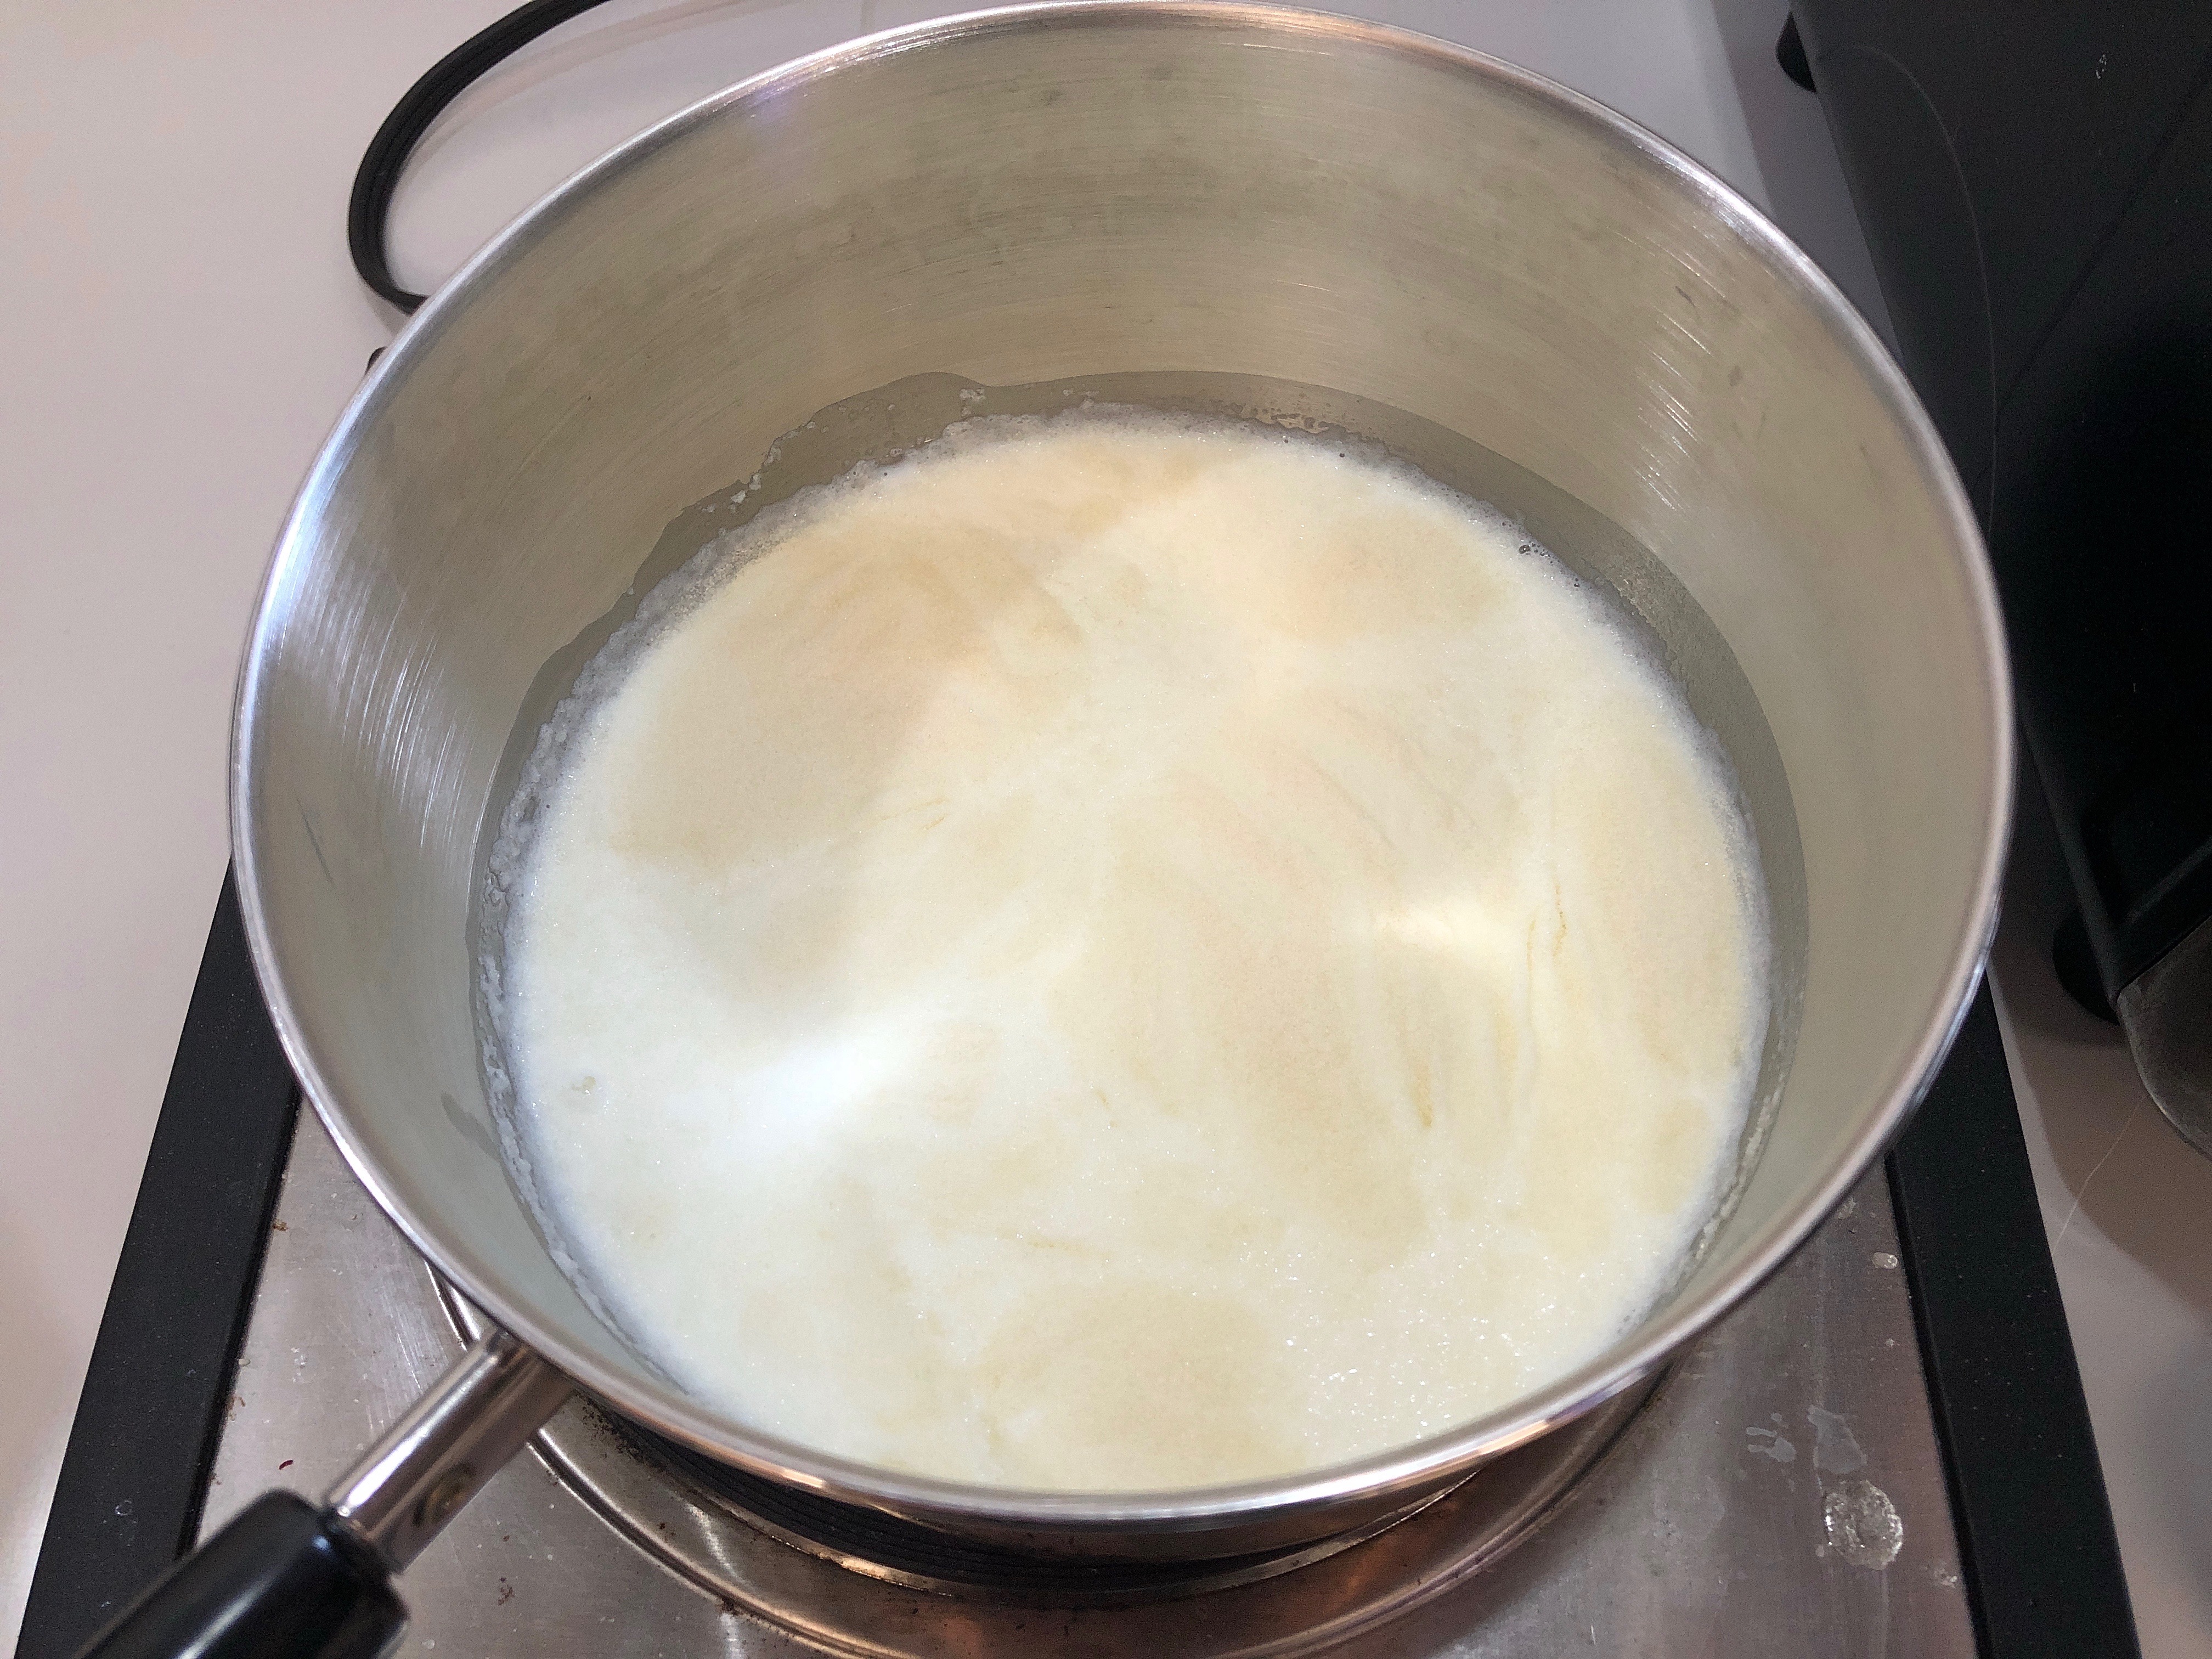
3. Set the saucepan on low heat and warm the milk gently, stirring frequently so that the gelatin dissolves. Never let the milk boil or simmer and if there is steam remove it from the hear and let it cool. This part should not take long.

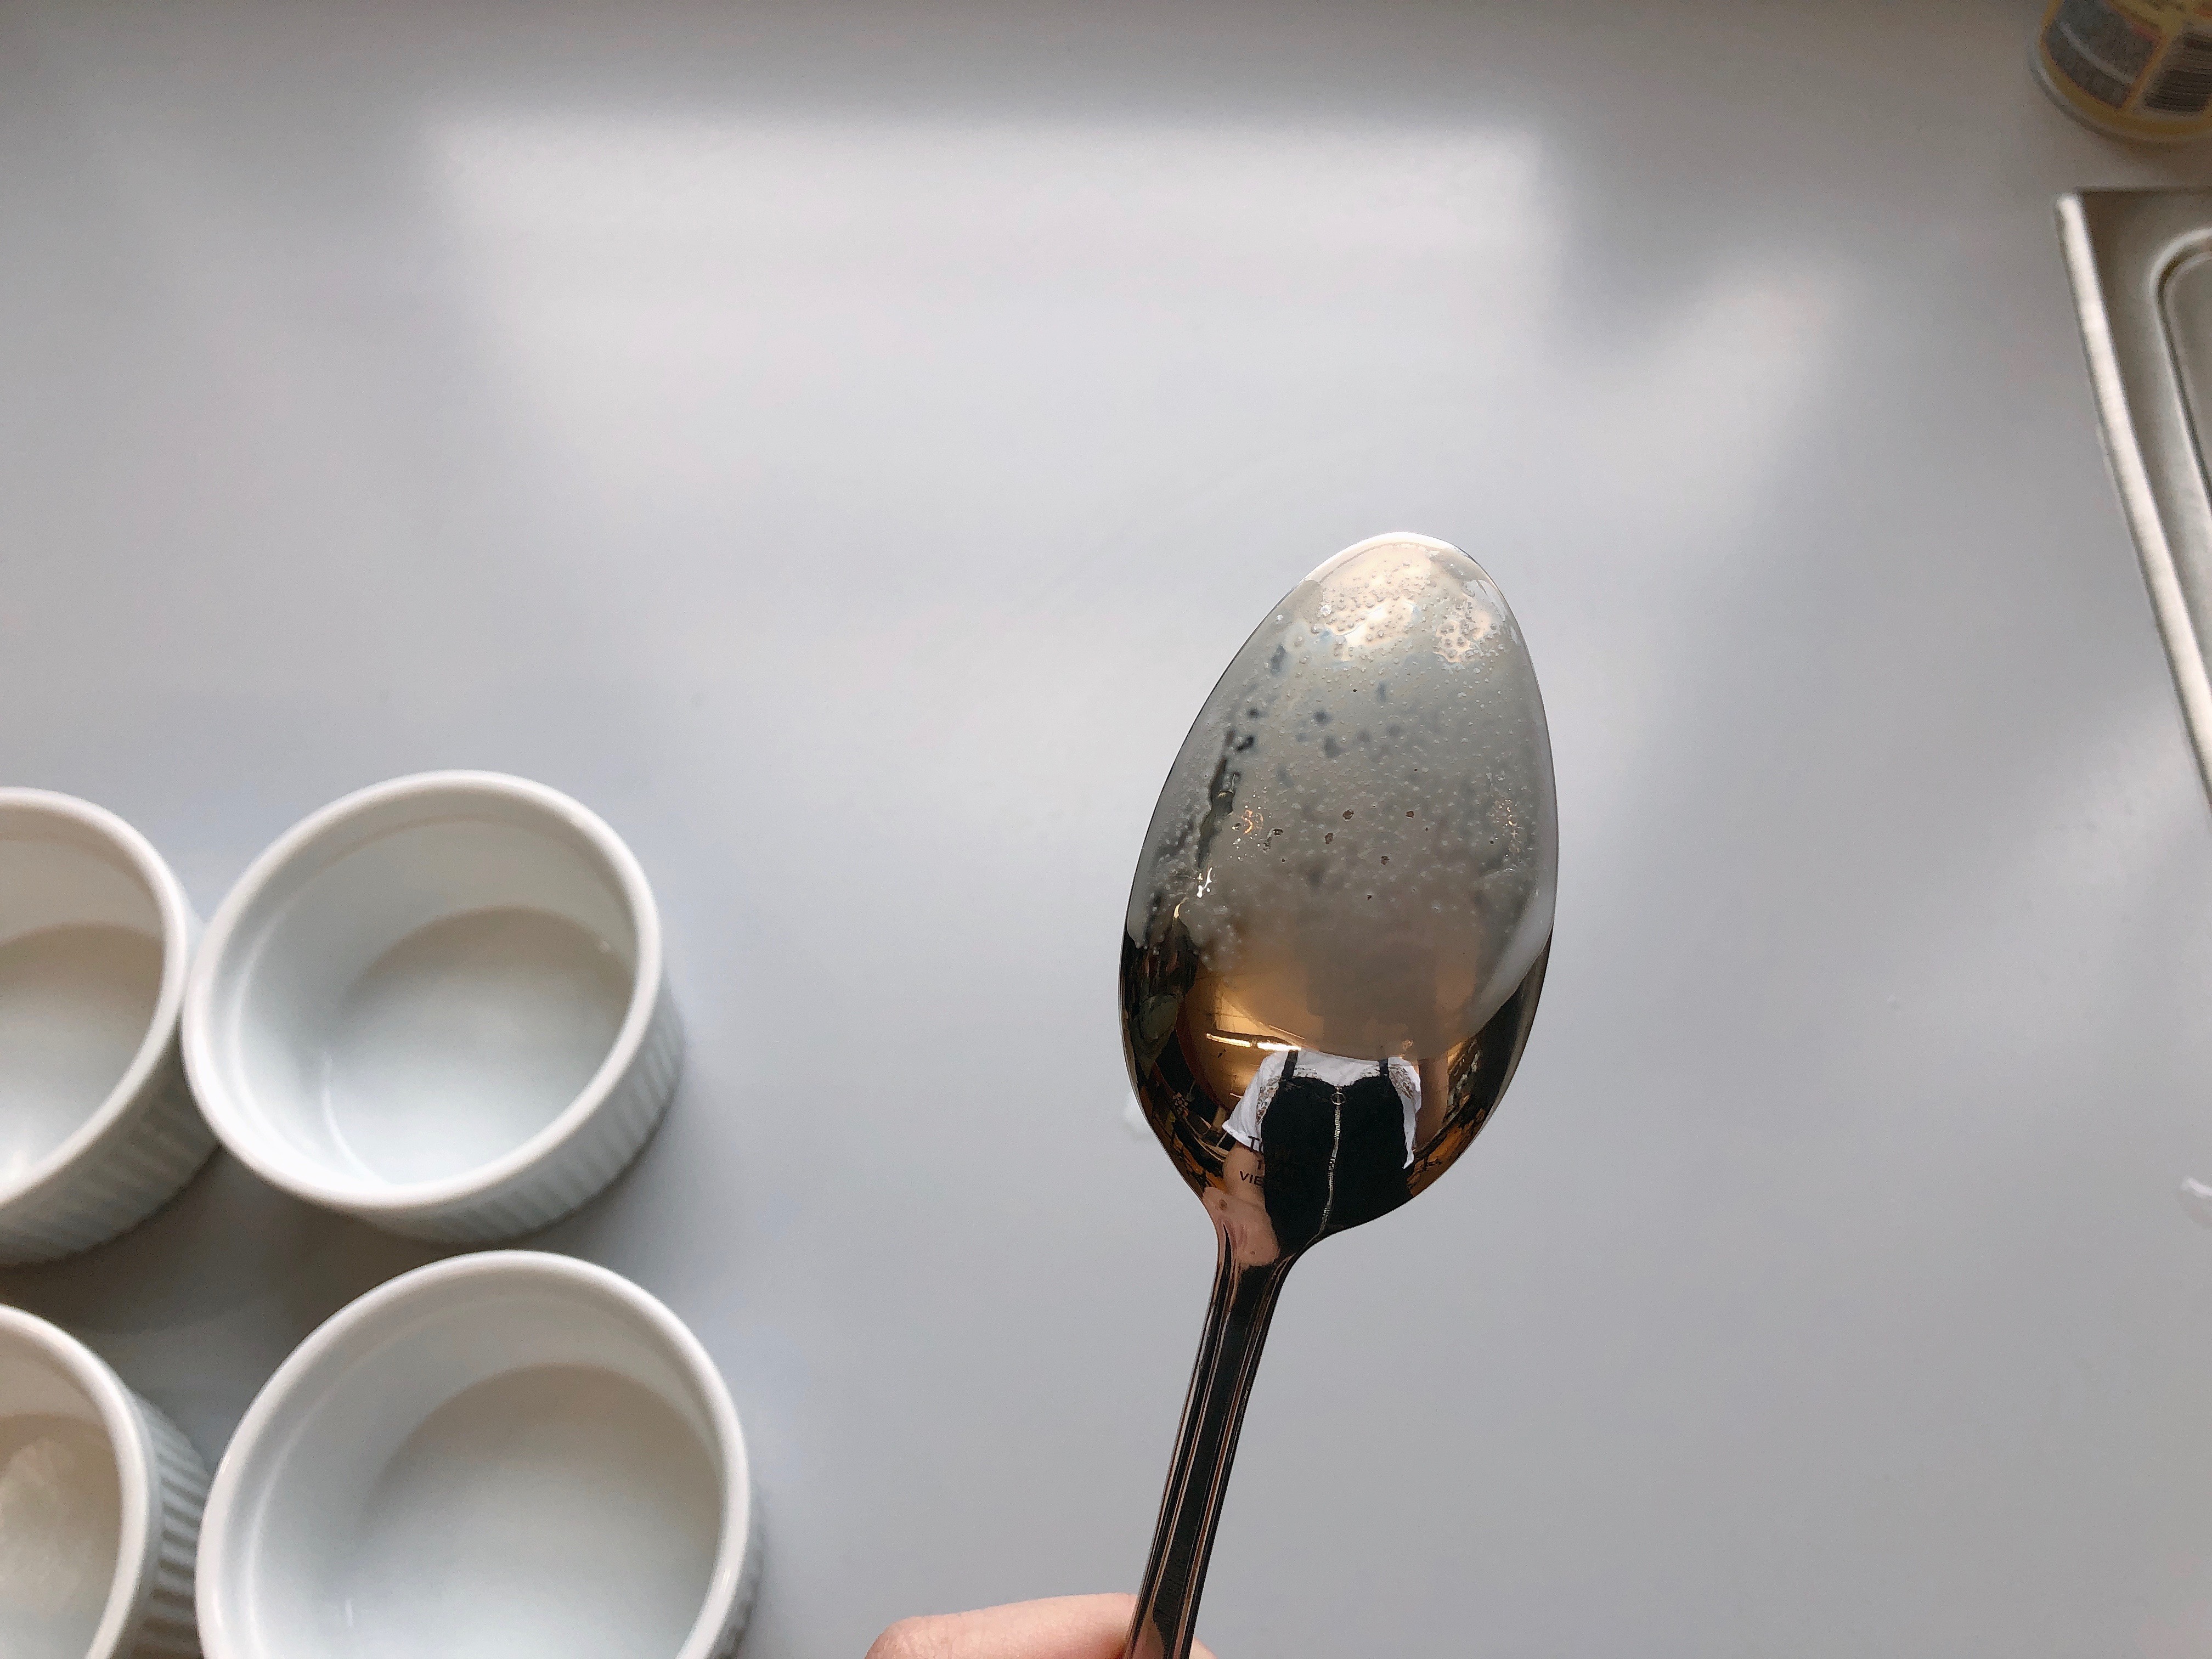
4. After 2 minutes of warming, rub a bit of the milk between your fingers to make sure it’s smooth, or dip a spoon in the milk and check the back for distinct grains of gelatin to make sure the gelatin has dissolved.

5. Next stir the sugar into the milk and continue warming until it dissolves too. This should take about 5 minutes and never reach a boiling level.

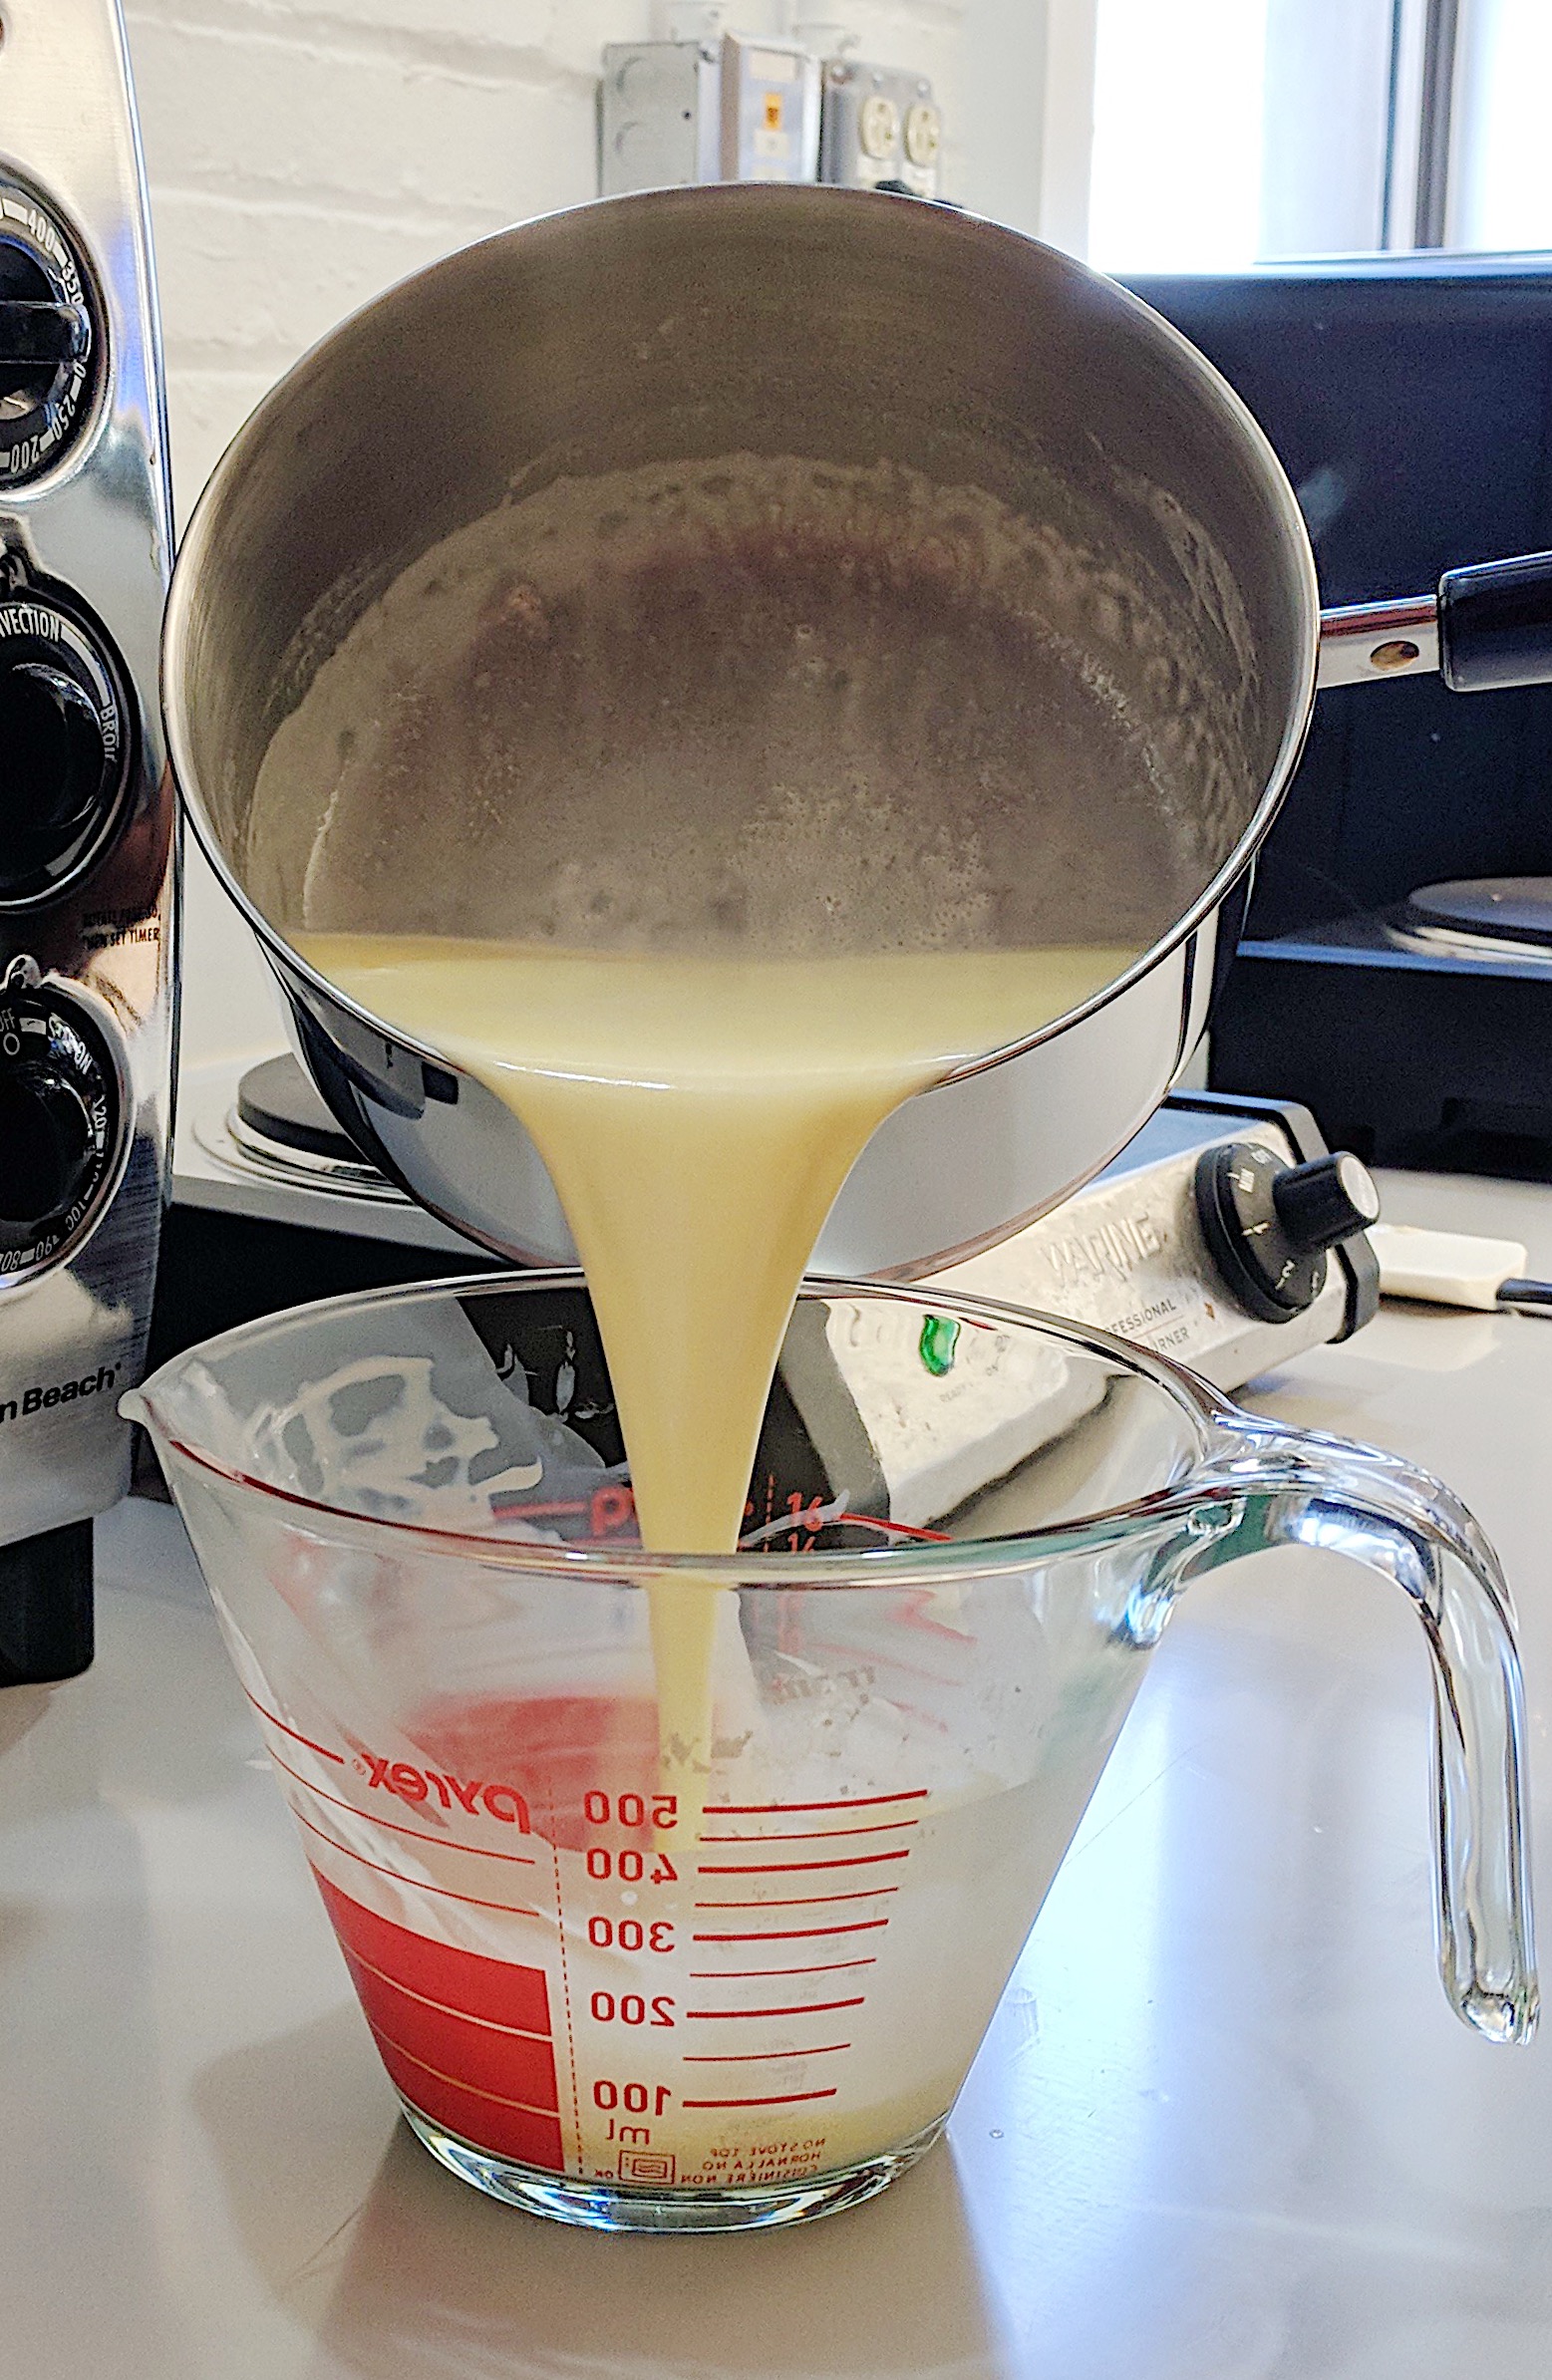
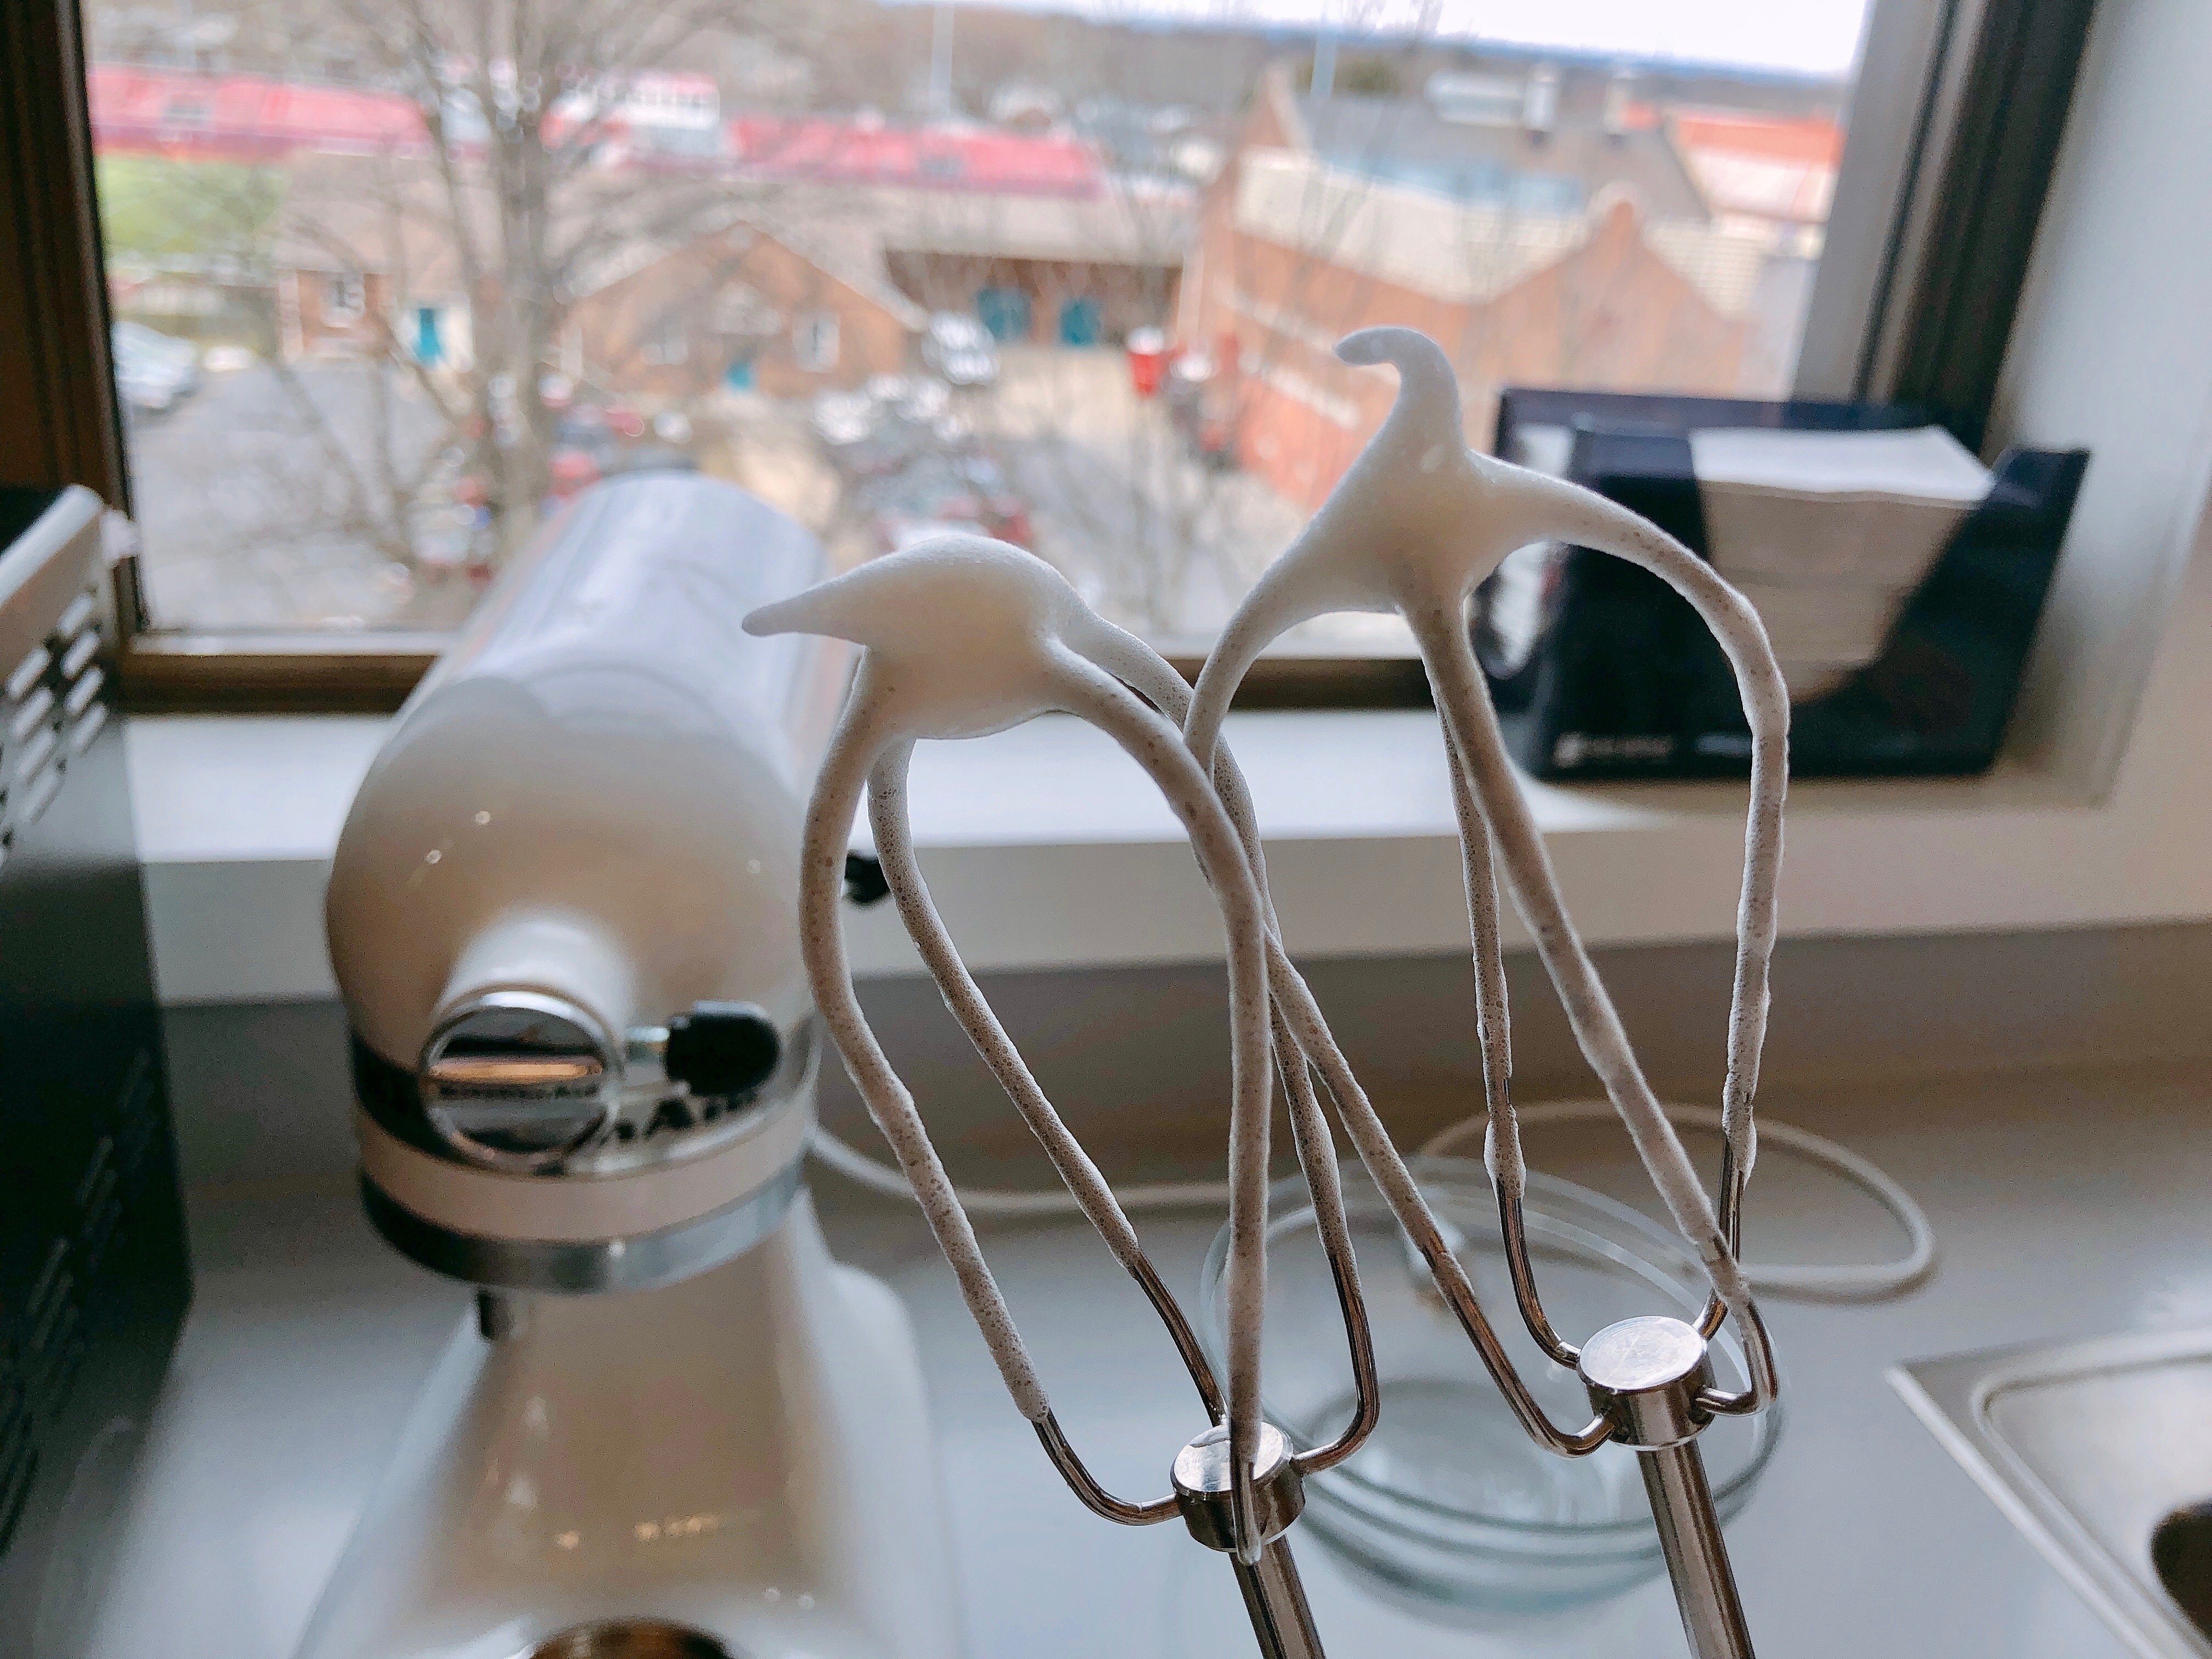
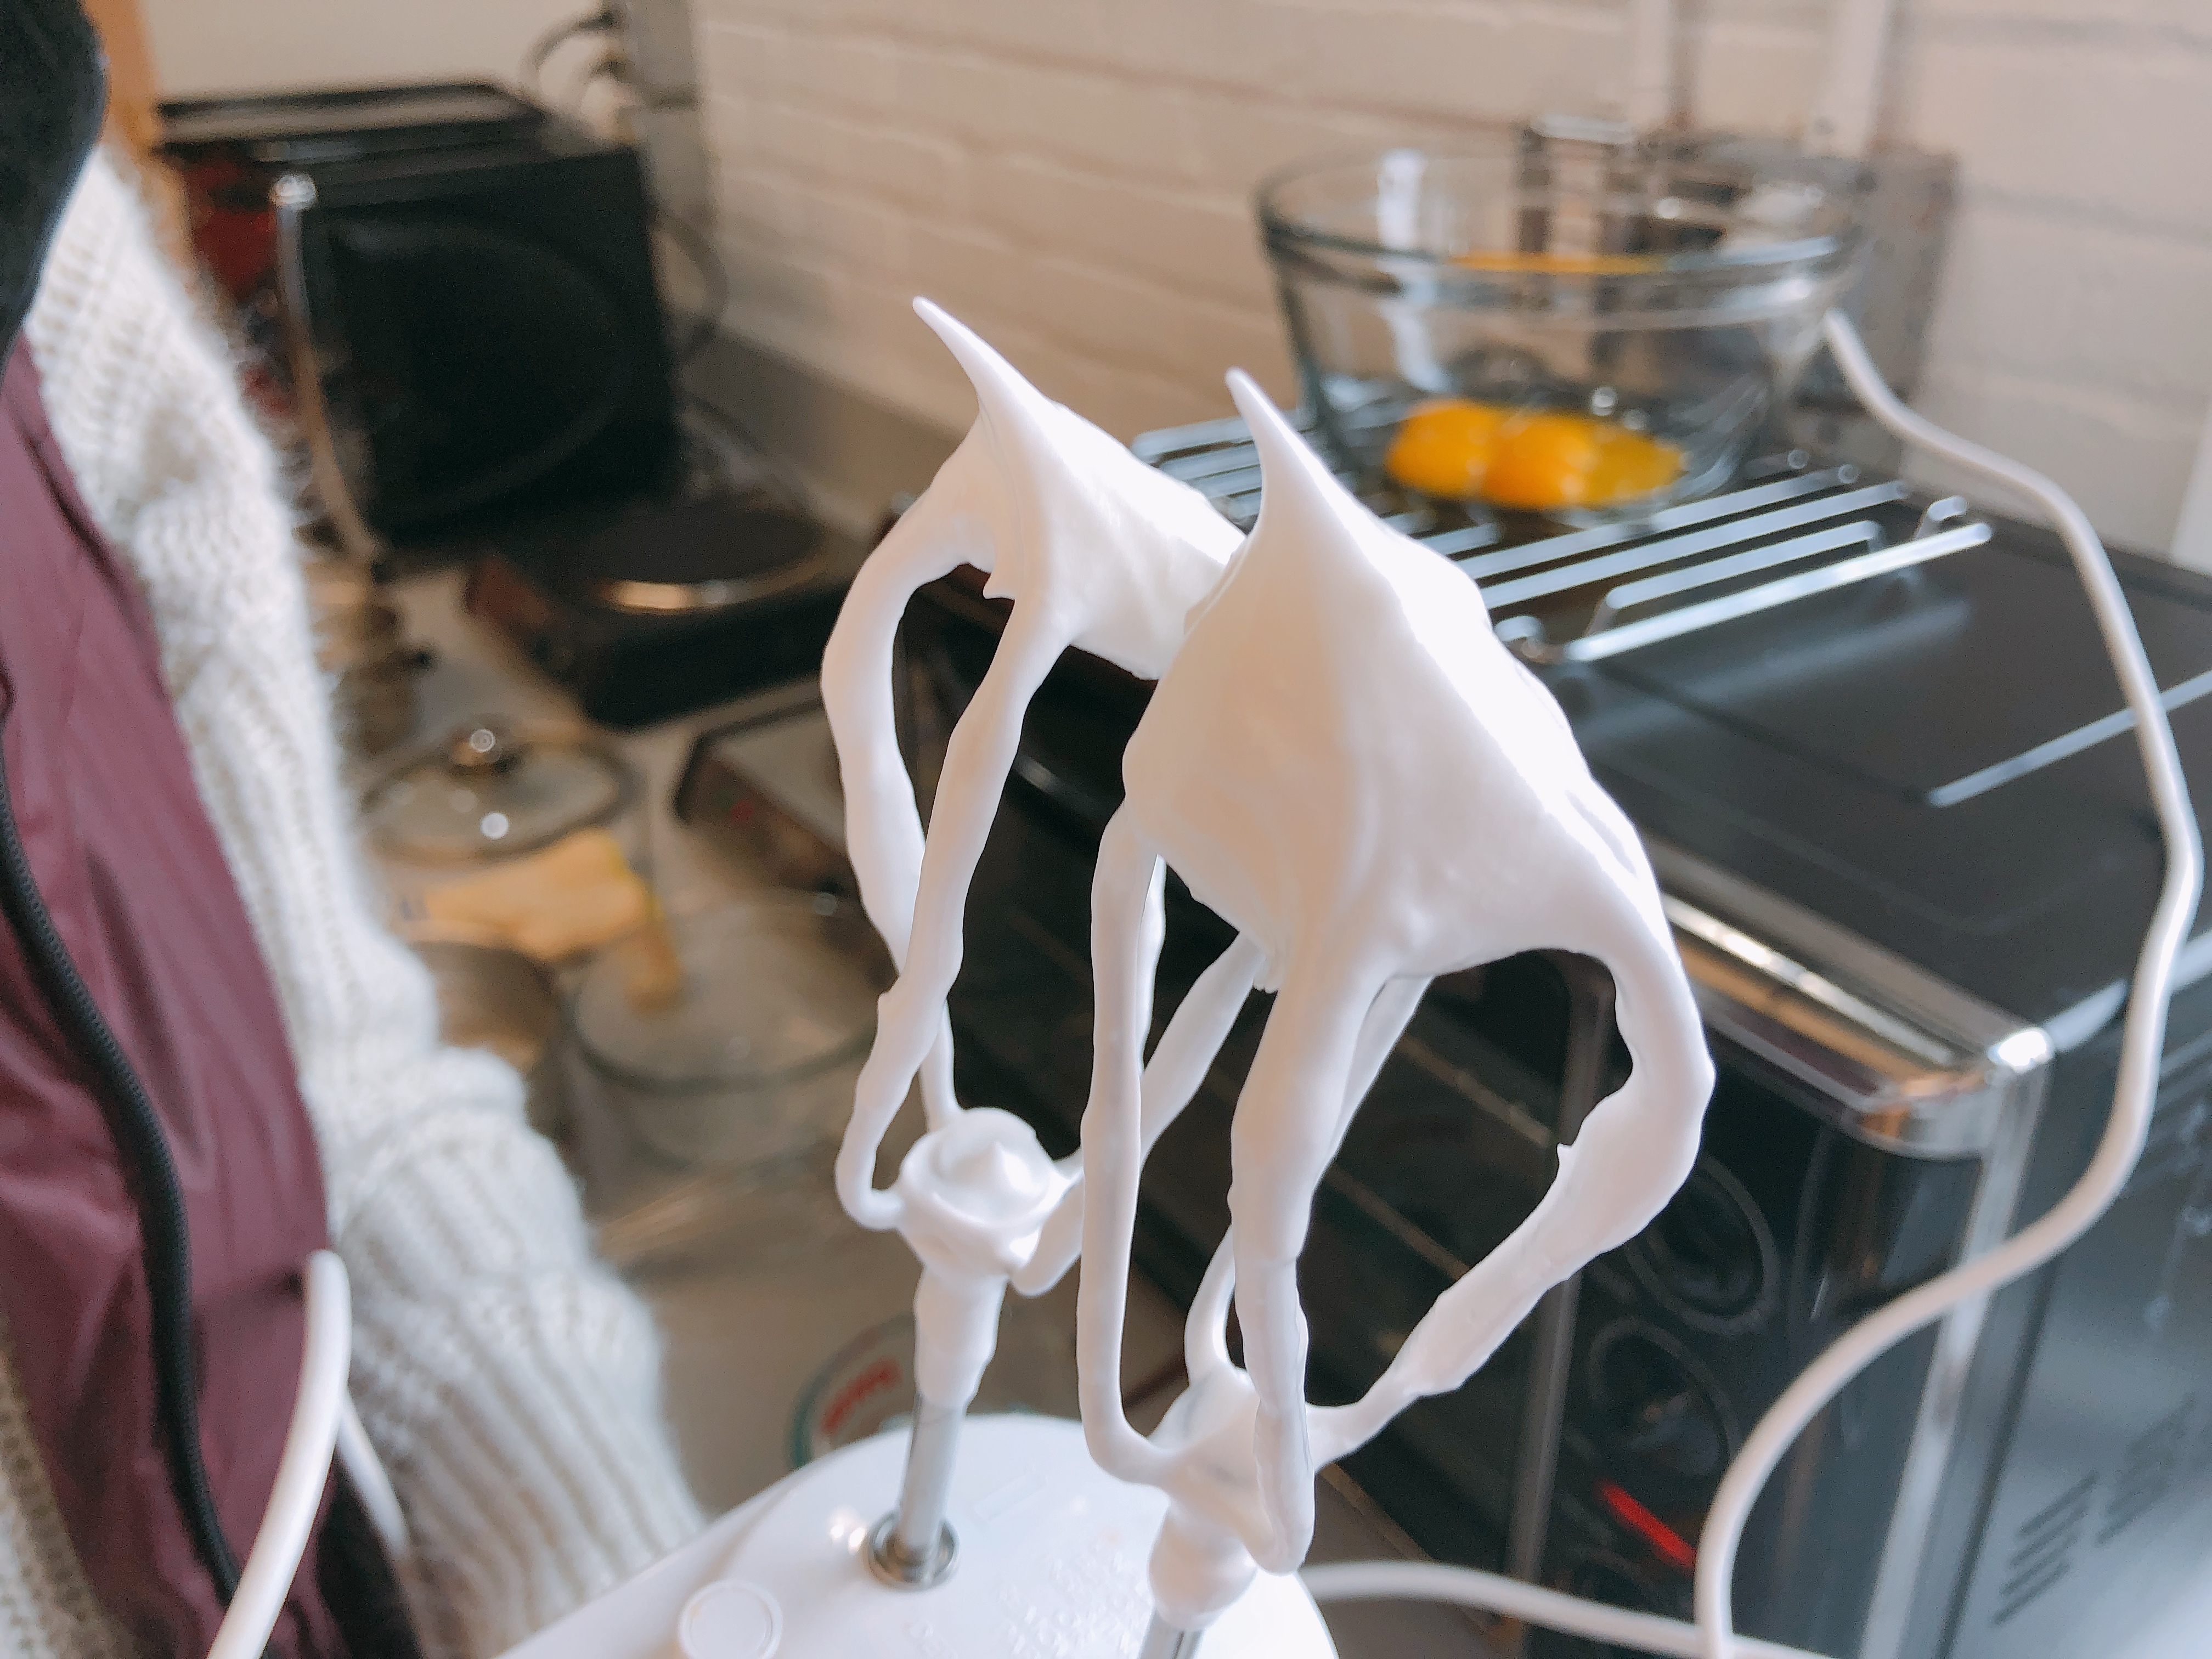
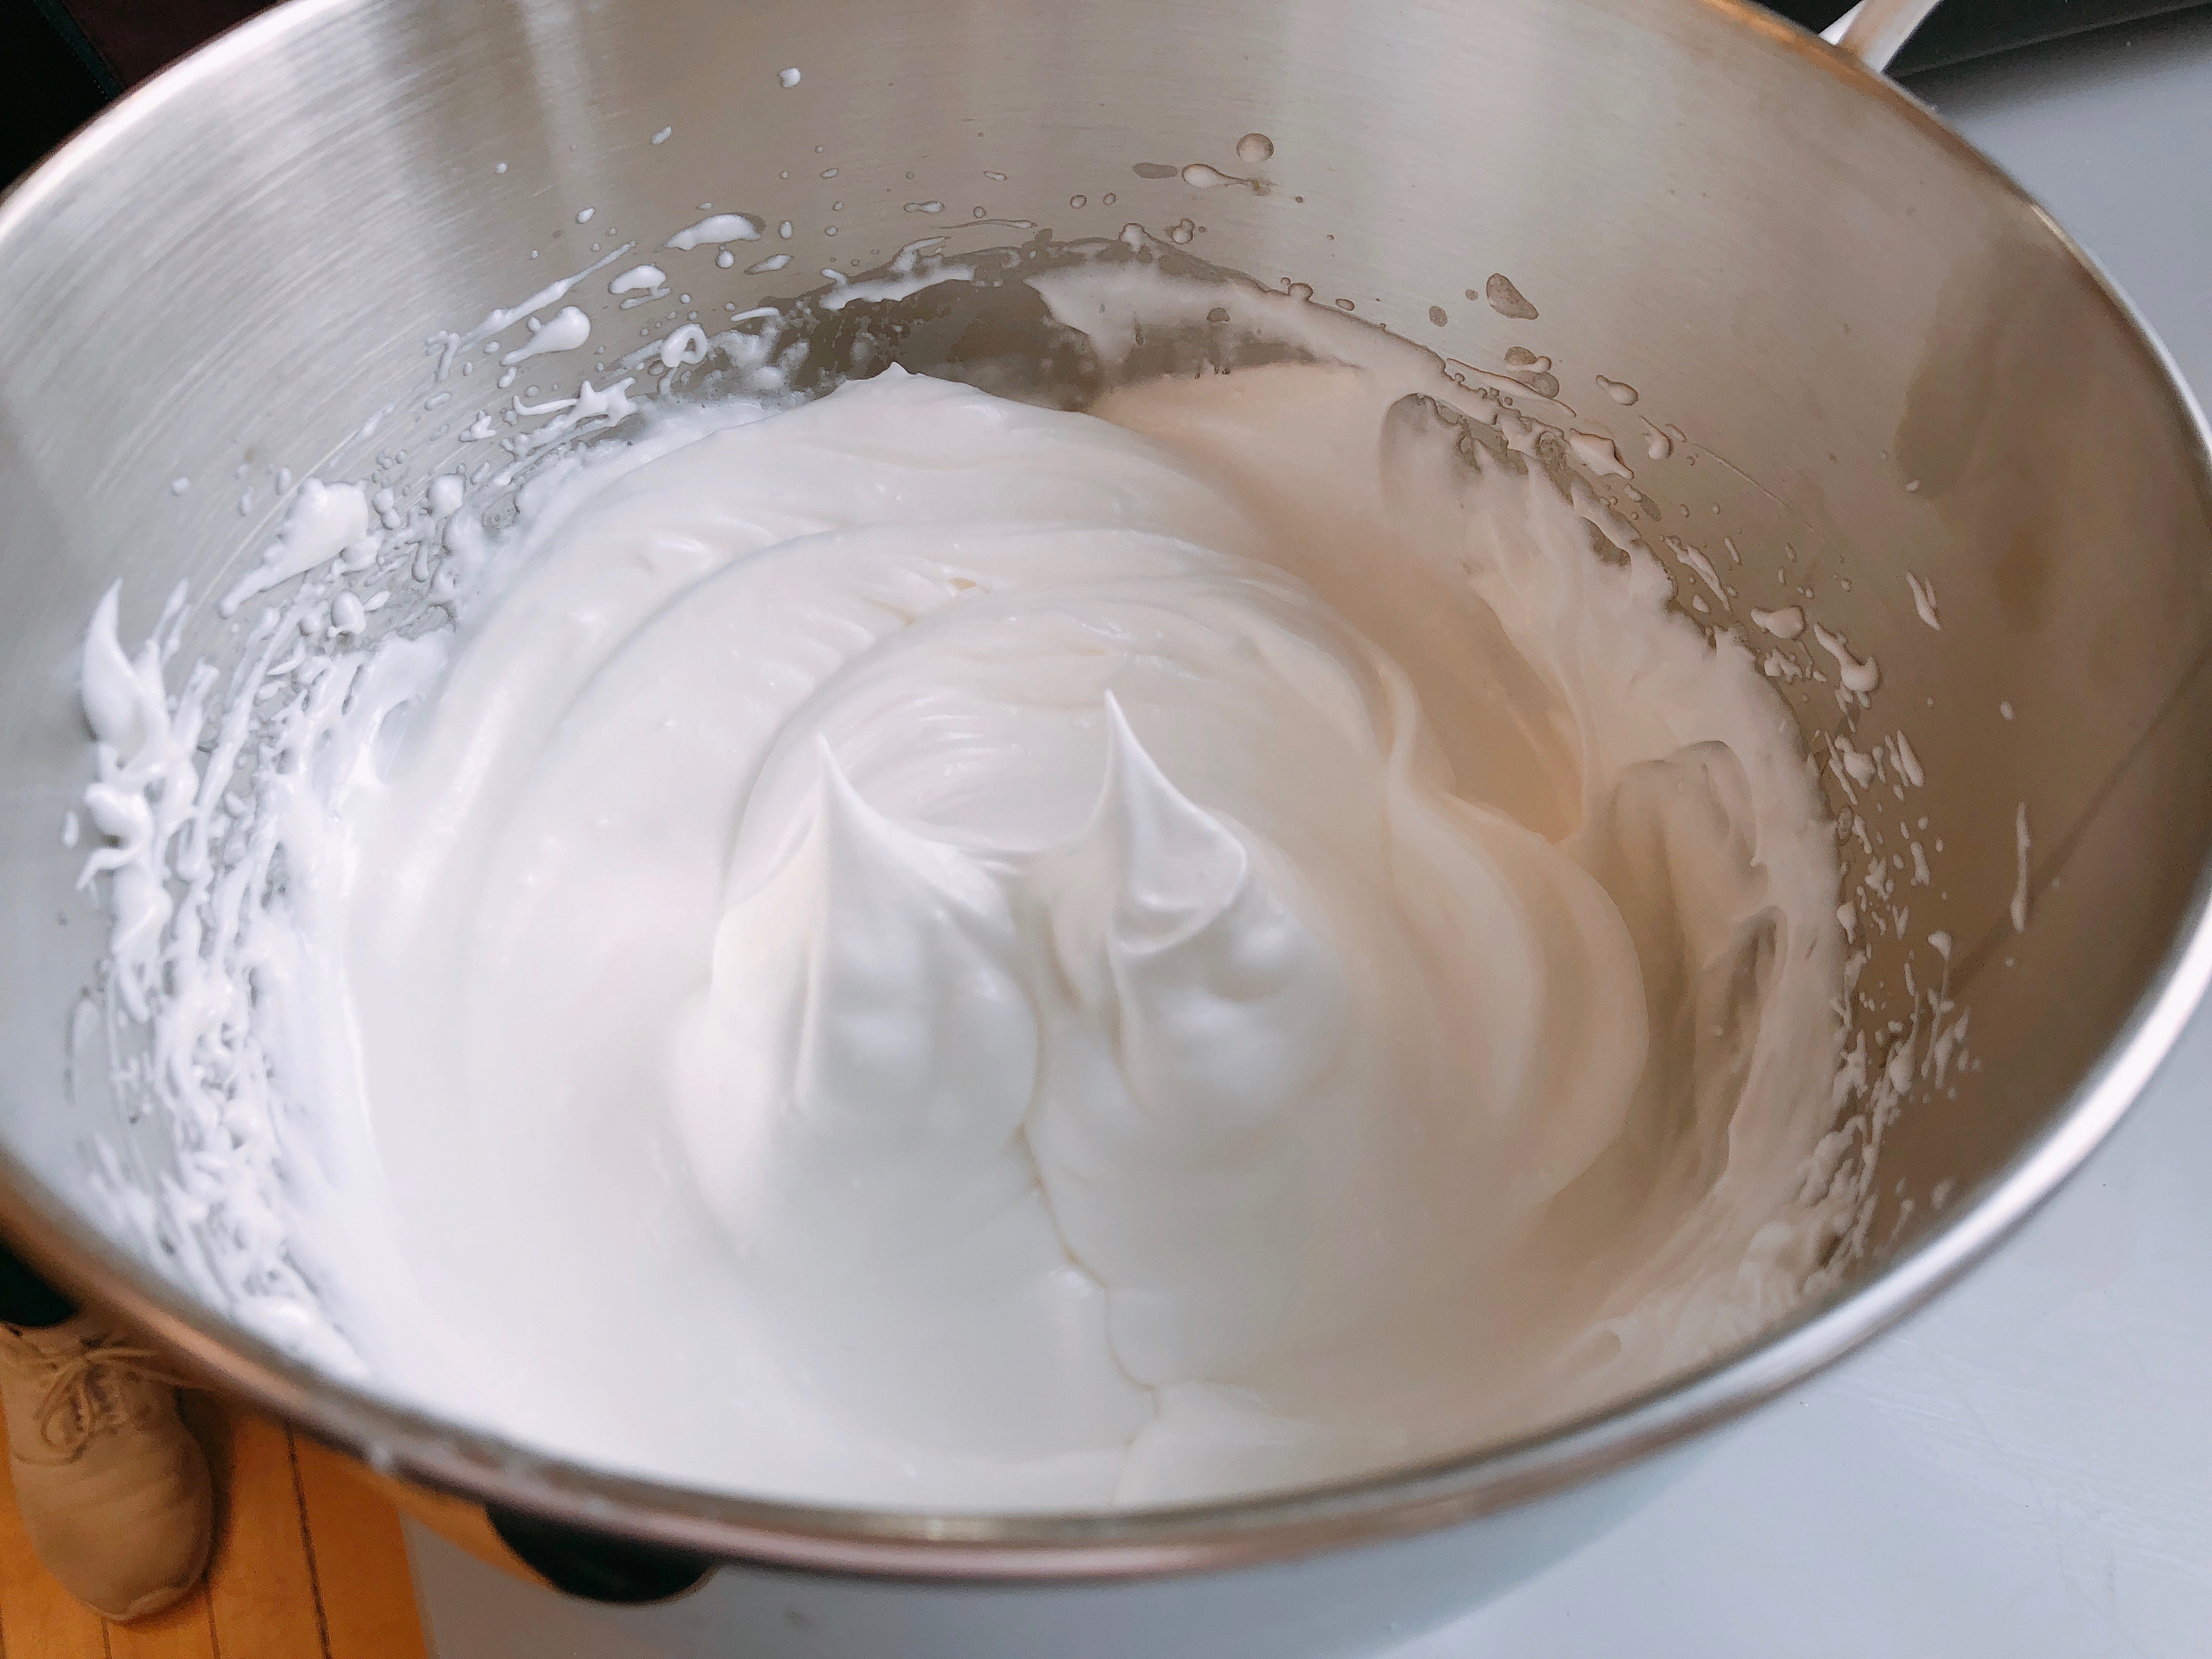
6. Once the sugar is dissolved remove the saucepan from the heat and whisk in the cream, vanilla, and salt.

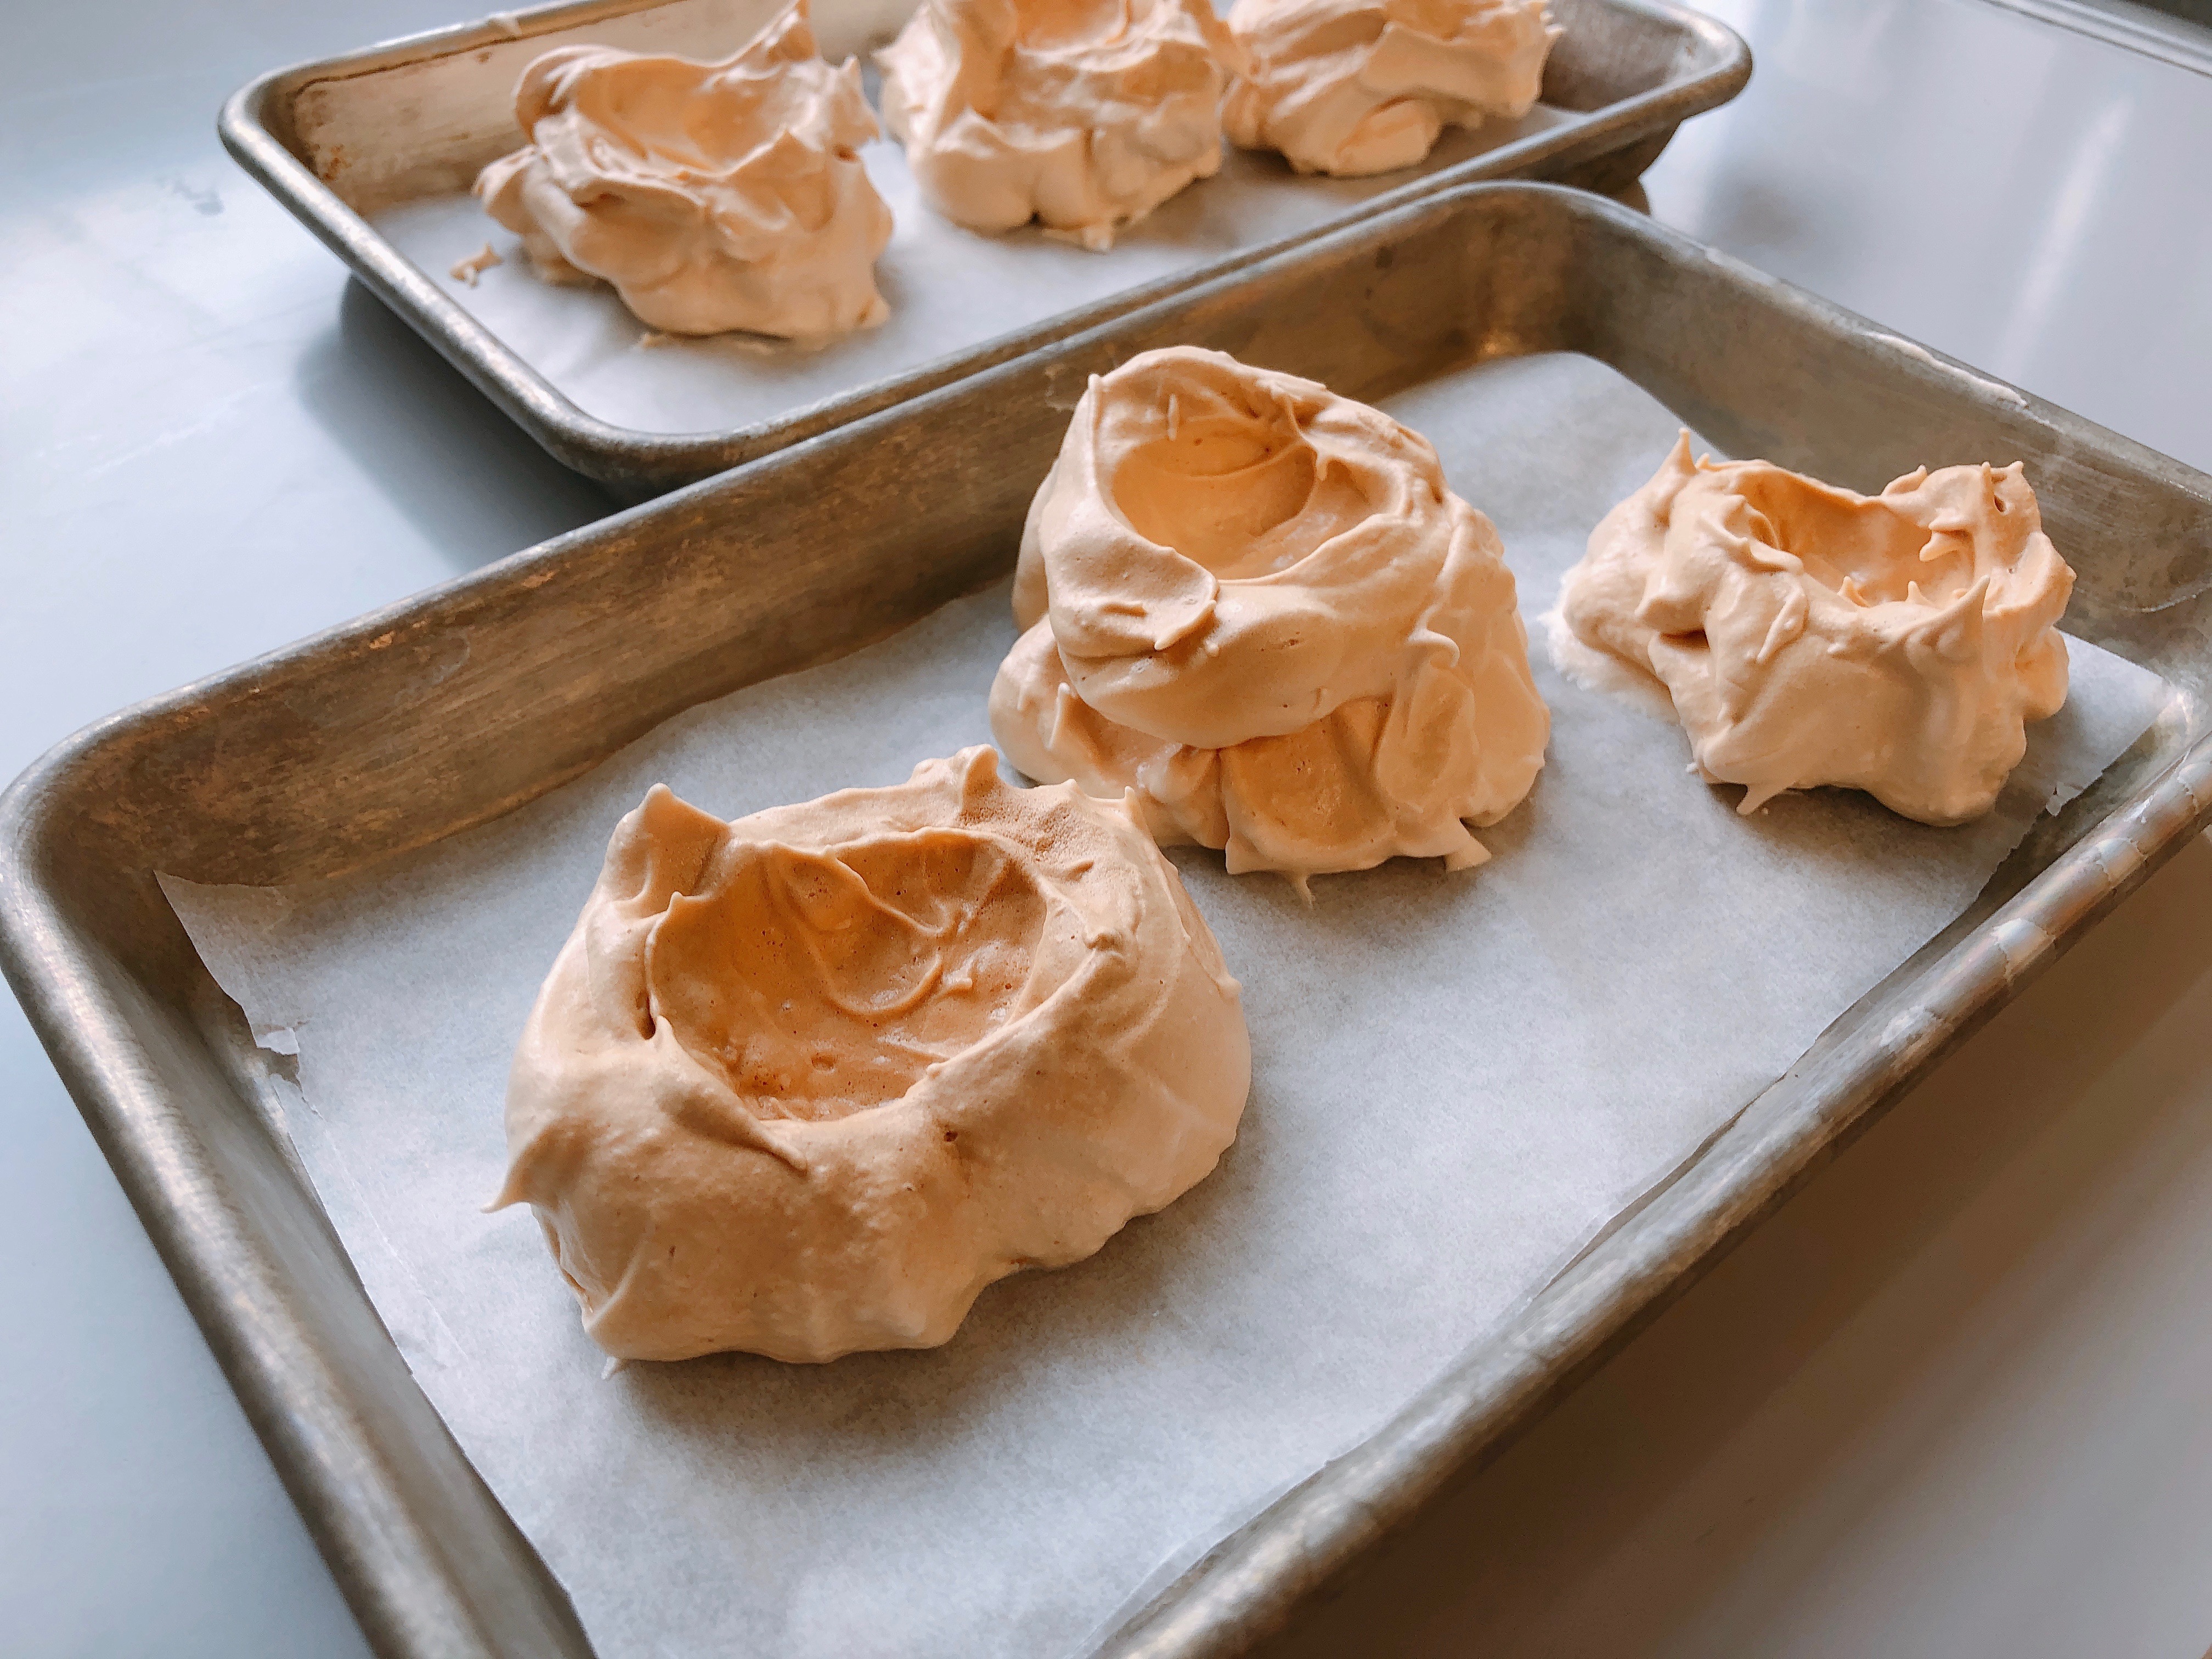
7. Finally pour the panna cotta into the oiled ramekins and refrigerate overnight.


Part 2: Making the Caramel Sauce and Caramel Coated Hazelnuts

Ingredients:                               

For the caramel                                                                For the caramel hazelnuts:

  • 2 cups sugar                                                                    – Whole hazelnuts, toasted and peeled
  • 1/2 cup water                                                                  – 3 tablespoons water
  • 7 tablespoons unsalted butter                                     – 4 ½ tablespoon sugar
  • 1 1/2 cups heavy cream                                                 – 1 pinch salt
  • 2 teaspoons sea salt, crushed

Materials:

  • Hot plate/burner, must be completely clean
  • 2-quart saucepan
  • Instant-read kitchen thermometer
  • Rubber spoonula/spatula
  • Pastry brush
  • Whisk
  • Toothpicks

Directions: Making the Caramel Sauce

1. Have a bowl of cold water nearby in case you get the hot sugar on your skin.

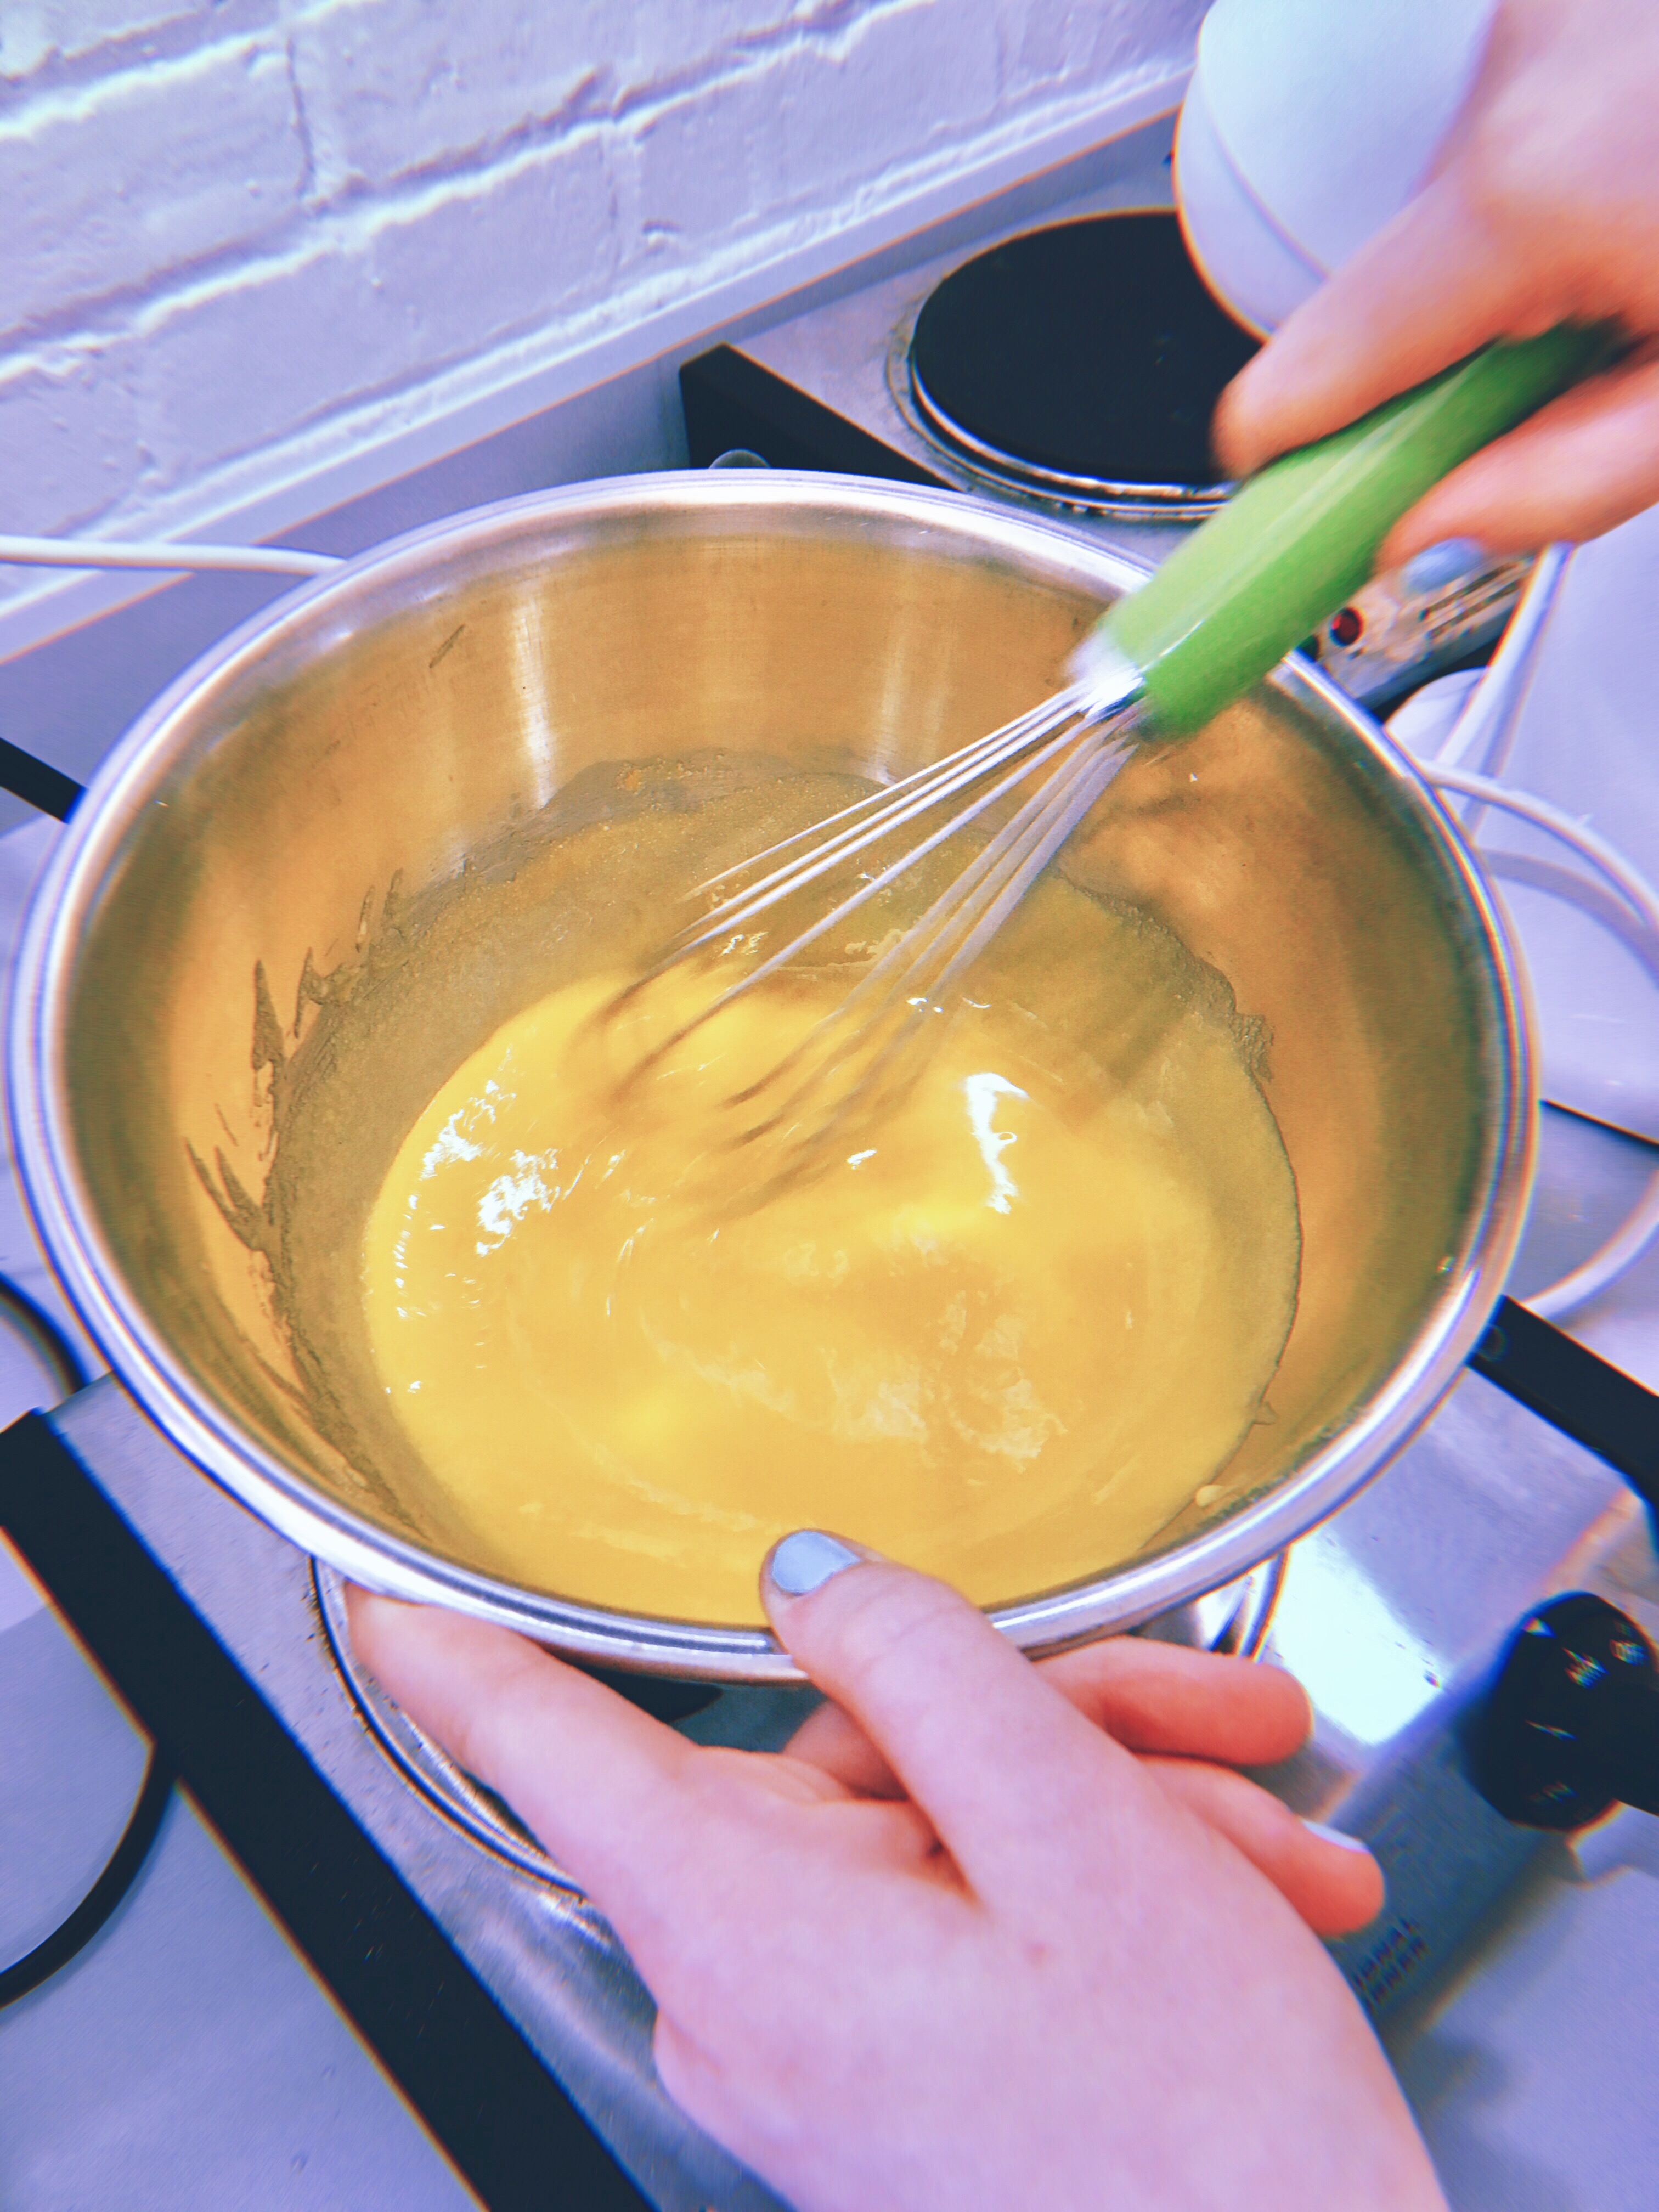
2. On medium heat, warm the cream and butter in the saucepan until the butter melts. Then take it off of the heat and pour the mixture into a measuring cup.

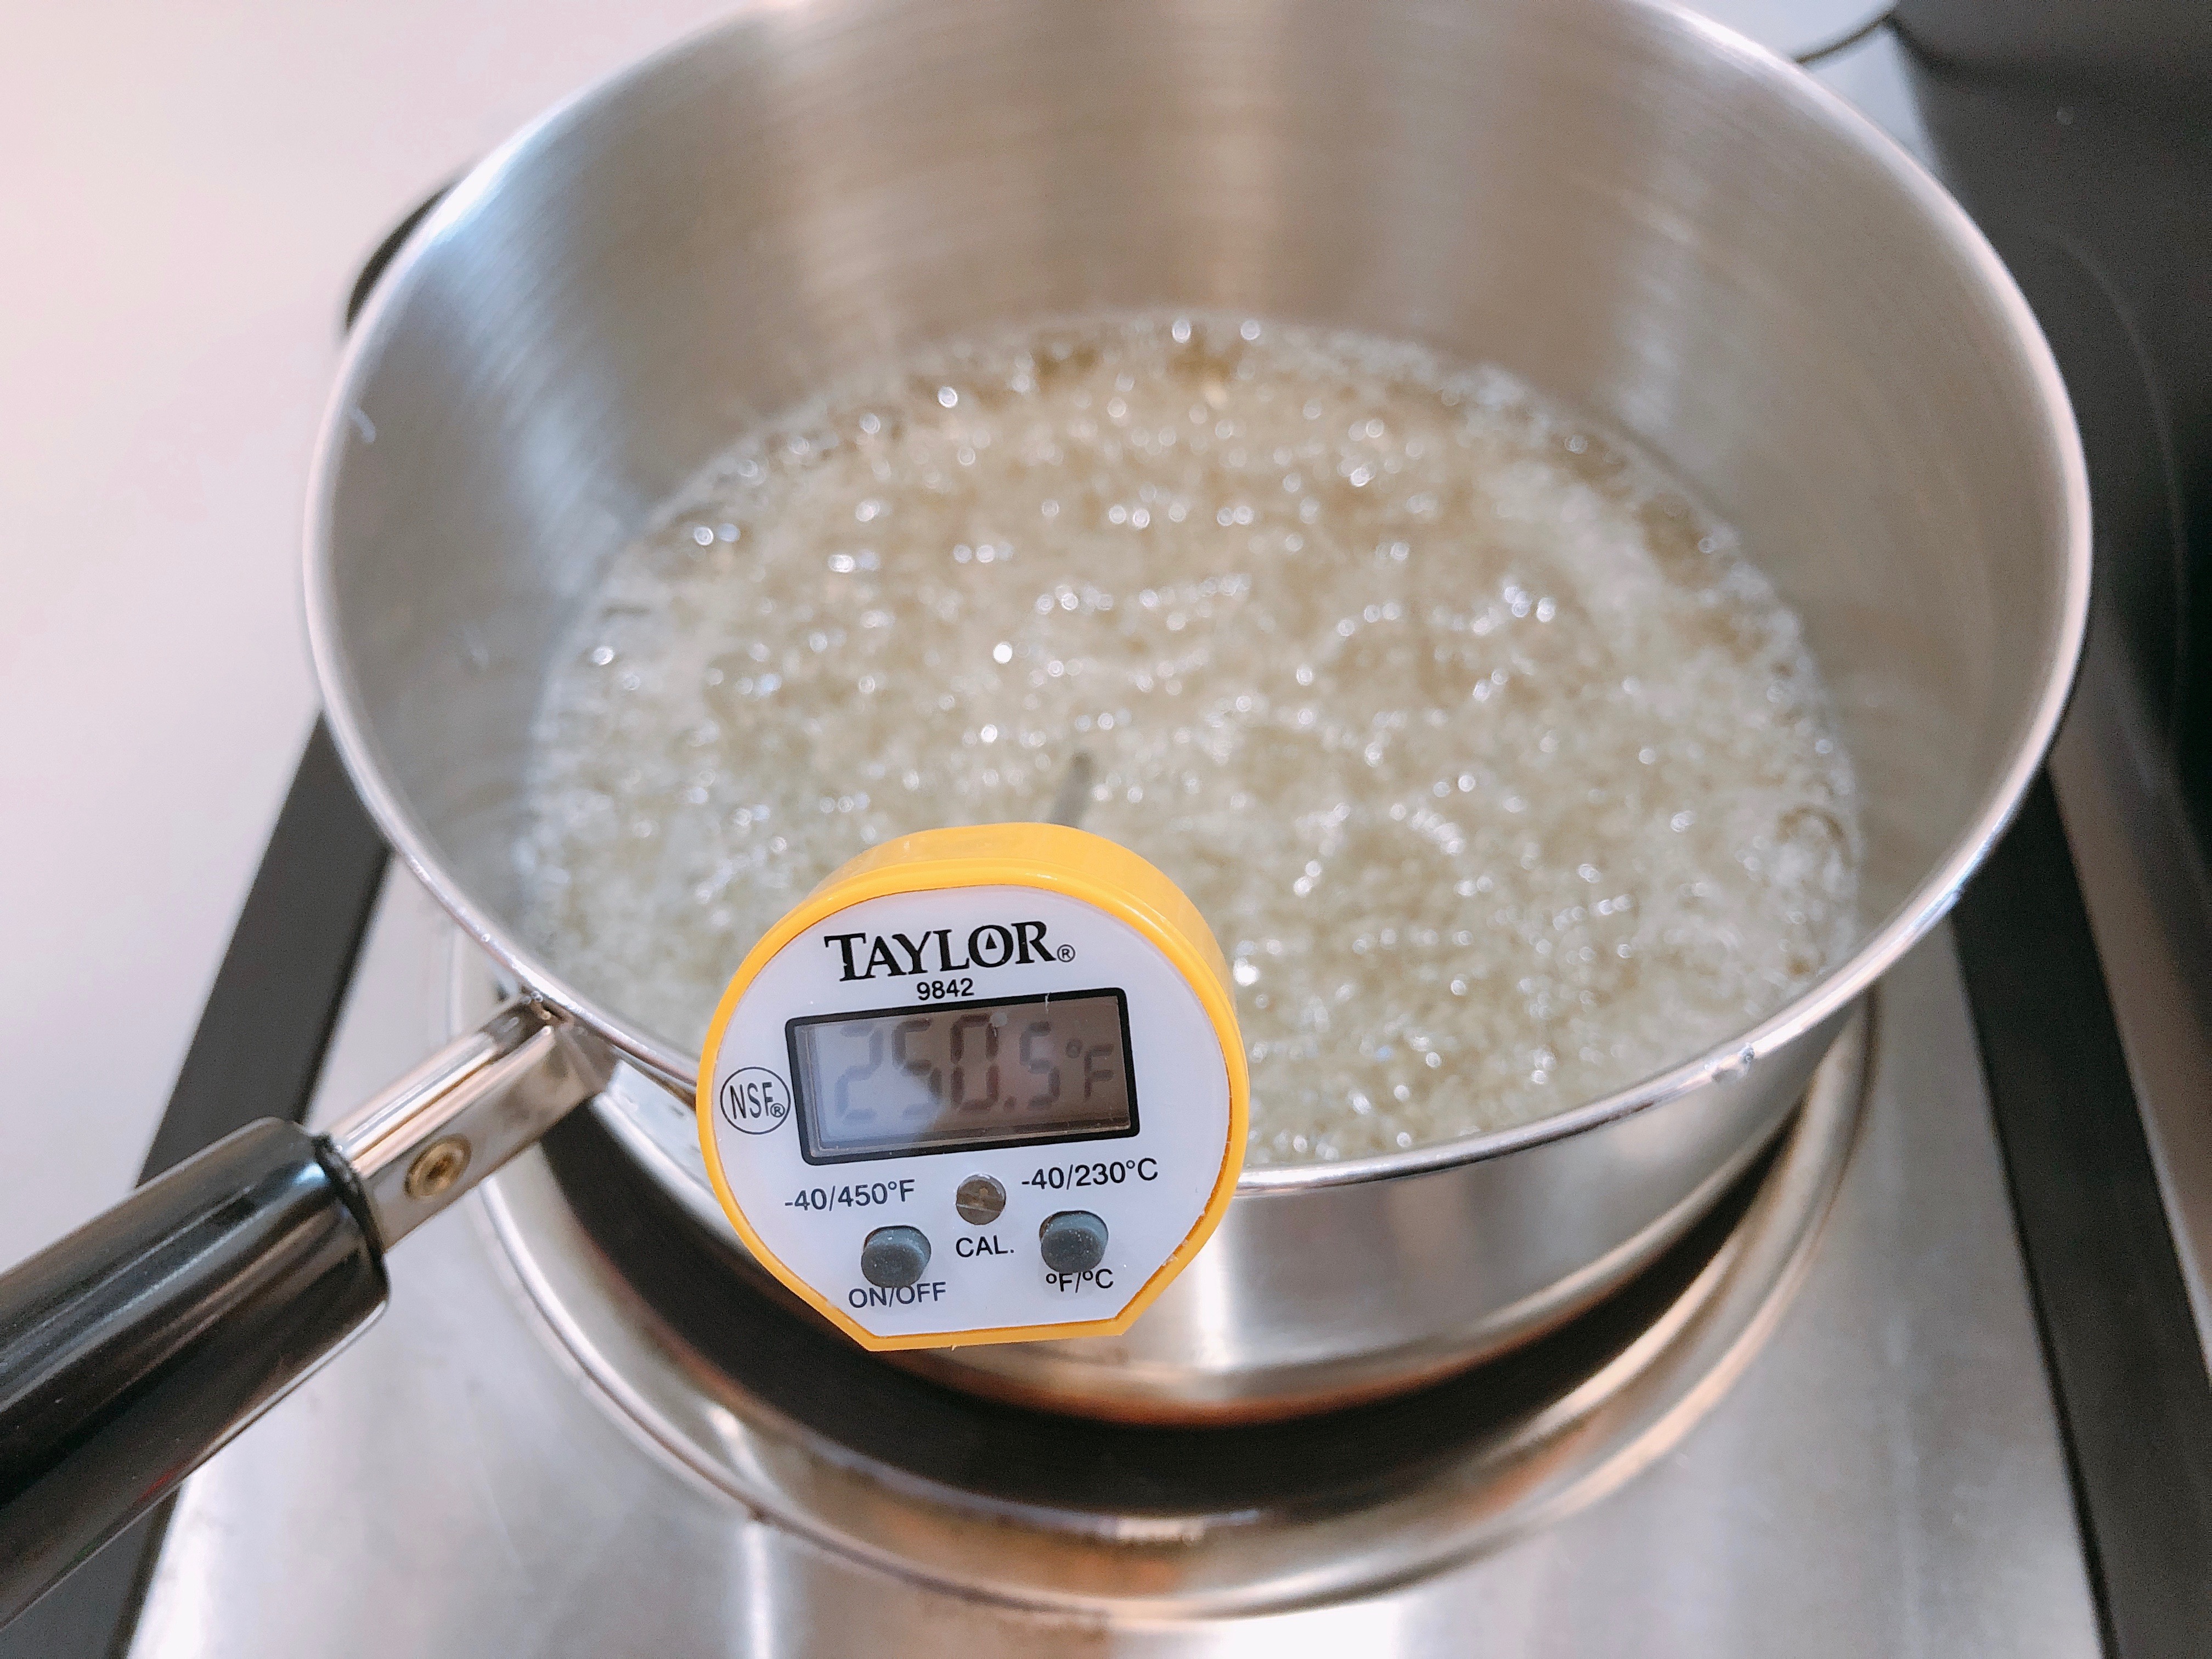
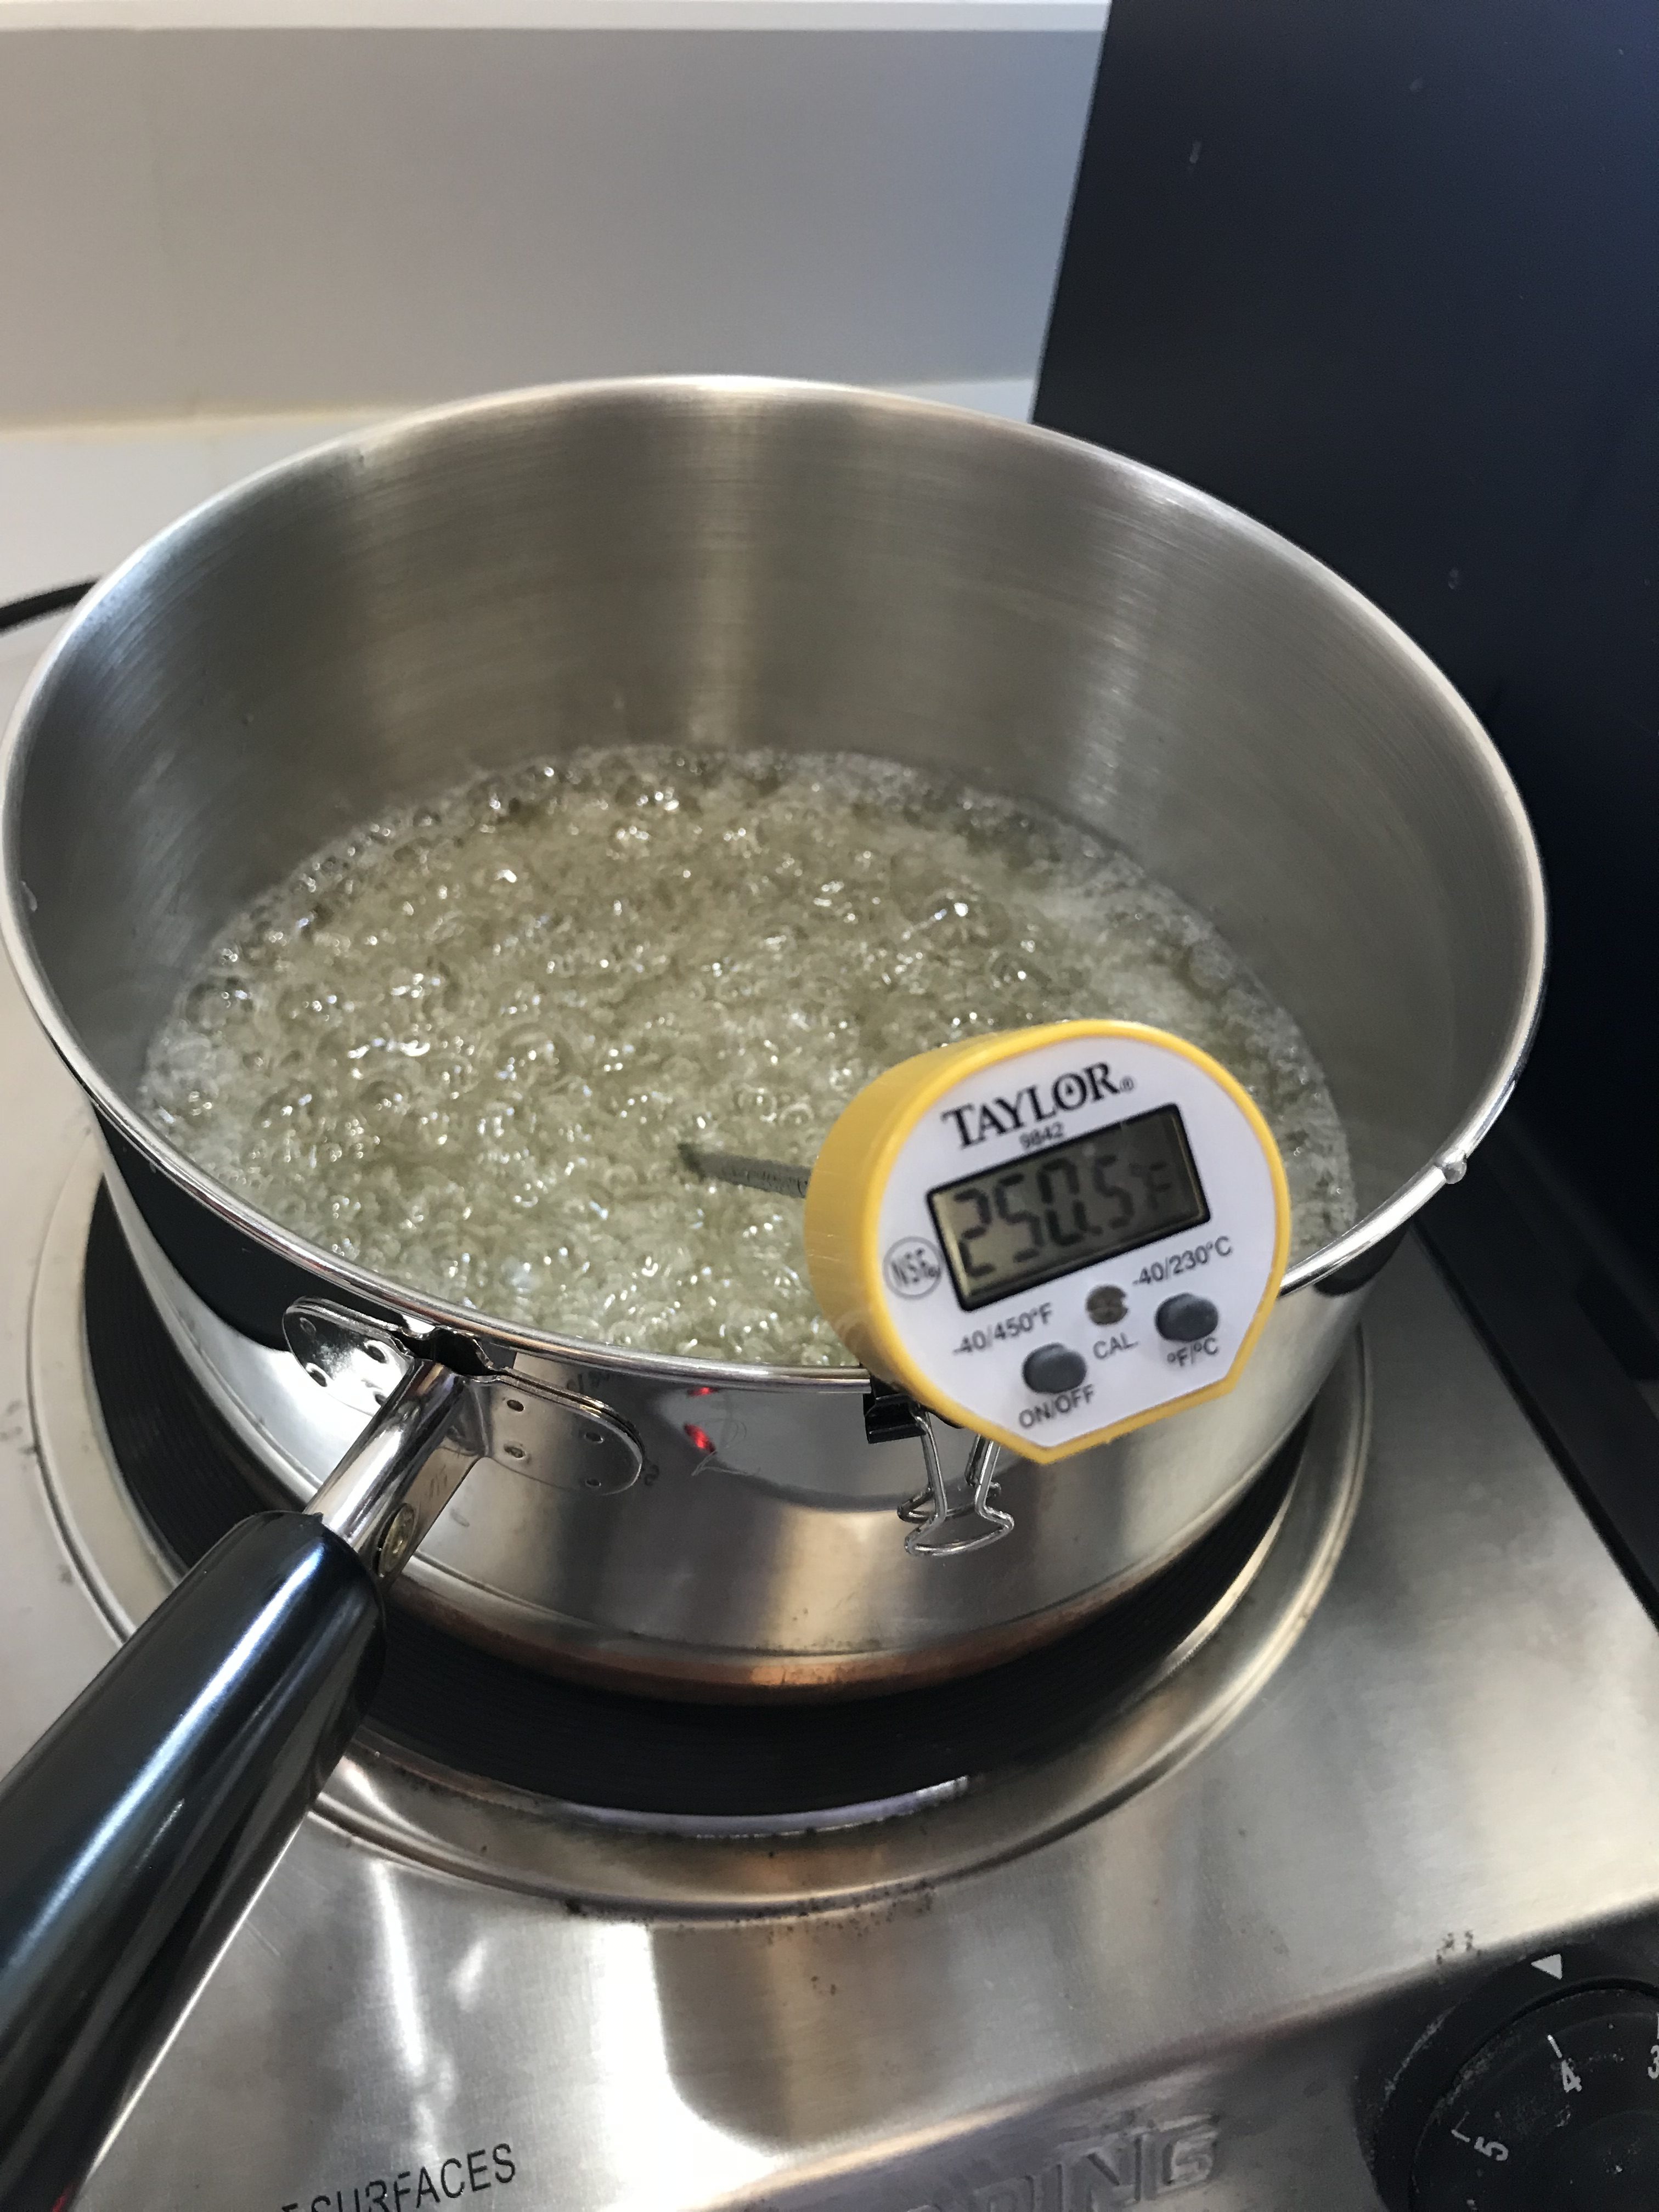
3. Combine the sugar and water. In the saucepan, combine the sugar and water and stir until the sugar is evenly moistened and combined so a thick grainy paste if formed. Next you will wipe down the sides of the pan with a damp pastry brush so that no sugar crystals above the surface of the mixture. Then spray a paper towel with non-stick cooking spray and wipe down the inside of the pot. Once this is done you will clip on a thermometer to the saucepan

4. Over medium-high heat you will cook the sugar syrup without stirring and you will let it come to a boil.  Around 250°F, the sugar syrup will turn transparent and boil rapidly.  Around 320°F, the mixture will start to caramelize and it is at this point you can decide how dark or light you want your syrup to be. Once it is at your desired color take it off of the heat but do not let it go past 350 degrees.

5. put your cream and butter mixture in the microwave for a few seconds if it is not hot and then slowly pour this mixture into the sugar syrup while whisking the syrup thoroughly and quickly. Once all the butter cream mixture has been mixed in stop mixing.

6. Next whisk the salt into the caramel.

7. Then pour the caramel into a glass measuring cup so it can cool.

8. Finally let the caramel cool to room temperature.


Directions: Making the caramel covered hazelnuts

1. Preheat the oven to 350ºF and line a baking sheet with parchment paper.

2. Spread the hand full of hazelnuts on the sheet and place them in the center of the oven. Let them roast for 12 minutes or until they are lightly browned.

3. Put a toothpick in each hazelnut.

4. Then melt the sugar and water in the saucepan like before on medium heat and after 320°F take the syrup off the heat once it has reached the desired color. Let this cool for only about a minute.

6. Next dip each hazelnut in the caramel by holding the toothpick. Place the hazelnut over a sink so the caramel drips down creating icicles and keep them in place taping down the toothpicks.

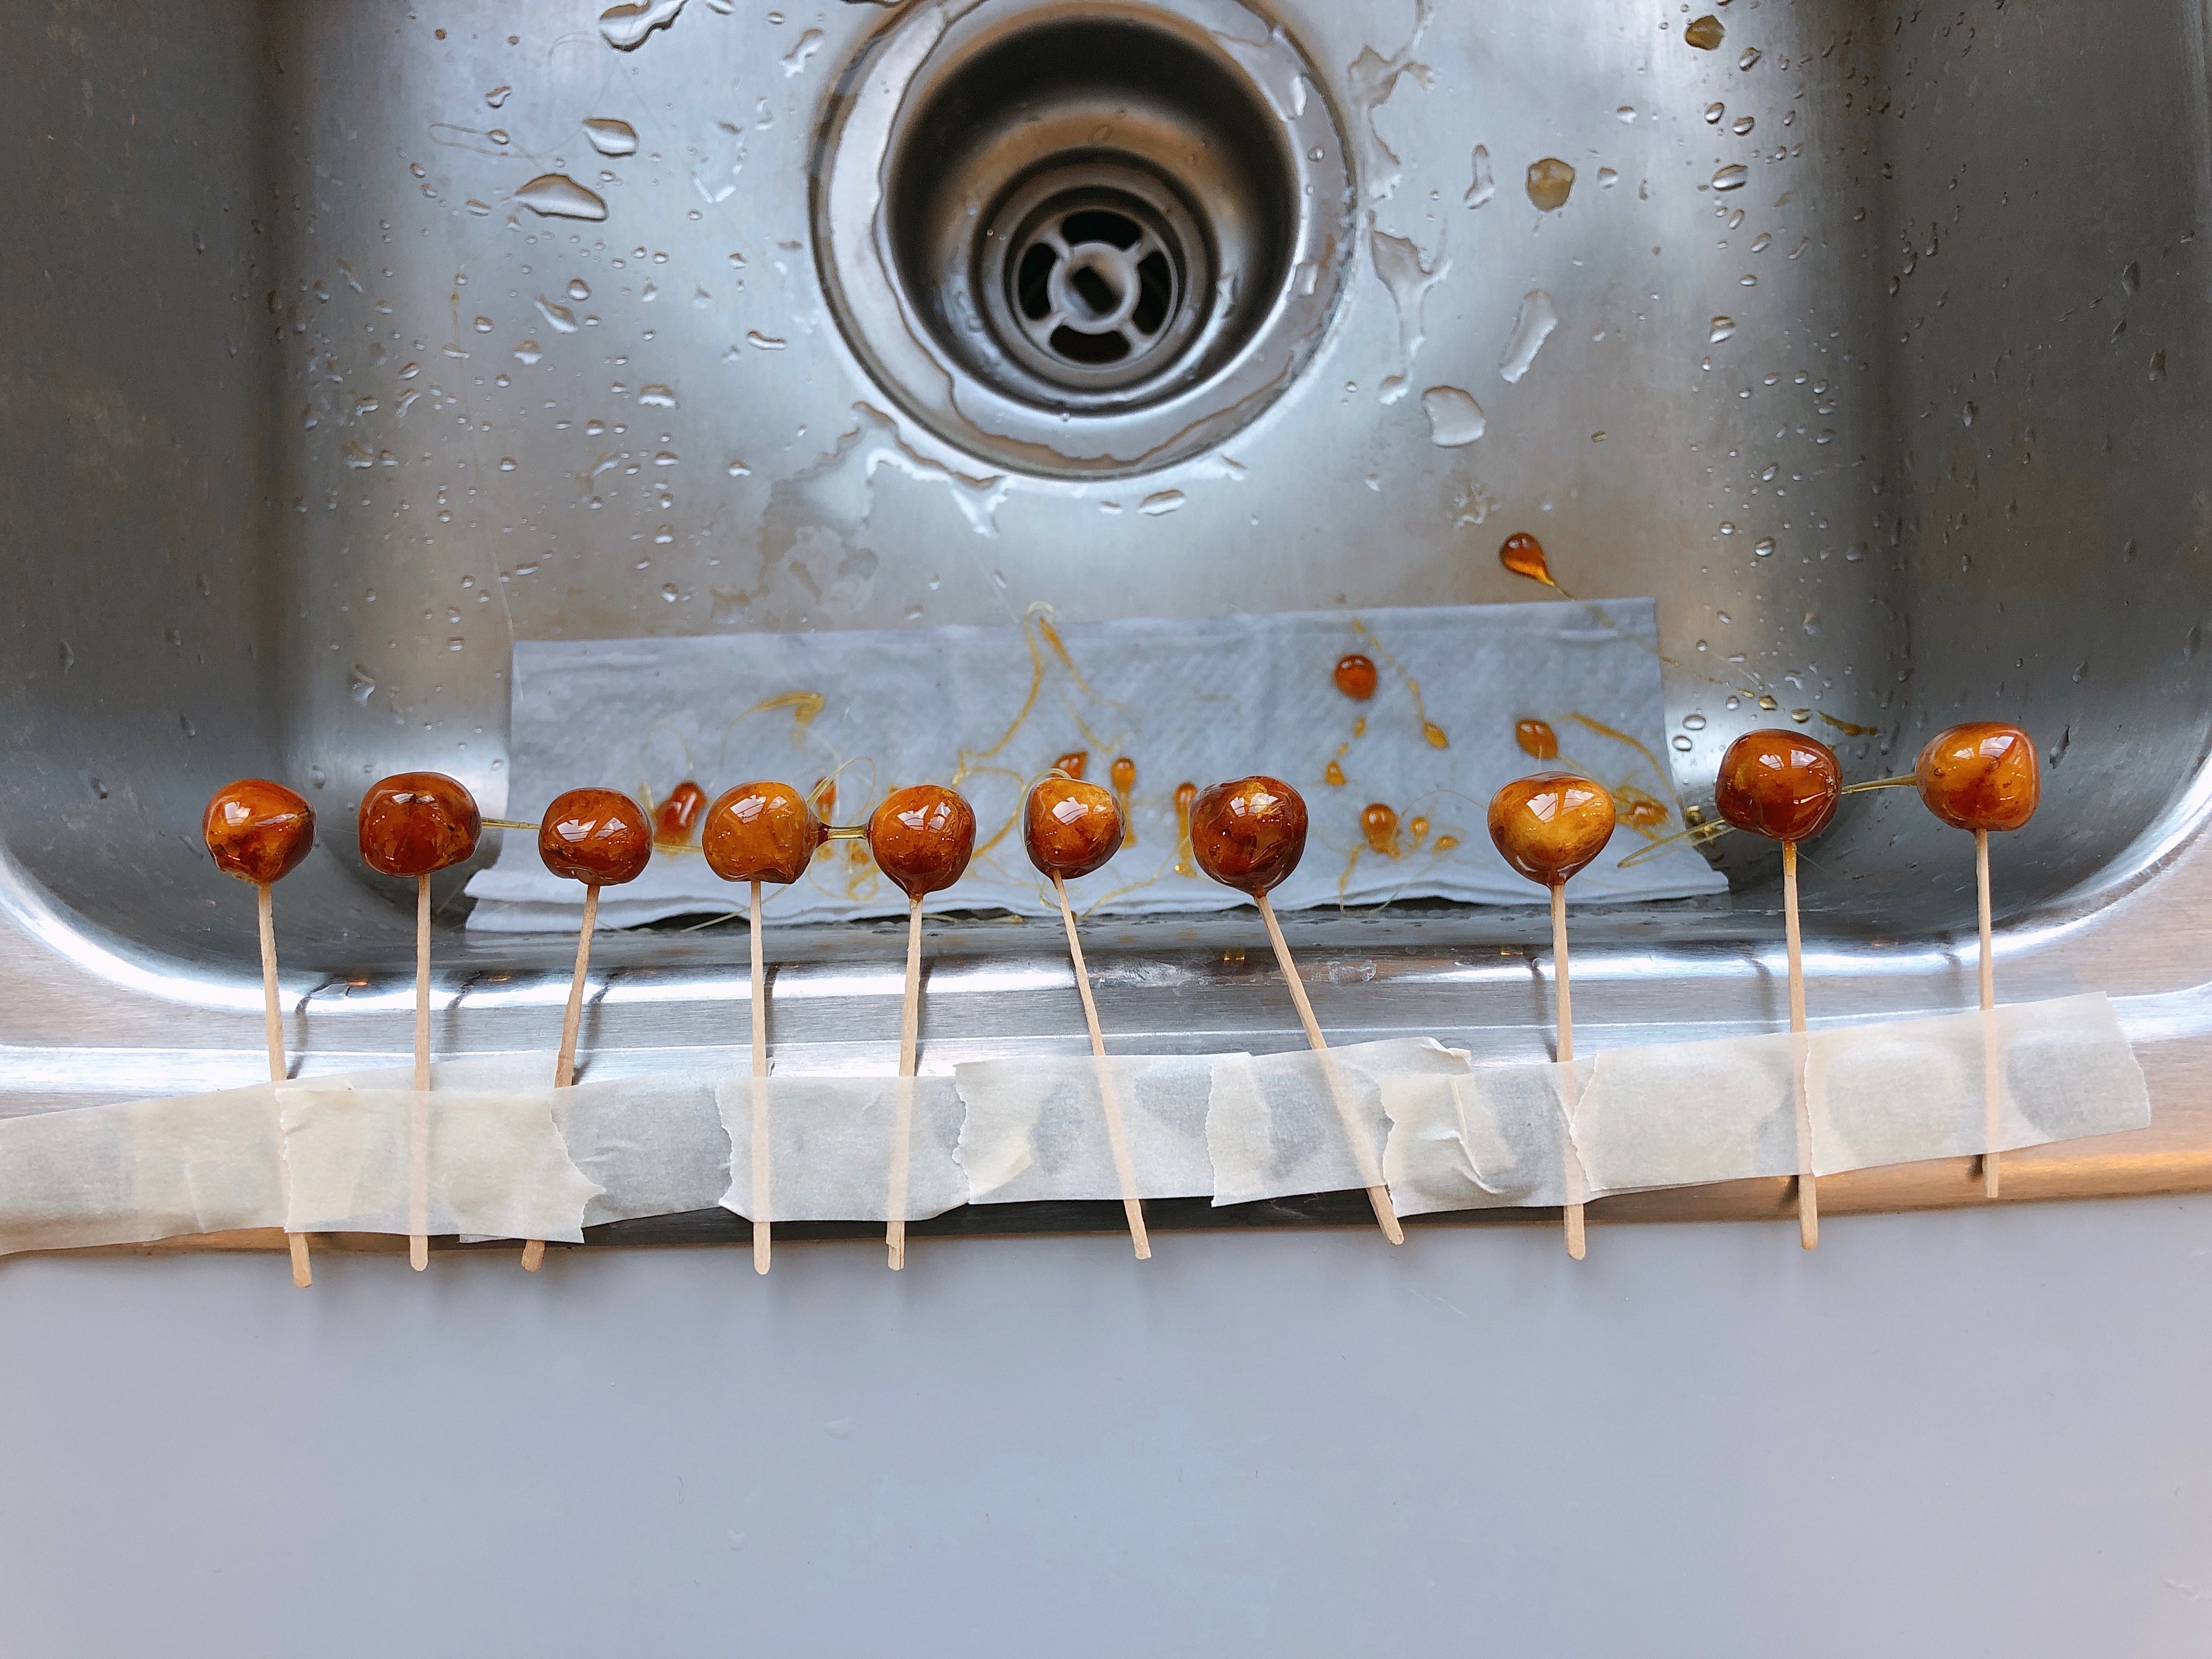
7. Let the hazelnuts cool completely.


Directions: Unmolding and topping the Panna Cotta

1. Fill a bowl only half way with very warm water.

2. Run a thin knife around the top edges of the ramekin.

3. Dip the ramekin in the warm water up to its rim, and hold it for about 3 seconds.

4. Invert the ramekin onto a plate and gently shake so the panna cotta falls out.

5. Finally pour with the caramel sauce on the panna cotta and place candied hazelnuts on top


Here is the video reflecting on the Panna Cotta Van and I made in class!

https://vimeo.com/266220307

Questions:

  • Why is the darker caramel, less sweet?
    • The caramel when it is darker becomes more bitter and has this different color to it because of the increased oxidation of the sucrose that is boiling which results in the caramel molecules giving off the darker brown color and also making the caramel more bitter.
  • At what temperature did YOU see caramelization chemistry occuring? How did you know?
    • We saw caramelization happening when Van and I saw a change in the color of the sugar mixture. Before it was even at 320 degrees the second time we made the caramel for the hazelnuts we saw it caramelize before then because the mixture was turning a golden brown and bubbling up more than it was before.

Integrative Assignment #3

Alex Goshert

Integrative Assignment #3

Basil- Aromatics


1. Assumption

Before learning about this in class, I originally thought basil was a basic plant that went on top of fancier meals to give it a slight fresh taste on top. Personally I never saw the point in basil or why it was put on top of these foods, and sometimes would just brush it off of my meals if it came with it. I knew it was a herb but I did not know of its benefits or why it was so commonly put on top of meals such as pasta or chicken. Through learning about basil I have come to appreciate its wide variety of uses and importance among Italian cuisine, which I had no clue about prior to learning about basil in class.


2. Dish

Basil is a key herb ingredient that is used in Italian cuisine. It is used for its strong scent and taste and also because of its many health and nutrient benefits.

http://balconygardenweb.com/wp-content/uploads/2017/05/Growing-Basil-in-a-pot-1.jpg


3. Chemical analysis

There are several chemical aspects that play a huge role in basil and its importance when it is used in meals. Fresh basil is very commonly used in recipes and is added to foods at the very last moment of cooking. Basil has various scents based on the different types of the herb, but all of them are full of essential oils and include great amounts of Vitamin A, K, C, magnesium,, potassium, iron, and calcium. Different types of basil such as lime and lemon basil have a very strong potent smell and taste which comes from their high concentrations of limonene. Another type of basil called sweet basil, which is most commonly used in Italian food, contains high concentrations of eugenol which is a chemical agent. Overall basil and its chemical components have many health benefits such as anti-inflammatory, anti-aging, and antibacterial qualities and basil is nutrient heavy but calorie light.


4. Cultural analysis

The word basil originally comes from the word Basilius which is Latin and means the word royal. Basil also can be seen through the word basilica, which is usually a church, and basil was at often times placed in pots with holy water and placed outside of buildings and churches, which shows the religious significance it had. Since basil was seen as this holy and kingly plant it has many religious implications and this can be inferred through the story of Lizabetta and The Pot of Basil. In the story, Lizabetta’s lover is killed by her brothers and upon discovering his dead body she takes his head and puts it in a pot and places basil on top to cover her lover’s head. She waters the plant with her tears and this causes the plant to grow beautifully, even though it is growing from something dead. This story really exemplifies the importance basil had in Italy and how basil was seen as a rich and holy source of nutrients. Even though her lover was poor when he was alive, in death he was beautiful and rich as the plant grew out of his head. Basil was also sometimes placed in the hands of the dead to ensure safe travels into the afterlife in Europe and different variations of the way basil was used for the dead was seen in places such as India, Egypt and Greece. Culturally basil had a high significance in how it was handled and because of how it was seen as such a royal and holy food, this is why it was handled with such care and used in special cuisine situations. 

5. Integration

When looking at both the chemical and cultural aspects of basil, I realized that basil is both heavy in nutrients and minerals and has many health benefits and basil also is considered holy and royal which I think tie together very well. When something is looked at as holy it comes with the implications that it is good for the soul and helps to keep one healthy and live a great long life. Now when trying to live a healthy life people try to eat nutrient rich foods that do not have a lot of calories and come with many benefits. Basil is a herb that comes with all these chemical components which causes it to be a healthy food that can be placed on top of foods, but it also is considered a kingly herb that is holy as seen through the story of Lizabetta and the Pot of Basil. Overall I think basil poses this wonderful mix of both chemical and cultural aspects and makes this aromatic food a key factor within Italian cuisine. 


Works Cited

  • Nordqvist, Joseph. “Basil: Uses, Benefits and Nutrition.” Medical News Today, MediLexicon International, 3 Jan. 2018, www.medicalnewstoday.com/articles/266425.php.
  • “Basil.” Wikipedia, Wikimedia Foundation, 16 Apr. 2018, en.wikipedia.org/wiki/Basil.

Figuring out Food: Part 3


1. Additives within Cream Cheese and Chives Crackers and their uses in the food.

  • Niacin, Reduced Iron, Thiamine Mononitrate, Riboflavin, and Folic Acid– All of these additives are nutrients found in the crackers. They replace vitamins and minerals that were extracted or lost during the cooking and processing stage of making the food. They also are added to help provide for nutrients that may be absent or missing from the diet.
  • Sodium Bicarbonate, Ammonium Bicarbonate,  and Monocalcium Phosphate– Together they are leavening agents and help to promote the rising of the flour and mixture no matter how little there is to rise.
  • Corn Syrup, Corn Syrup Solids, and Sugar– These additives bring sweetness to the crackers with and without adding calories
  • Xanthan and Guar Gum– They both are stabilizers that help to produce a cohesive texture to the food which helps it to feel better in the mouth. They also bind the food together and are fat replacers where in reduced fat foods they give more texture and a mouth like feel.
  • Natural and Artificial Flavor-This adds specific flavoring that is both natural and synthetic to the cracker.  
  • Soy Lecithin– This is an emulsifier and helps to make a stable product and allows for a smooth mixture of all the ingredients. This emulsifier also prevents the separation of ingredients and controls the dispersion and dissolving of products together.

2. Two Vitamins found in large amounts in Cream Cheese and Chives Crackers

  • Riboflavin- This vitamin helps with the conversion of food into energy and also aids to growth and development of the body. Another main thing this vitamin does is riboflavin helps in the formation of red blood cells. The recommended daily value of riboflavin is 1.7mg and it can commonly be found in eggs, grain products, mushrooms, meat, seafood, milk and spinach.
  • Below is the chemical structure and formula of Riboflavin

C17H20N4O6

  • Folic Acid– The vitamin folic acid helps to prevent birth defects and just like riboflavin aids in red blood cell formation. Also folic acid helps the body’s protein metabolism. This vitamin is extremely important for pregnant women and women who are able to become pregnant. The daily value of this vitamin is 400mcg and is found in foods such as avocado, grain products, leafy green vegetables, asparagus, orange juice, beans, and peas.
  • Below is the chemical structure and formula of Folic Acid

C19H19N7O6

3. Carbohydrates

Identify the ingredients that are contributing sugars.

  • Corn Syrup and Corn Syrup Solids

What types of sugar are likely to be present? From which ingredients?

  • From the corn syrup and corn syrup solids there are most likely monosaccharides, which are simple sugars.

Identify the ingredients that are contributing fiber

  • The enriched four, which is wheat flour, is contributing to the fiber.

What types of fiber are likely present? Soluble vs insoluble? What ingredients are contributing what?

  • Cellulose and some hemicellulose are the types of fibers that are present and they can be found in the wheat flour. They also are insoluble fibers.

Starch and carbohydrates found in the ingredients.

  • The wheat flour is also contributing to the starch found in the crackers and milk, cheese, cheese cultures, buttermilk and wheat flour all are carbohydrates in the food.
  • A carbohydrate consists of carbon, hydrogen, and oxygen atoms that make up a biomolecule. Also there is usually a 2-1 ratio with a hydrogen-oxygen atom. Starch is just a polymer carbohydrate which means it is a large molecule with repeating units and is a polysaccharide.  
  • One example from the ingredients that add to the carbohydrates in the food is milk, otherwise known as lactose. Lactose is a disaccharide, a double sugar where each molecule has one glucose molecule and one galactose molecule that are bonded together. The chemical formula and structure of lactose is shown below.

C12H22O11


Calculation of the calories from carbohydrate per serving and fiber per serving.

  • Since carbohydrates contain 4 calories per gram, there are 23 grams of carbohydrates in the crackers totaling in 92 calories that are contributed from carbs to the overall food.
  • It is commonly used that there are 4 calories per gram of fiber, so since there is less than one gram of fiber in the recipe there would be less than 4 calories from fiber in the crackers.


Works Cited

  • International Food Information Council (IFIC) Foundation US Food and Drug Administration (FDA). Food Ingredients & Colors. muhlenbergcollege.instructure.com/courses/6764/files/323492/download?verifier=RJ2Xgq2kgRpjgJncv4IAGKhyx52RqjBxzOGIYBLO&wrap=1.
  • Food and Drug Administration (FDA). Vitamins and Minerals Chart. muhlenbergcollege.instructure.com/courses/6764/files/329698/download?verifier=0XEaUwH5sZTC6860aWzoFEnJV5DUzONK4fZbihIY&wrap=1.


Meringa con Zabaglione Recipe

Meringa con Zabaglione

This delicious desert food is an Italian baked Meringue that is served with a warm custard called Zabaglione at the center and then topped with fresh fruit.

Making the Meringa

Materials:

  • electric mixer or stand mixer
  • measuring spoons and cups
  • liquid measuring cup
  • parchment paper
  • regular spoon
  • baking sheets
  • kitchen thermometer

Ingredients for Meringa:

  • 1 cup superfine sugar (Run one cup plus 2 teaspoons of white sugar in the food processor for 30 seconds. This gives you 1 cup of superfine sugar)
  • 1/2 tsp water
  • 1/4 tsp cream of tartar
  • 4 egg whites; the yolks will be used in making the zabaglione

Instructions for Meringa:

1. Preheat your oven to 300 degrees

2. Place the egg whites in a stainless-steel bowl and beat with an electric/hand mixer until foamy. When we made this we used a Kitchen Aid and whisk attachment. Then add the cream of tartar and beat until soft peaks form; they should flop over like below.

3. In a small pot over low heat on your Waring burner, combine the sugar and water. Stir carefully to dissolve the sugar completely.

  • Get some cool water in your glass measuring cup and set it to the side of the pot
  • Put the oven glove on your hand and use the kitchen thermometer to check the temperature. Increase the heat and boil the sugar water to 236-240 degrees F – or the soft-ball stage. With the oven glove on your hand, scoop some of the syrup with a spoon and drop into the cool water. This small sample of the cold syrup should form a soft ball when dropped into cold water like pictured below.

  • Fix the thermometer to your saucepan so the thermometer is near the bottom of the pot but not touching.

4. Start the mixer again and pour the hot sugar syrup in a thin stream over the beaten egg whites. Beat until the egg whites are stiff and glossy, they should stand up straight as pictured below.


5. Line two baking sheets with parchment paper.

6. Scoop spoonfuls of the meringue onto the parchment lined baking sheet and shape into cups or tarts using the back of a spoon, then bake for about 40 minutes at 300 degrees. Then shut the oven off and leave the meringue shells in there for another hour until they are dry and airy.

7. When the meringa are 45-50 minutes from finished proceed to making the zabaglione.

8. Remove the meringa tart shells from the oven when they are lightly browned and dry and allow them to cool.

Making the Zabaglione

Materials:

  • Medium saucepan with lid
  • A glass or stainless steel bowl that will sit on top of the saucepan and not fall in
  • Whisk
  • Measuring spoons

Ingredients for the Zabaglione:

  • 4 egg yolks
  • 1/4 cup of superfine sugar (Run 1/4 cup plus 2 teaspoons of white sugar in the food processor for 30 seconds)
  • 2 teaspoons of almond extract

Instructions for the Zabaglione:

1. Put an inch or so of water in a clean, medium saucepan. Cover with a lid and bring it to a boil, then reduce heat and maintain at a simmer.

2. In a glass or stainless-steel bowl that will sit on top of the sauce pan without falling in, whisk together the egg yolks, sugar, and almond extract.

3. Place the bowl on the saucepan and whisk constantly while the mixture heats. This process takes a lot of time so make sure to not overheat the zabaglione.

  • The signs to look for that tell if the zabaglione is done are if the mixture starts to come away from the sides of the bowl, the mixture mounds easily, and when you run a whisk through the mixture a trail is visibly left behind. 
  • Once it is done take the bowl off the heat and into a bowl of cold water, and keep whisking to further thicken the zabaglione.

  • Then place the mixture in a bag that will allow you to squeeze the mixture out onto the meringa.

4. Proceed immediately with the still hot Zabaglione to assembling the tarts.


Assembling the Tarts

Materials and ingredients:

  • Berries and fresh fruit
  • Spoon
  • Plate/bowl for serving

Instructions:

1. Put a meringa on a plate or small bowl and pour warm zabaglione over it.

2. Decorate with washed and dried berries


View our video discussing how our Meringa con Zabaglione and how it went when we made it!

https://vimeo.com/261054623

1. Type an answer to the following question(s)


https://vimeo.com/261054623

1. Type an answer to the following question(s)

  • What chemical changes occurred when you made the meringue/meringa? What did you observe that told you these chemical changes were happening?
    • When making the meringue there were many chemical changes that occurred but they all had to do with the denaturation and coagulation of the proteins in the food. When we separated the egg whites and then whisked them together in the kitchen aid this is when the egg proteins began to denature. This is also in part because of the air that was being put into the mixture. This mixing then caused the proteins to coagulate and the egg whites turned from being a clear substance to a white foamy mixture. This was even further coagulated when the cream of tartar was added. Once the hot syrup was added more denaturation and coagulation happened with the proteins and this was seen when the soft peaks became stiff glossy peaks. Finally cooking the meringue caused for more coagulation and this was seen when the meringue hardened from being in the oven.
  • What was responsible for the thickening of the zabaglione as you stirred it over the hot water bath?
    • The thickening of the zabaglione is due to chemical property of the proteins in the custard. When the denatured proteins are heated they coagulate and causing the thickening to occur. The zabaglione’s proteins were denatured from beating the eggs and then were coagulated from heating and stirring the mixture together over a long period of time. By doing this the proteins came together to create a new structure that became the new thickened and cohesive custard.
  • Overheating (too fast and or too hot) the zabaglione can leave you with “scrambled eggs” – a lumpy grainy mess of clumps in watery liquid. What is happening in this case?
    • The egg that is in the zabaglione is being cooked at a higher temperature and if there is too much heat and not enough stirring the proteins that are present in the mixture will be heated too fast. This causes the hydrophobic molecules to clump together and cause this separation from the rest of the mixture. They will start to clump together creating these “scrambled eggs” in the custard.

Integrative Assignment #2 Biscotti- Olive Oil

1. Assumption

When I first heard of and saw biscotti I did not know much of what this food was but I did think it was a super hard and crunchy bread. I had never tried it before making it in kitchen chemistry lab but my initial assumption was that it was a super hard break your teeth type of food and it would not be enjoyable, I thought it was going to be this bland and unappealing food. After making my own biscotti I realized that this food is actually quite tasty and has a lot of flavor in it. I also was under the assumption that biscotti was to be dipped in other drinks such as coffee. I had no clue of what chemical components were behind the making of the food but I did think biscotti came from Europe, even if that was my only cultural assumption of the food. It is not as hard as I thought it would be and through making it and eating biscotti I began to appreciate this snack more because of its precise baking instructions and all the time and patience that comes with making this delicious food.

2. Dish 

The “Southern Italian” olive oil biscotti is an Italian dish that has a central ingredient of olive oil. The olive oil is important because it allows for the specific consistency, texture, and flavor to come through in this Italian almond cookie.

This is an Italian biscotti which is a cookie or biscuit that is twice cooked and is dry and hard in consistency.


3. Chemical analysis 

Olive oil in foods inhibits the gluten formation, so even though there is flour present in the recipe the olive oil mixed into the recipe creates for less gluten. The olive oil coats the flour therefore making an oil/fat mixture that prevents the gluten from being formed. However, there is still enough gluten for the dough to be cohesive. When little gluten is in a mixture it causes the end product to crumble, just like biscotti does when you bite into it, and it makes it more dense which is a correct description of biscotti.

When a food has a higher water content the end product is more moist, tender, and chewy where as foods with a lower water content are hard, dry, and tough and have a crunch to them. Olive oil has less than 1% of water in it and this explains why biscotti made with olive oil is much more dry and hard then biscottis made with ingredients such as butter. In olive oil there is a lower water content so the end product will be more crisp and dry. Especially since biscotti is twice baked and the olive oil has such a low water content, almost all the product that would make it moist and chewy is gone by the end leaving the dry and hard characteristics of biscotti.

4. Cultural analysis 

Biscotti originated from Italy and the word biscotti originally comes from the medieval Latin word biscoctus. This meaning twice cooked, explains how the long hard cookie like biscuits are baked. They are extremely dry and in the past they were a popular food to be made because they could be stored for long periods of times. These Italian cookies are primarily made with either olive oil or butter; north of Italy using butter and Mediterranean southern Italy using olive oil. There is no fat in biscotti which helps create the dry and hard snack but the climate where olive oil is a primary ingredient in its baking is where olive trees are extremely abundant and became very popular.

Biscotti is most commonly known to come from the Tucsan area of Italy and its origins can trace all the way back to Roman times. Biscotti when it first came about was not a food of luxury or of preference, but it was more of a convenience food for travelers who needed something that would travel well and that they could still eat after being stored for long periods of times. Because of its dryness from being cooked twice it was made to travel and its nourishment stayed. This food became a staple in the diets of people during the Roman Empire. Biscotti went away for a bit after the fall of the Roman Empire but during the Renaissance it came back and that is when dipping the biscotti in wine and coffee became a popular method of enjoying the dry and crunchy snack. Nowadays biscottis are commonly served with drinks where they can be dunked and soaked in and in Italy they are normally eaten as a snack or dessert after meals.

5. Integration

A way through which I am able to connect the cultural and chemical analyses of biscotti is through the baked twice chemical aspect of the biscotti and how biscotti came to popularity twice. Biscotti first came to be a common food during the Roman Empire and it mostly was a travel food, but after the Roman fall it fell out of the public eye until the Renaissance time period where it came back again and this time stayed and became a popular food to dip into beverages. Biscotti itself is twice cooked and this allows for its dry, crunchy, and hard texture and taste which comes from the olive oil in the recipe which has a low water content. The chemical and cultural aspect of both have this twice element to them and this connection I found to be very interesting. Essentially biscotti is cooked twice and biscotti rose to popularity twice.

Works Cited:

  • The Nibble: Biscotti History, www.thenibble.com/reviews/main/cookies/cookies2/the-origin-of-biscotti.asp.
  • Colabroy, Keri. Biscotti (Italian Almond Cookies) (Sp 18). muhlenbergcollege.instructure.com/courses/6764/assignments/31756.

Figuring out Food Part 2

Continuing my research on my favorite snack Cream Cheese and Chives crackers I looked up the full report of the food including the ingredients and nutritional information. Below is some of the information I found out about the protein and fat of this food!

1. What is protein?

Protein is primarily found in animal products and is a macronutrient that is essential to creating muscle mass. Macronutrients give the body energy and provide calorie intake. Protein is made up of amino acids which are the main building blocks for protein; which help create muscle mass.

2. How much protein is this food item contributing to the % DV? What does that mean? 

The daily value for protein is about 50 grams, the amount of protein in the crackers was 3.00 grams therefore making the the contribution to the daily value percentage 6% based on a 2,000 calorie diet. This means that on a 2,000 calorie based diet 6% of your daily intake of protein is being contributed from this food. The daily value shows how much of a nutrient is included in a single serving of a food.

3. What ingredients in your food item are contributing the protein? 

Cream Cheese, Buttermilk, Nonfat Dry Milk, Sodium Caseinate, Spices (Chives and Parsley)

4. How many calories in your food item are due to protein? How can you tell?

Each gram of protein contains 4 calories and since there are 3 grams in the food there are 12 calories from protein. 


1. What is Fat?

Fats are composed of esters of three fatty acids and the alcohol glycerol, fats are also known as triglycerides and they are solids.

2. How much fat is this food item contributing to the % DV? What does that mean?

There is 15% of the daily value of fat included in this food. This can be found directly on the food label on the right side and does not have to calculated like I had to do for protein. This means that the daily value of fat that is contributed from the crackers is 15%.

3. What ingredients in your food item are contributing the fat?

Vegetable Oils, Cream Cheese, Peanut Oil, Buttermilk, Spices (Chives and Parsley), Soy Lecithin

4. What types of Fats does your food item contain? What are these different types of fat and why should we care?

Fatty acids, total saturated

Fatty acids, total monounsaturated

Fatty acids, total polyunsaturated

Saturated, monounsaturated and polyunsaturated fatty acids can all be used to make triglycerides, and saturated fatty acids specifically refer to no double bonds. Together they all refer to the composition of fatty acid chains that make up the triglycerides or fat in the product. Also different triglycerides from different sources contain different types of fatty acids therefore giving the products different physical properties; ex. liquid or solid.

5. How many calories in your food item are due to fat? How can you tell?  

There are 90 calories that are due to fat in the crackers and I can tell this because on the original nutrition label it is listed on the top right section of the label.                                                                                                                                                                                                                                                                                                                                    

Spring Break Food Journal

Spring Break Food Journal

Over Spring break I had a lot of good food but there were two specific meals I had that left an impact on me and made me think of their connections to Eatalians and Kitchen Chemistry


When I went to The Cheesecake Factory I ordered the Miso salmon which is described as Fresh Miso Marinated Salmon Served with Snow Peas, White Rice and a Delicious Miso Sauce. This food promoted a reaction for me because it is my favorite thing off the menu from this restaurant and every time I get it I am never disappointed. I found the balance between the sauce and the salmon and rice to be perfect and I found the combination to be a great match. I did not make any particular connections between the culture and chemistry of this food but when we got bread with our meal I did think about how the bread rises and the chemistry that goes behind making the bread. One thing I was able to connect to Eatalians was how there was sauce around the meal to accompany the taste and I even asked for extra sauce because of how good it was, but in Italy they do not like to mask the taste of things with sauces. Also when our waitress offered us dessert she asked if we wanted any coffee or cappuccinos and I remembered how in Italy having a cappuccino past breakfast time was a big no.

During the week my Dad got lasagna from a stand at the farmer’s market and my family ate it for dinner that same night. It was a meat lasagna and even though I have had this many times before I thought about this Italian dish and how it related to Eatalians and Kitchen Chemistry. I thought of how the pasta in the lasagna is very thin and therefore does not have a lot of gluten formation happening in the dough therefore causing it to not rise. Also this food was made by an Italian family who has had this stand at the market place for a long time and actually owns their own family run Italian food store where you can get groceries, specially made foods, cheeses, meats, olive oil, and etc since 1946, and in comparison to other lasagnas I have had their’s is always the best. I don’t know the specific ingredient they use but it always tastes so different and amazing than most lasagnas. I connected this to the marketplaces with Eataly and how with the slow food movement one thing they want you to do is buy food and bring it home to eat it with your family and that is exactly what my family did with the lasagna.

Biscotti

Biscotti Recipe

Italian Almond Cookies


Here are some of the materials you will need!

  • Baking sheet
  • A spoon
  • A whisk
  • 2 Large mixing bowls
  • Measuring cups and spoons
  • Parchment paper
  • Sharp knife for chopping
  • Serrated knife for slicing

Ingredients for Biscotti using butter:

  • 1/2 cup roasted almonds, coarsely chopped
  • 1 large egg
  • grated zest of one lemon
  • 1/2 cup sugar
  • 4 tbsp unsalted butter, melted
  • 1-1/4 cups all-purpose flour, spooned and leveled
  • 1/2 teaspoon baking powder
  • 1/4 teaspoon table salt
  • 1/2 teaspoon pure almond extract
  • 1/2 teaspoon vanilla extract

Procedure: Part 1

1. First preheat your oven to 350°F

2. Next put all the almonds onto the baking sheet and put them in the oven for approximately 15 minutes, and remove them when the almonds are browned and fragrant as pictured below.  Once the almonds are cooled chop them very finely with the sharp knife. Note- you must keep the oven on after removing the almonds.

3. Then you will combine all the wet ingredients together in a mixing bowl and whisk them together; eggs, lemon zest, sugar, butter, almond extract and vanilla.

4. In another mixing bowl, combine all the dry ingredients; the chopped almonds, flour, baking powder, and salt. Gradually add the flour mixture to the egg mixture, stirring thoroughly with a spoon. Once the dry and wet ingredients are combined stir together until the dough is stiff.

5. Take the dough out of the bowl and place it onto a baking sheet with parchment paper. Shape your dough into a log about 6-8 inches long, 1 inch high, and 3 inches wide.  The dough should be sticky so you may need to wet your hands in order to form the dough shape.

6. Once the dough is shaped put it in the oven for 14 minutes and then rotate the sheet and bake the dough for an additional 14 minutes. When the loaf is done cooking take it out of the oven and let it cool for about 12 to 15 minutes. The biscotti should look like the picture below.


Procedure: Part 2 Twice Baked

1. When the loaf is cooling reduce the oven temperature to 250°F.

2. After the biscotti has cooled use the serrated knife and slice it into ½-inch-thick pieces.

3. Next place the biscotti on a baking sheet lined with parchment paper, spacing them ½-inch apart and bake for 7 minutes. Rotate the baking sheet and bake for an additional 7 more minutes, or until the biscotti are slightly crisp

4. Finally remove them from the oven and let the biscotti cool completely.


Your biscotti should be crisp and you should be able to see some of the almonds peeking through the middle!

Below is the end result of the Biscotti Van and I made!

When we made our biscotti we made it with butter but the lab group next to us, Elise and Nikki, made their biscotti with olive oil instead. Below is the side by side comparison of the completely cooled olive oil biscotti and butter biscotti, and in both pictures above and below you can see the interior texture of both types of biscotti. In the video at the bottom of the page the comparison between the two types are discussed.

Lab Questions

1. Why is butter a solid at room temperature while olive oil is a liquid.

Butter is a solid at room temperature because it is considered a solid fat. Butter is 50% Saturated and 50% unsaturated fatty acids and olive oil on the other hand is a liquid fat consisting of 85% Cis unsaturated and polyunsaturated and 15% saturated fatty acids. Solid and liquid fat is based on the type of fatty acid in the triglycerides.

2. Butter is a fat that contains ~15% water, compared to olive oil (or shortening) which contains < 1% water. Explain the textures of the two different types of biscotti.

When a food has a higher water content the end product is more moist, tender and chewy where as foods with a low water content are hard, dry, and tough and have a crunch to them. Since butter is 15% water and olive oil has less than 1% of water in it, this explains why the butter biscotti was more soft and chewy compared to the more dry and hard olive oil biscotti. In olive oil there is a lower water content so the end product will be more crisp and dry, while butter has more water present so the end product will still be crisp but will be more soft and chewy than an olive oil biscotti.

3. When mixing the ingredients you added the flour mixture slowly to the fat/oil mixture. What effect does the fat/oil have on gluten formation in the dough? What about your biscotti supports your conclusion?

The oil coats the flour therefore making the oil/fat mixture to prevent the gluten from being formed. However, there is still enough gluten for the dough to be cohesive. When little gluten is in a mixture it causes the end product to crumble, just like our biscotti did when you bit into it, and it makes it more dense instead of light texture which is a correct description of our biscotti.

Below is the video discussing the Biscotti we made!

http://vimeo.com/256852087


Integrative Assignment #1 Basic Neapolitan Pizza Dough Recipe- Flour

Integrative Assignment #1

Basic Neapolitan Pizza Dough Recipe- Flour

1 &2. Assumption & Dish

Before I started my journey into this cluster class I thought of pizza in an American way and did not know what the authentic types of pizza were. I did not realize that there was no pepperoni on the pizzas in Italy. The funny thing is is that when I was in Italy I had pepperoni pizza which I came to learn was from a tourist location and therefore catered to people like myself who did not know what true pizza entailed. I also did not realize how specific a real authentic pizza must be, I thought it was a simple dish that really did not involve such specificity. I was just taken aback a little when I realized how much America had changed pizza and therefore my view on how I thought it was in Italy.

Authentic Neapolitan pizza in Italy according to the VPN include “the margherita (tomato, olive oil, basil, and mozzarella), the marinara (tomato, olive oil, oregano, and garlic) and the margherita extra ( tomato, fresh cherry tomatoes, mozzarella, oil, and basil)” (Helstosky p. 38).

Authentic margherita pizza made with tomato, olive oil, mozzarella cheese and basil. As you can see from the crust the dough has a lot of bubbles and that is in part because of the flour used and its protein content.


3. Chemical analysis

In this specific recipe of Neapolitan pizza dough recipe bread flour type 00 is used. To make the dough for pizza yeast, water and salt are the ingredients that are needed. Also in order for the dough to rise letting the dough sit for a decently long amount of time is required. The flour that is used is also very important in this process. The type 00 flour that is used is the finest grade of flour and usually has a higher protein content and lower water absorption rate. In pizza you want to have a lot of bubbles and in order to have this the type of flour you use and the flour protein content is crucial.

Bread flour which can come in white and whole wheat options has a higher protein level than normal all purpose flour. Because of this  “bread flour is able to absorb more liquid, allowing it to hold its shape and rise upwards instead of outwards. All of these elements create an incredibly sturdy flour that works wonders when used to bake a variety of different kinds of bread. The high amount of gluten in bread flour also creates a more elastic dough, which produces a lighter and chewier bread”(Bobsredmill.com). Kneading the dough allows for the gluten matrix to form and during this formation air is trapped making the bubbles you see in pizza crusts. When more gluten is made more bubbles form and also when there is more protein in the dough more of these bubble are created.


4. Cultural analysis

Pizza started off in Italy as being a food for the poor and it really was not popular. It was cheap and was originally made with garlic, lard, asly or basil, tiny fish, and cheese. This poverty stereotyped food soon grew to be a classic favorite when Queen Margherita of Italy came to Naples and tried pizza; soon after the Margherita pizza was born. This simple dish of pizza represents the population of Italy when it first started being made and represented the culture at the time, it was considered street food for the urban poor of Naples. Eventually pizza became a symbol of the revolutionary change that occured in Italy and its society. Pizza is now one of the most popular foods ever.

Pizza’s popularity spread from Naples due to migration within Italy and also because of WWII and British and American soldiers stationed in Italy. In today’s society pizza in Italy is a national treasure as authentic neapolitan pizza must fall under the Associazione Verace Pizza Napoletana and there are many requirements. Italians try to stick to what is authentic and what has a rich historical and cultural significance; pizza is one of those things.

5. Integration

When I look at the cultural analysis and the chemical analysis of neapolitan pizza the one connection I made was how pizza itself rose from being a food for the poor to one of the most popular foods in the world and how the flour in the dough of pizza rises. Pizza was a food sold on the streets and was looked down upon but once Queen Margherita came to Naples the food blossomed and became a national treasure earning VPN status. The dough for pizza rises and allows for the bread to have its unique flavor and texture and part of this comes from the type of flour that is used as well. I think this symbolic connection between the rise of pizza during the actual baking process and the rise of pizza to its cultural status now is quite interesting. Pizza did not have the best start just like dough doesn’t sometimes, but it has grown into this world phenomenon that is quite amazing just like pizza once it comes out of the oven perfectly risen.


Works Cited

  • Helstosky, Carol. Pizza: a Global History. Reaktion Books, 2008.
  • Bobsredmill.com, www.bobsredmill.com/blog/featured-articles/breaking-difference-bread-flour-vs-purpose-flour/.

Ciabatta Recipe

Ciabatta Bread Recipe

Ciabatta bread is a light risen bread that has an amazing airy texture to it. With this type of bread many large holes form giving it its signature look which comes from the weak gluten network that is inflated by the steam of the excess moisture in the dough once its put in the oven. Ciabatta may be hard to work with because of its wet and loose structure but the end result is worth it.

__________________________________________________________________________________________________

Recipe

Part One: Creating the Sponge

Ingredients:

  • 1/2 cup all-purpose Flour
  • 1/8 tsp Rapid Rise Yeast
  • 1/4 cup room temp water

Materials:

  • Sturdy spoon
  • Small glass bowl
  • Measuring Cups and spoons
  • Plastic wrap

To begin your bread you must first combine the flour, instant/rapid rise yeast and water in a bowl and stir with a spoon until a uniform mass forms.

Then you will have to cover the bowl with plastic wrap and let it stand at room temperature for at least 8 hours or up to 24 hours. Allowing the dough to sit lets the yeast to ferment and start the flavor of the bread to come through.


Part Two: Making the Bread

Ingredients:

  • 1/4 teaspoon rapid rise or instant yeast
  • 1 and 1/2 tablespoons milk (room temperature)
  • 1/3 cup room-temp water
  • 1 cup all-purpose flour
  • 1 teaspoon salt

Materials:

  • 2 baking sheets
  • Large glass bowl lightly sprayed with non-stick cooking spray
  • Parchment paper
  • Scissors
  • Non-stick cooking spray
  • Ice cubes or cold water
  • Kitchen towels
  • Digital thermometer
  • Cooling rack
  • Serrated bread knife

After the sponge has been fermenting the dough should look something like this

Then get your baking sheets ready with parchment paper that is sprayed with cooking spray with flour put over top.

Directions: Making the Dough

1. First place the sponge you made earlier and all the dough ingredients into the bowl of the mixer using the paddle attachment and mix on low until a shaggy dough forms (1 minute). Then once this happens up the speed to medium low and continue this until a mass that collects at the bottom of the paddle and pulls away from the sides of the bowl (4-6 minutes). once this is done change to the dough hook and knead the bread on medium speed, it should be smooth and shiny yet sticky (10 minutes).


2. Next perform the windowpane test on the dough

3. After that transfer the dough to a bowl covered with plastic wrap and let sit for an hour so the dough can rise. 


Directions: Shaping the Dough

1. After the 1 hour fold the dough over itself by gently lifting and folding the edge of the dough toward the middle. Do this for a total of 8 folds and let the dough sit for 30 minutes.

2. Preheat the oven to 450 degrees F and put an empty baking sheet onto the bottom rack. This sheet will be used for ice/ steam when the ciabatta is cooking.

3. Once you have waited 30 minutes split the dough using a spatula creating 2 inch deep dough halves.

4. Shape each lump into a rectangle

Directions: Baking the Bread

1. Measure out 1 cup of ice into a glass measuring cupPlace the baking sheets with the ciabatta in the middle rack once the oven is at 450 degrees F.

2. Place the baking sheets with the ciabatta in the middle rack once the oven is at 450 degrees F.

3. Dump the ice into the empty baking sheet that is on the bottom rack in the oven; The ice creates steam which allows for the surface of the bread to not harden quickly and also allows for the dough to expand more when its baking 

4. Bake until the crust is a deep golden brown for about 20-22 minutes and the loaves register 210 degrees F.

5. Put the two loaves onto the cooling rack and let then cool completely before cutting them.

The bread will come out hot, puffed up, and smelling and looking delicious!

When we made this recipe the bread tasted delicious and the inside had all the special unique characteristics Ciabatta bread is supposed to have, like the holes inside that we discovered more of as we ate the amazing bread. The outcome was exactly as expected and everything went very good during our baking process. The video below discusses our reaction to the Ciabatta we made and also discusses the science behind the holes in the bread and suggestions as to what we would do differently in the future.

http://vimeo.com/253914200